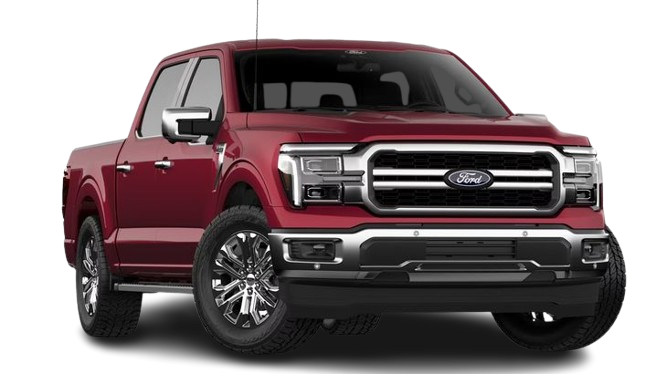
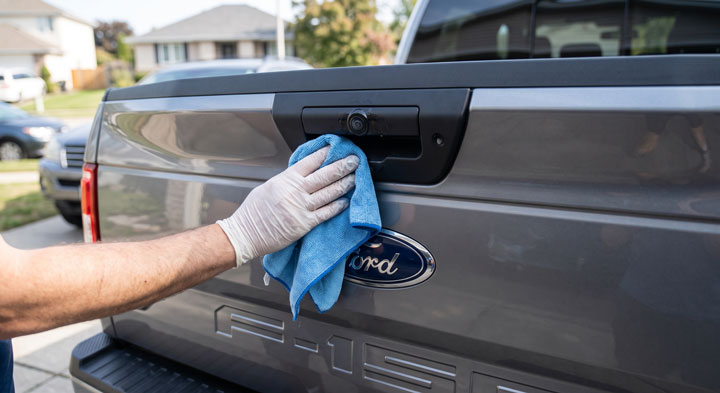
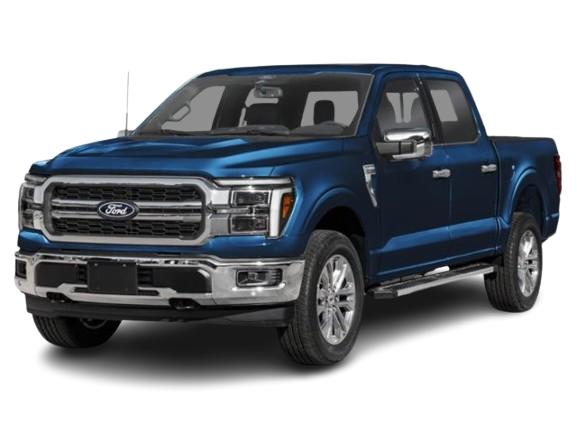
I still remember the sinking feeling in my stomach when I shifted into reverse and my ford f150 tailgate handle camera displayed nothing but a blue screen while backing up to a trailer.
Replacing dealership-quoted camera modules for hundreds of dollars seemed ridiculous, which is why our team at Bryan’s Garage created this master repair guide to help you fix or upgrade your truck camera easily at home.
In This Article
- Step-by-Step Installation Guide: Master the complete DIY procedure for removing tailgate panels, latch hardware, and wiring harnesses safely.
- Diagnostic & Recall Analysis: Identify root causes for blue screens, distorted video feeds, LIN-bus faults, and official Ford safety recalls.
- OEM vs. Aftermarket Comparison: Evaluate image clarity, night vision range, dynamic parking line support, and total replacement costs.
- Electrical Harness Maintenance: Inspect tailgate connectors, seal pin terminals against moisture corrosion, and troubleshoot grounding paths.
- Pro Installation Protocols: Prevent clipped wires, misaligned trajectory lines, and water intrusion with proven mechanic tips.
Your F-150 has a secret slot that starts the truck when your key fob dies.
And 8 other things Ford never told you.
Dead fob fix · Remote window trick · 7.2 kW generator hiding in your bed · Tailgate ladder · and 5 more.
▶ Read Now — Show Me Everything
bryansgarage.com · Bryan Mark · 2026
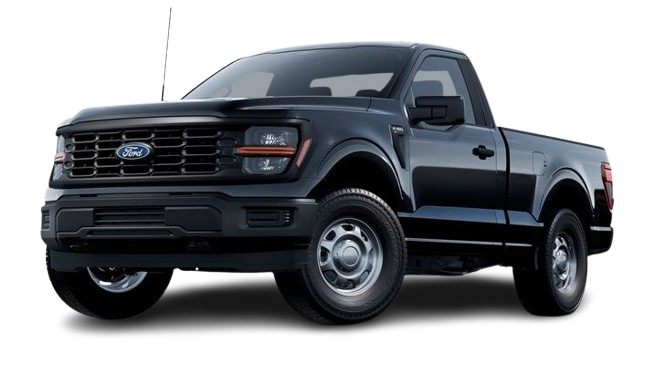
How to Replace and Upgrade Your Ford F150 Tailgate Handle Camera: A Step-by-Step Guide
Upgrading or replacing your rear camera restore critical safety visibility when reversing into tight parking spaces or hooking up heavy trailers.
Before beginning the replacement process, gather a T25 or T30 Torx driver, an 8mm socket, a 10mm socket, a plastic trim tool, and dielectric grease.
Always park your truck on a level surface, engage the emergency parking brake, and disconnect the negative battery terminal before working on tailgate wiring systems.
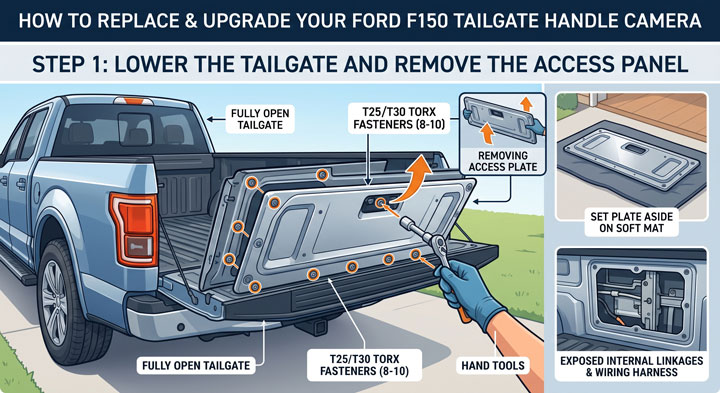
- Step 1: Lower the Tailgate and Remove the Access PanelDrop your truck tailgate to the fully open horizontal position.Locate the mounting screws securing the inner access panel using your T25 or T30 Torx socket.Unscrew all eight to ten Torx fasteners lining the perimeter of the metal access plate.Carefully lift the metal access plate off the inner tailgate framework and set it aside on a soft work mat.Inspect the exposed internal mechanical linkages and wiring harness runs for visible dirt accumulation or rust debris.
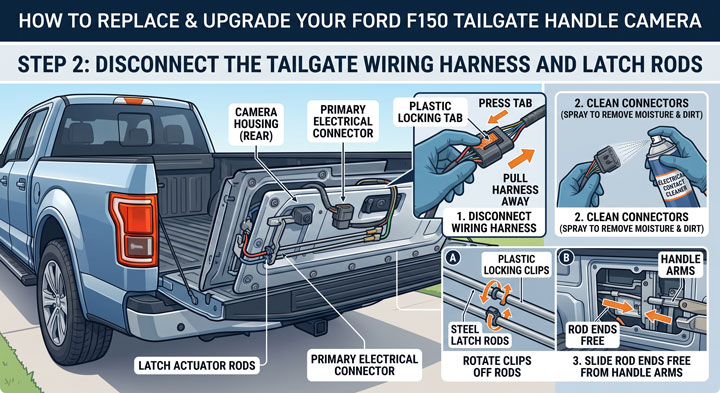
- Step 2: Disconnect the Tailgate Wiring Harness and Latch RodsLocate the primary electrical connector plugging into the rear housing of the tailgate handle latch assembly.Press the plastic locking tab on the harness connector and gently pull it away from the camera housing.Spray electrical contact cleaner into the plug to remove trapped moisture or fine dust particles.Unclip the plastic retainers securing the twin steel latch actuator rods to the handle mechanism.Rotate the plastic locking clips off the metal rods and slide the rod ends free from the handle arms.
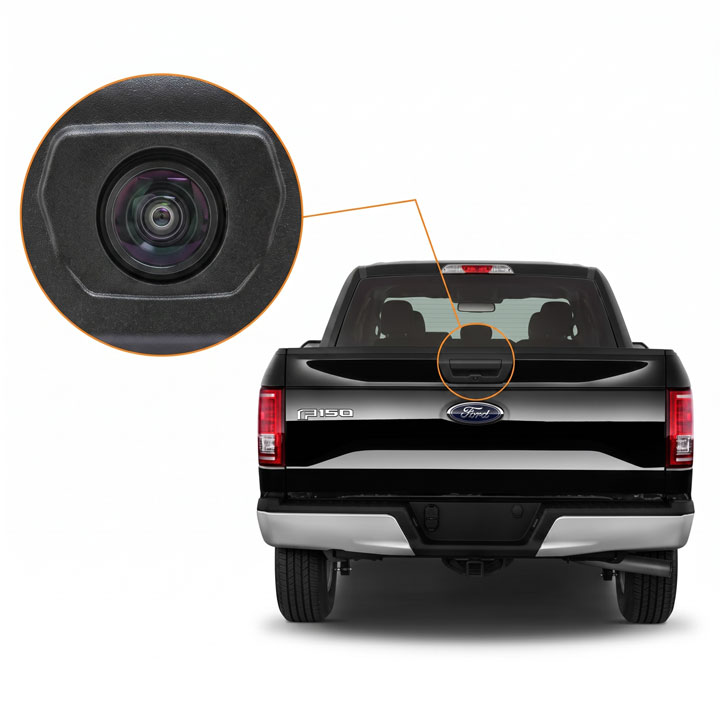
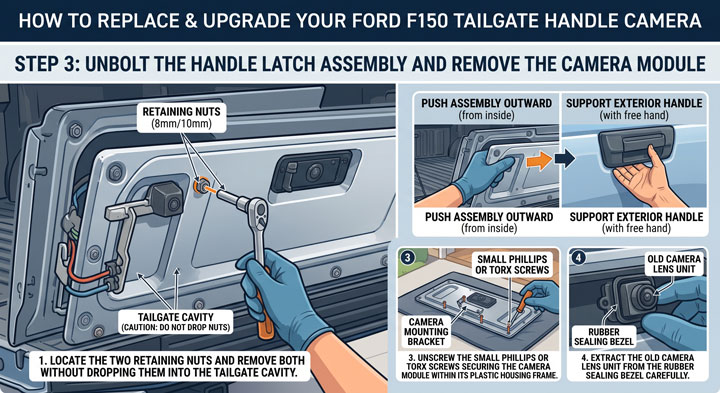
- Step 3: Unbolt the Handle Latch Assembly and Remove the Camera ModuleLocate the two 8mm or 10mm retaining nuts holding the tailgate handle housing against the outer body sheet metal.Use a socket wrench with a short extension to remove both retaining nuts without dropping them into the lower tailgate cavity.Push the handle assembly outward from inside the tailgate structure while supporting the exterior handle with your free hand.Remove the handle housing from the truck exterior, exposing the internal camera mounting bracket.Unscrew the small Phillips or Torx screws securing the camera module within its plastic housing frame.Extract the old camera lens unit from the rubber sealing bezel carefully.
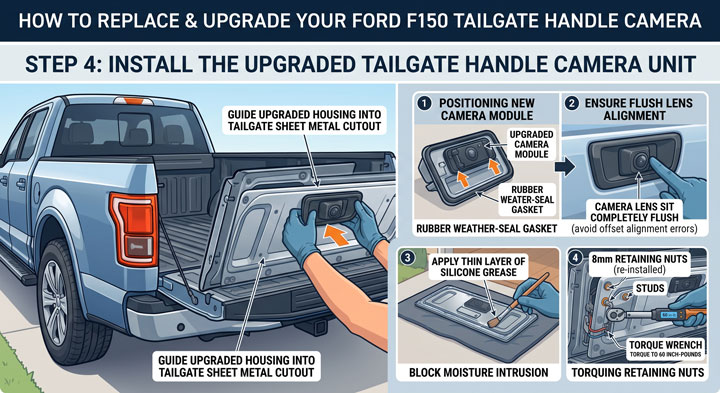
- Step 4: Install the Upgraded Tailgate Handle Camera UnitPosition the new replacement camera module into the rubber weather-seal gasket inside the handle housing.Ensure the camera lens sits completely flush against the outer window frame to avoid offset alignment errors.Reinstall the retaining bracket screws tightly to lock the camera module in place against road vibration.Apply a thin layer of silicone grease around the perimeter of the handle gasket to block moisture intrusion.Guide the upgraded handle housing back into the tailgate sheet metal cutout from the exterior side.Thread the 8mm retaining nuts back onto the studs and torque them to 60 inch-pounds.
- Step 5: Reconnect Linkages, Test Video Display, and Reassemble PanelSnap the twin steel latch actuator rods back into their plastic retainer clips on the handle arms.Apply dielectric silicone grease across the electrical harness pins before snapping the connector plug firmly into the new camera.Reconnect the vehicle negative battery cable under the hood.Turn the ignition key to the run position, depress the brake pedal, and shift the transmission into reverse to test the video feed.Confirm that the center display screen shows a crystal-clear image with active steering guide lines functioning correctly.Reattach the inner metal access panel and torque the Torx screws firmly in a crisscross pattern.
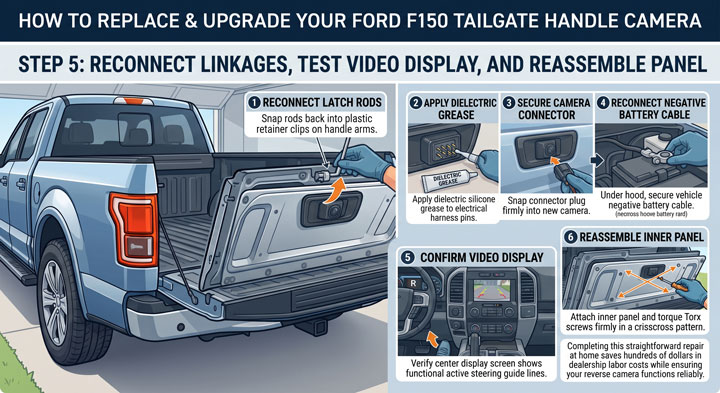
Completing this straightforward repair at home saves hundreds of dollars in dealership labor costs while ensuring your reverse camera functions reliably.
If you want to explore more step-by-step automotive guides and maintenance hacks, check out our full resource index at Bryan’s Garage.
Diagnosing F-150 Rear Camera Glitches, Blue Screens, and Recall Issues
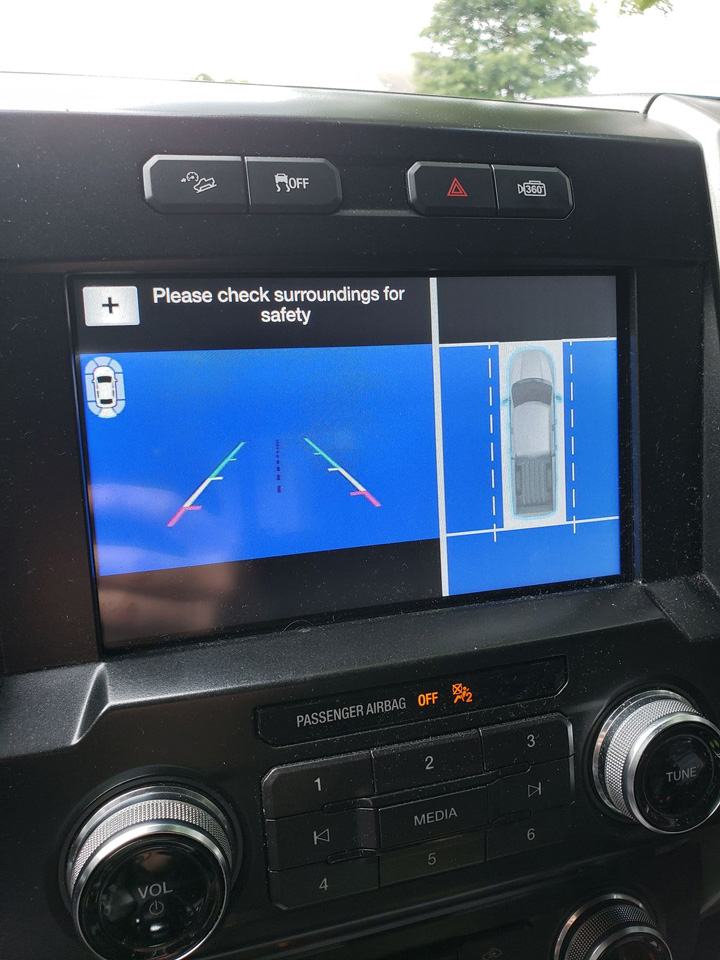
Reverse camera failure is one of the most frustrating electronic issues modern Ford truck owners face.
A solid blue screen on your SYNC center display indicates complete video signal loss from the camera module to the image processing module.
Black screens usually indicate a blown power supply fuse or a total loss of ground connectivity along the tailgate harness.
Distorted video, rolling static lines, or flickering images point to high electrical resistance across corroded terminal pins inside the tailgate quick-disconnect plug.
Ford issued major safety recalls (such as recall 20S62 and 21S25) covering hundreds of thousands of trucks due to internal camera circuit board manufacturing defects.
These defective factory cameras experience solder joint fatigue, causing the internal image sensor to shut down randomly during vehicle operation.
You can check if your specific truck is covered under an open safety recall by submitting your 17-digit VIN on the official NHTSA website.
ASE certified mechanics utilize dedicated OBD2 scanners to read stored diagnostic trouble codes (DTCs) within the Image Processing Module A (IPMA).
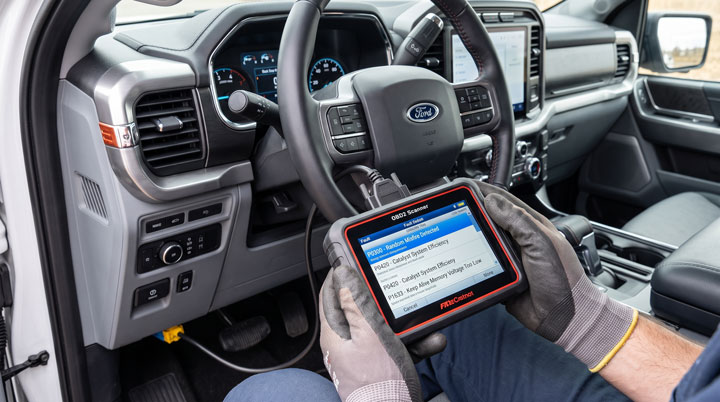
Common fault codes include B115E for camera module failure and C1001 for vision system camera blind status.
Clearing these codes with a diagnostic tool after physical replacement is often necessary to restore dynamic park assist lines.
Modern trucks store numerous electronic configuration options that can be customized or reset using advanced software tools.
If you enjoy discovering hidden cabin options and digital system tricks, read our guide on useful hidden Ford F-150 tech features.
Systematic diagnostic testing prevents you from replacing functional display screens when the true root cause is simply a damaged twenty-dollar harness plug.
Evaluating DIY Aftermarket Upgrades vs. OEM Camera Assemblies
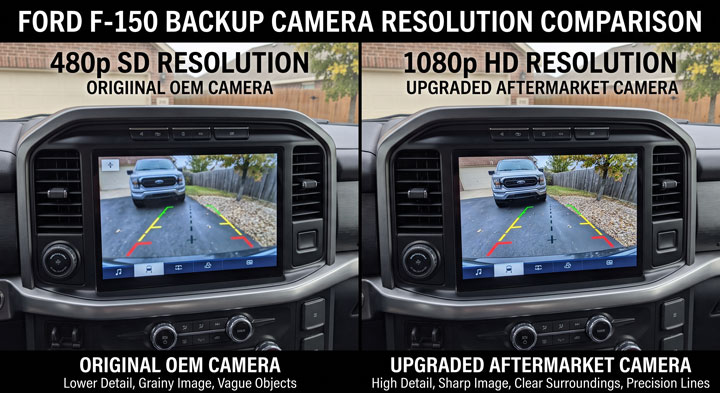
When replacing a faulty factory unit, truck owners must decide between buying genuine OEM Ford replacement parts or aftermarket upgrades.
Below is a comprehensive head-to-head comparison table evaluating key operational performance attributes of both options.Average Component Cost$250 – $450 (Camera & Latch)$60 – $140 (Full Assembly)Video Sensor ResolutionStandard 480p / 720p CCD1080p HD CMOS SensorNight Vision CapabilityStandard Reverse Light IlluminationLow-Lux Infrared / Super Night VisionLens Field of View Angle130° Standard View170° Wide Angle ViewPlug-and-Play Compatibility100% Factory MatchRequires Wire Harness Adapter on older trimsDynamic Guide Line SupportSupported via IPMA ModuleStatic or Dynamic dependent on model
| Performance Attribute | Genuine OEM Ford Camera Housing | Aftermarket HD Upgrade Kit |
|---|
Component Cost and Overall Value
Genuine OEM Ford camera modules purchased directly from dealership parts counters carry premium price tags ranging from $250 to over $450.
Aftermarket replacement kits engineered for the f150 tailgate handle camera market cost between $60 and $140 complete with updated handle housings.
This massive price difference makes aftermarket kits highly attractive for DIYers working on tight repair budgets.
However, ultra-cheap unbranded cameras from unknown online sellers often lack adequate weather sealing, leading to moisture fogging inside the glass lens after the first rainstorm.
Investing in a reputable aftermarket brand ensures high manufacturing standards while still saving over fifty percent compared to dealer rates.
Many truck owners choose to upgrade their stock handle to textured matte black or chrome finishes during replacement.
Customizing your truck with functional accessories enhances both utility and exterior styling appearance.
If you want to explore more rugged truck equipment ideas, take a look at our list of tactical truck equipment and upgrades.
Video Clarity, Field of View, and Sensor Quality
Modern aftermarket cameras frequently feature upgraded 1080p high-definition CMOS image sensors that outperform older factory 480p sensors.
Higher resolution sensors deliver sharper image contrast, making small obstacles like tow hitch balls, rocks, and curbs much easier to spot on the cabin screen.
Expanded wide-angle lenses offer up to 170 degrees of view, eliminating blind spots on the rear corners of your truck bumper.
Advanced low-lux sensor technology improves night vision clarity significantly during dark backing maneuvers on unlit gravel roads.
Factory OEM cameras, by contrast, maintain factory color accuracy and integrate seamlessly with Ford’s computerized trailer hitch zoom software features.
Selecting an upgraded camera housing with an IP68 or IP69K waterproof rating guarantees total resistance against high-pressure car wash sprays.
Installation Complexity and System Integration
Genuine OEM replacements fit into factory connector plugs without requiring wire splicing or harness modifications.
Plug-and-play installation ensures that factory dynamic steering guidance lines curve accurately on your SYNC screen as you turn the steering wheel.
Some aftermarket cameras use standard RCA video connectors, which require harness adapter looms when retrofitting older base trim trucks.
Retrofitting a backup camera system onto an older truck model that never came with factory screen displays requires routing a video extension cable under the cab floorboards to an aftermarket dash monitor.
Both OEM and high-quality aftermarket kits offer straightforward bolt-on installations when paired with correct model-year wiring adapters.
Choosing the right replacement depends on whether you prioritize factory system integration or max budget savings.