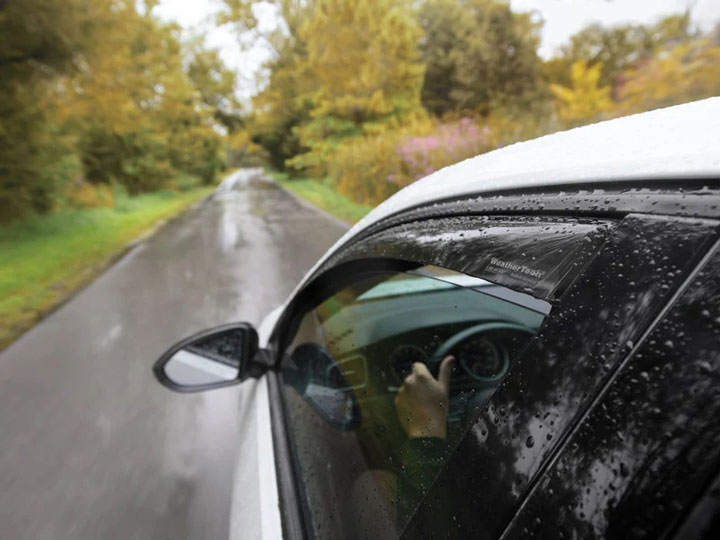
I still remember driving my CR-V through a sudden downpour on the highway, desperate for fresh air but getting soaked every time I cracked the glass, until mounting a set of honda crv window deflector visors completely transformed my daily commute.
It gave me silent, rain-free cabin ventilation without soaking the power door controls. At Team Bryan’s Garage, we want to share our hands-on mechanical experience so you can complete this installation easily, avoid costly body shop labor fees, and enjoy a quieter ride on every journey.
Honda CRV Window Deflector Installation and Rain Guards ( Internet)
In This Article
Step-by-step installation instructions for in-channel and tape-on visors
Mechanical breakdown comparing mounting methods and long-term durability
Aerodynamic science behind wind noise reduction and cabin heat ventilation
Generation-specific fitment considerations from 2002 to 2026+ CR-V models
Troubleshooting anti-pinch automatic window sensors and adhesive bond failures
🔴 MOST OWNERS NEVER FIND THIS
Your CR-V has a secret trick that starts the SUV when your key fob dies. And 14 other things Honda never told you.
Dead fob fix · Global window down trick · The hidden folding picnic table · Walk Away Auto Lock · and 11 more.
Before pulling out your supplies, take a moment to inspect your window seals for dry rot or accumulated road grime.
Working in a temperature-controlled environment between 65°F and 85°F ensures maximum bonding strength for automotive tapes.
Prerequisites and Essential Tools Needed
Honda CRV Window Deflector Installation and Rain Guards
Gathering the correct materials before starting keeps your project smooth and organized.
You will need an isopropyl alcohol wiping pad (70% concentration or higher) to strip wax and oil residues.
Keep a clean microfiber cloth handy along with a plastic trim removal tool for seating internal retention clips.
If installing in cold weather, a standard hair dryer helps warm up the door frame metal and adhesive tape.
Make sure your vehicle surface is washed thoroughly with proper automotive shampoo before proceeding.
Avoid using household dish soaps that leave silicone films behind on glass weatherstripping channels.
Step 1: Thoroughly Clean and Prepare the Surface Area
Lower the door glass completely down into the door frame on all four windows.
Take an alcohol prep pad and vigorously scrub the inner rubber window channel or top exterior painted door frame.
Remove all accumulated dirt, tree sap, road film, and old wax residue from the contact area.
Allow the isopropyl alcohol to evaporate completely for at least three minutes.
Wipe the surface dry with a lint-free microfiber towel to ensure no moisture remains hidden in the rubber folds.
Step 2: Dry-Fit the Visors for Generation-Specific Fitment
Hold each individual visor against its corresponding front and rear door window frame.
Verify that the front edge fits snugly against the side mirror corner housing without overlapping plastic trim.
Check the rear curve alignment to confirm you have the correct piece for the specific side of the vehicle..
Ensure that the contour matches the factory body lines of your specific Honda generation perfectly.
Never peel off the protective tape backing until dry-fitting confirms exact alignment across all contact points.
Step 3: Position the Channel Flange or Align the Adhesive Base
For in-channel visors, peel back two inches of protective red tape backing at both ends of the mounting flange.
Fold the exposed tape strips outward so you can pull them off after the visor rests inside the track.
Insert the front lower flange into the window channel right behind the side mirror base.
Slightly flex the middle section of the acrylic deflector outward to slide the rear flange into the window channel track.
Work your way along the top edge, pushing the upper flange firmly up into the rubber seal.
Honda CRV Window Deflector Installation and Rain Guards
Step 4: Secure Retention Clips and Set Permanent Adhesive
If your kit includes thin steel mounting clips, insert them into the rubber channel between the visor flange and interior seal.
Use your plastic trim tool to push the metal clip until it seats flush inside the window channel track.
Grasp the exposed tails of the red tape backing and peel them away slowly while pressing the visor outward.
Apply firm, direct thumb pressure along the entire length of the visor for 60 seconds to set the acrylic tape.
Inspect the outer edge to make sure no gaps exist between the deflector flange and the rubber weatherstrip.
Step 5: Calibrate the Auto-Up Anti-Pinch Window Sensor
Slowly roll the window up manually in small increments using your door switch controls.
Watch closely for any resistance as the top glass edge enters the modified channel flange.
If the glass hits resistance and automatically reverses direction, hold the switch UP continuously for five seconds to override the bounce-back mechanism.
Roll the window fully up into the top frame seal until it firmly presses the visor flange outward.
Leave all windows completely rolled up and closed for at least 48 to 72 hours so the seal relaxes around the new thickness.
Completing these simple steps guarantees your window deflectors remain rock-solid even during car washes and severe winter storms.
If you enjoy adding personalized upgrades to your vehicle, explore our extensive guide on honda crv custom modifications to discover more budget-friendly DIY projects.
Our mechanical team continuously tests aftermarket accessories to help everyday drivers make informed decisions without spending thousands at dealership service centers.
For more detailed maintenance tips and troubleshooting guides, explore our full library of auto care resources at Bryan’s Garage.
In-Channel vs. Tape-On Window Deflectors: Mechanical Breakdown
Honda CRV Window Deflector Installation and Rain Guards
Choosing between internal slot mounting and external adhesive attachment represents the single biggest decision CR-V owners face.
Both styles serve the underlying purpose of keeping rain out while allowing fresh air to circulate inside the cabin.
However, their structural engineering, mechanical contact points, and installation methods differ significantly.
In-channel visors slide directly into the upper window channel seal where the door glass rests when closed.
This design offers an extremely low-profile aesthetic that blends naturally with factory OEM window frames.
Tape-on deflectors attach to the exterior painted sheet metal or plastic door chrome molding above the window glass.
Understanding these differences helps you select the ideal option for your driving environment and aesthetic preferences.
Based on long-term testing data from over 18,587+ car owners, both designs perform exceptionally well when installed correctly.
Feature / Attribute
In-Channel Deflectors
Tape-On (Stick-On) Deflectors
Mounting Location
Inside internal rubber glass channel track
Outer painted door frame or trim sheet metal
Visual Aesthetics
Sleek, OEM flush-fit profile
Slightly wider, flared exterior profile
Installation Complexity
Moderate (requires precise flange bending)
Simple (requires surface degreasing only)
Glass Seal Interference
Slight contact with glass edge possible
Zero contact with glass or window motor
Paint Protection
Zero contact with exterior vehicle paint
Adhesive sits directly on paint or chrome trim
Ease of Removal
Fast pop-out removal without sticky residue
Requires eraser wheel or adhesive solvent
In-Channel Deflectors: The OEM Sleek Choice
honda crv in-channel rain guards provide a factory-installed appearance that seamlessly follows the vehicle’s aerodynamic lines.
Because the lip inserts directly into the rubber window channel, there is no exposed tape visible from the outside.
This construction eliminates concerns about exterior paint fading unevenly around glued plastic components.
However, the inserted flange narrows the tolerance gap inside the window channel slightly.
On modern CR-V models equipped with sensitive auto-up window motors, initial resistance can trigger safety anti-pinch mechanisms.
Proper calibration and allowing the rubber seals to seat over 72 hours completely resolves this issue.
Classic exterior stick-on visors remain popular among drivers who prioritize maximum water diversion and effortless installation.
By mounting onto the outer door frame, these guards extend slightly further over the window opening.
This extended coverage allows you to roll windows down further in heavy rain without water splashing inside.
Because tape-on visors never touch the window glass, they eliminate any potential friction against window tint films.
The primary concern with stick-on models centers on long-term adhesive breakdown from improper cleaning during installation.
Using high-grade 3M VHB automotive acrylic tape ensures the visors remain locked down even through automatic touchless car washes.
When washing your vehicle, using a dedicated honda crv car wash soap preserves both the acrylic plastic finish and the tape bond.
The Aerodynamics of Wind Buffeting and Cab Ventilation
Honda CRV Window Deflector Installation and Rain Guards
Understanding how air flows over your crossover explains why honda crv side window deflectors make such a dramatic difference in driving comfort.
At highway speeds, opening a single rear or front window creates a harsh low-frequency acoustic pressure change known as wind buffeting.
This thumping noise occurs because high-pressure outside air rushes into the cabin, compressing the internal air mass violently.
Deflectors act as aerodynamic ramps that alter the boundary layer of air moving along the vehicle’s side profiles.
They force high-velocity wind outward and away from the window gap, creating a localized low-pressure vacuum zone.
This negative pressure pocket actively draws stale, warm air out of the interior without allowing direct wind blasts to enter.
As a result, you enjoy silent continuous air circulation even while driving at 70 miles per hour.
In rainy conditions, downward-sloped acrylic lips deflect falling water droplets downward past the open window gap.
This allows humidity from wet coats, dogs, or boots to escape naturally, preventing windshield fogging without blasting the air conditioner.
During scorching summer months, leaving your windows cracked half an inch under deflectors keeps cabin temperatures up to 30°F cooler.
Because the visors cover the window opening, passersby cannot tell your windows are cracked, maintaining vehicle security.
Adding matching accessories like honda crv door edge guards further protects your vehicle’s bodywork against tight parking lot mishaps.
Combining aerodynamic visors with heavy-duty honda crv mud guards minimizes road spray flung onto side windows during highway storms.
Drivers who frequently haul camping gear on a honda crv roof rack will also appreciate how deflectors balance overall vehicle wind resistance.
Matching Rain Guards to Your Honda CR-V Generation
Honda CRV Window Deflector Installation and Rain Guards
Selecting the best window deflectors for honda crv models requires matching the exact generation and body geometry of your specific model year.
Honda redesigned the door frames, chrome trim lines, and window curvature significantly across every generation.
Installing a deflector intended for a 4th generation model onto a 5th generation CR-V leads to improper sealing and loose fitment.
Reviewing official factory dimensions or consulting detailed honda crv specs ensures 100% fitment accuracy before ordering aftermarket parts.
Here is a breakdown of fitment nuances across popular CR-V production years:
2nd Generation (2002–2006): Features squarer window frames with thicker rubber channel seals that easily accommodate in-channel flanges.
3rd Generation (2007–2011): Introduced curved window pillars; tape-on visors must line up carefully with the top door arch.
4th Generation (2012–2016): Features tighter window motor tolerances; in-channel visors require a proper 72-hour window closure cure period.
5th Generation (2017–2022): Incorporates sleek upper chrome trim strips; tape-on designs require adhesion directly over chrome moldings.
6th Generation (2023–2026+): Sharper beltlines mean precision laser-cut in-channel visors offer the cleanest look without blocking sightlines.
If you recently purchased a pre-owned vehicle, inspecting existing accessories on a used honda crv helps determine if old tape remnants need removal prior to installing new guards.
Shopping for a quality pre-owned set or finding a salvaged used honda crv window deflector set can save money, provided the mounting flanges remain crack-free.
When reusing pre-owned tape-on visors, always strip off old degraded tape completely using an adhesive remover before applying fresh 3M VHB tape.
Common DIY Installation Mistakes and Risk Mitigation
Honda CRV Window Deflector Installation and Rain Guards
While installing honda crv rain guards is straightforward, avoiding common DIY pitfalls ensures long-term performance.
The most frequent error car owners make is rushing the surface preparation stage.
Applying mounting tape onto a door frame covered in wax or environmental fallout prevents the adhesive from forming a permanent bond.
This oversight allows wind to lift the front edge at high speeds, resulting in loud flapping noises or lost deflectors.
Another major mistake involves operating power windows immediately after installing in-channel deflectors.
Rolling the window down before the rubber channel adapts to the extra flange thickness can dislodge internal retention clips.
Always leave windows rolled up tightly for at least 48 to 72 hours following installation.
Never apply force or bend acrylic deflectors excessively during installation, as extreme flex can shatter the plastic.
If working in cold weather under 60°F, use a hair dryer to gently warm both the door metal and adhesive backing.
Warm acrylic and flexible rubber channels yield smooth, stress-free fitment without cracking.
Following verified procedures from Team Bryan’s Garage protects your vehicle while ensuring an easy DIY repair experience.
🟢 Going viral on CR-V Owners Club & Reddit
“I’ve driven a CR-V for 4 years and didn’t know this existed.” — The most common reaction when this article is shared
15
features
1997+
models
15 min
read
Free
no signup
Did you know your backup camera has a hidden top-down ‘drone view’? Or that your cruise control automatically downshifts on steep mountain hills to save your brakes?
Frequently Asked Questions About Honda CR-V Window Deflectors
Q: Do in-channel window deflectors scratch tinted windows or damage glass edges?
A: When installed correctly, high-quality in-channel deflectors sit inside the outer rubber channel and do not contact aftermarket window tint applied to the inner glass surface. However, dirty channels containing grit can scratch glass edges over time, making thorough cleaning vital before installation.
Q: Why does my automatic window roll back down after installing in-channel rain guards?
A: Modern Honda CR-V models feature anti-pinch safety sensors that detect pressure resistance. The new flange thickness increases friction initially. Override the sensor by holding the power switch UP until closed, then keep windows shut for 72 hours so the seal expands.
Q: Are Honda CR-V window deflectors safe to take through automatic car washes?
A: Yes, properly installed tape-on and in-channel deflectors easily withstand standard touchless and soft-cloth car washes. Ensure you allow 72 hours of adhesive cure time post-installation before taking your CR-V through any car wash facility.
Q: How do I remove old tape-on rain guards without damaging my car’s paint?
A: Heat the acrylic deflector gently with a heat gun or hair dryer to soften the acrylic adhesive tape. Slice through the tape backing using monofilament fishing line held taut against the door frame. Clean off remaining residue using a rubber eraser wheel or citrus-based adhesive remover.
Q: Will installing aftermarket window deflectors void my Honda factory warranty?
A: No, under the Magnuson-Moss Warranty Act, installing simple non-invasive exterior accessories like window visors cannot void your vehicle’s factory warranty unless the part directly causes a mechanical failure.
Conclusion
Installing quality window deflectors on your Honda CR-V enhances daily driving comfort, reduces highway cabin noise, and keeps rain out effortlessly.
By following our proven step-by-step instructions and choosing the right fitment style, you achieve professional results right in your driveway.
Ready to transform your car maintenance from a stressful chore into a breeze?
Have questions? Our team can help you find the best solutions for your car problems and avoid costly mechanic visits.
Note: Individual results may vary depending on individual vehicle makes, models, year of manufacture, and overall condition. This article is intended for general automotive reference purposes only and does not replace official manufacturer service manuals or advice from a certified mechanic.