
I still remember standing in the pouring rain late one evening after a brutal twelve-hour shift, clicking my remote repeatedly only to realize my trusty truck was firmly locked against me.
The driver door refused to budge while the lock peg twitched lifelessly, forcing me to crawl awkwardly across the passenger console just to get inside.
Dealing with a failing chevy silverado door lock actuator is an infuriating rite of passage for truck owners, but our team at Bryan’s Garage is here to show you how a quick DIY fix can save you hundreds of dollars.

In This Article
- Comprehensive step-by-step tutorial to replace your power door lock assembly at home.
- Crucial electrical tests to isolate actuator motor failure from wiring or switch problems.
- Deep dive into General Motors latch architecture and door lock mechanical linkages.
- Preventative latch maintenance hacks that extend the working life of factory hardware.
- Troubleshooting guide for keyless entry remotes, manual lock rods, and child locks.
Your Silverado has a secret compartment hiding above your glove box.
And 8 other things Chevy never told you.
Hidden dash storage · Key fob window trick · Auto 4WD mode · Buckle to Drive · and 5 more.
▶ Read Now — Show Me Everything
bryansgarage.com · Bryan Mark · 2026

How to Replace Your Chevy Silverado Door Lock Actuator: A Step-by-Step Guide
Replacing a burned-out actuator unit on a pickup truck looks intimidating when you first peer inside the hollow door shell.
Modern General Motors door shells house an interconnected maze of control cables, electrical harnesses, window tracks, and sheet metal edges.
You do not need an advanced engineering degree or high-dollar specialized shop machinery to conquer this repair safely in your own driveway.
You only need ordinary hand tools, a clean workspace, and roughly ninety minutes of patient mechanical work per door.
Prerequisites and Required Tools
Before turning a single fastener, gather a reliable set of hand tools to keep your project moving smoothly.
You will need a metric socket set featuring 10mm and 7mm sockets with a compact 1/4-inch drive ratchet.
You will also need a T30 Torx bit driver to release the heavy structural latch bolts mounted in the door jamb.
A non-marring nylon trim removal wedge is essential to protect painted surfaces and plastic panel clips from permanent gouges.
Pick up a flathead pick tool, a clean rag, electrical contact cleaner, and safety glasses before opening your door.
- Step 1: Disconnect Battery Power and Prep the Worksite.
- Safety starts under the hood before you touch any interior panel hardware.
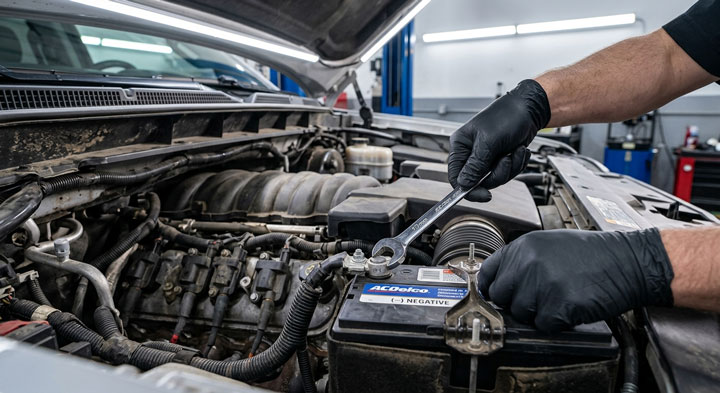
- Pop the front hood and use a 10mm wrench to loosen and remove the negative battery terminal cable.
- Isolate the negative cable clamp securely away from the battery post to prevent sudden short circuits or accidental electrical surges.
- This critical safety habit protects delicate electronics inside the body control module while you disconnect live interior wiring connectors.
- Park the truck on level concrete ground and roll down the vehicle window completely so you have direct physical access through the window frame.
- Step 2: Remove Interior Trim Fasteners and Switch Panels.
- Begin stripping the interior door panel by unclipping the triangular mirror sail trim cover located at the front upper corner.
- Use your plastic trim pry tool to gently lever the window switch panel upward out of its retaining spring clips.
- Disconnect the electrical wiring plugs from the back of the chevy silverado window switch by pressing their center locking tabs.
- Pry out the small rectangular inspection access cover located directly behind the chevy silverado interior door handle.Remove the exposed 10mm bolt found behind that handle pocket and locate the additional 10mm bolts secured beneath the armrest pull pocket.
- Step 3: Lift and Separate the Main Door Card.
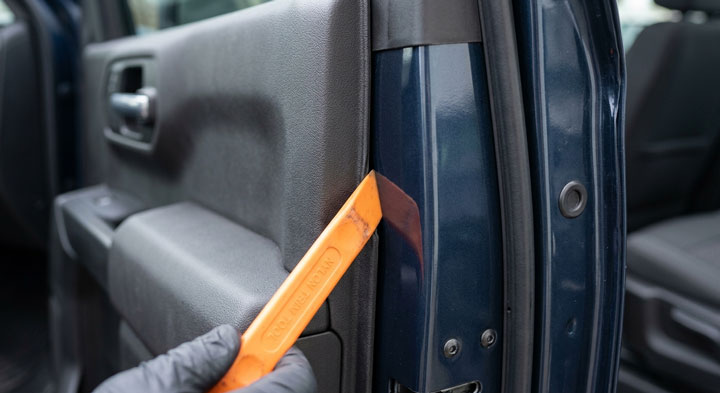
- Take your nylon trim wedge tool and insert it firmly between the metal door frame and the plastic lower panel border.
- Slide the tool inward until you hit a nylon retainer clip, then firmly pop the clip outward from the steel door sheet.
- Work your way deliberately along the bottom edge and up both sides until every perimeter fastener releases cleanly.
- Lift the entire door panel upward toward the roofline rather than pulling straight out so you clear the upper window molding channel.
- Reach behind the suspended panel to unhook the metal release cable, allowing you to set the finished panel aside on a clean towel.
- Step 4: Peel the Vapor Barrier and Unbolt the Old Latch.
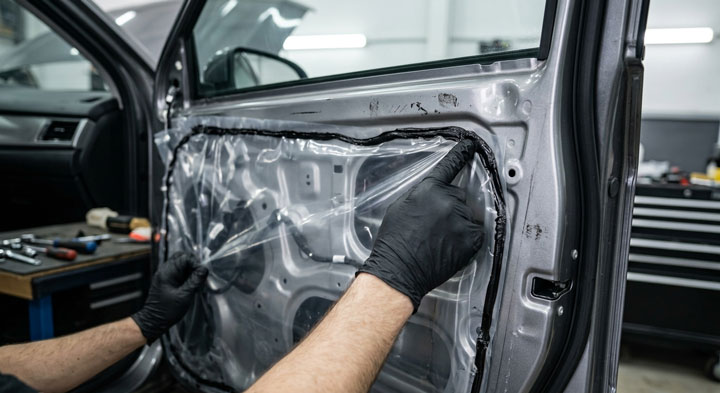
- Carefully slice through the tacky black butyl sealant ribbon to peel back the clear plastic water vapor shield.
- Peel the sheet back halfway from the latch side of the door, taking care not to rip or tear the protective barrier film.
- Reach inside the door access cavity to release the plastic retainer clasp securing the vertical lock indicator rod.
- Move to the outer door jamb edge and locate the three stout T30 Torx machine screws holding the latch in place.
- Support the heavy latch assembly with one hand inside the metal door shell while backing out all three Torx fasteners with your driver.
- Step 5: Extract the Assembly and Install the New Actuator.
- Maneuver the combined latch and motor housing downward past the interior window guide channel toward the large maintenance port.
- Carefully disconnect the primary wiring harness plug from the motor housing by depressing the weather-pack locking tang.
- Compare your brand-new replacement assembly side-by-side with the worn factory unit to verify connector pin counts and mounting bracket holes.
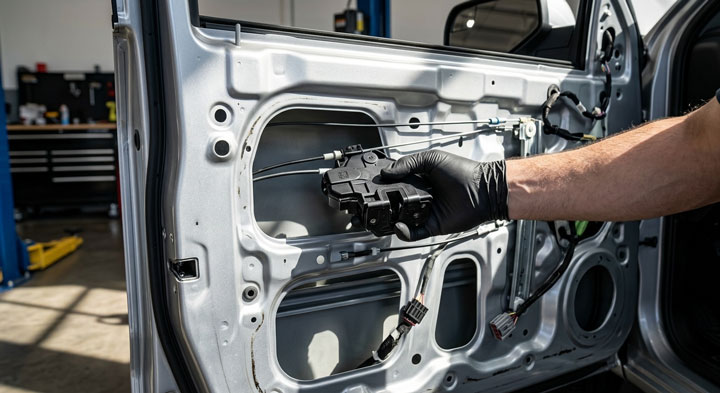
- Feed the new component inside the hollow door frame, plug in the electrical lead, and align the three exterior mounting screw bores.
- Thread the T30 Torx hardware by hand first to avoid cross-threading, then torque them securely to factory latch specifications.
- Step 6: Reconnect Linkage Rods and Test Functionality.
- Snap the manual door lock rod back into its colored plastic swivel bushing and lock the retention retainer tab in place.
- Inspect the flexible door release lines, and if your truck shows signs of stretched metal wiring, perform a dedicated chevy silverado door latch cable replacement before reassembly.
- Press the clear vapor shield back into the tacky butyl bead around the perimeter of the door cavity.
- Hang the interior door trim back onto the top sill channel, push all perimeter retention clips firmly into the frame, and reinstall the bolts.
- Reconnect your negative vehicle battery cable under the hood and test the locking system thoroughly using both manual controls and power switches.
Completing this repair with your own hands delivers unmatched satisfaction and keeps hundreds of hard-earned dollars in your bank account.
Whenever you run into an unexpected hitch during an automotive repair, you can always turn to the practical diagnostic breakdowns published by Bryan’s Garage to get your vehicle running smoothly again.
Understanding Silverado Door Lock Architecture and Why Actuators Fail

Power door lock assemblies on modern pickup trucks are marvels of electromechanical packaging.
Automakers combine the mechanical structural door latch, child-safety lock blocks, door-ajar switches, and electric drive motors into a single sealed component.
Inside the plastic outer shell of the actuator sits a tiny bidirectional direct-current electric motor coupled to a reduction gear train.
When you trigger your key fob, the motor spins rapidly, turning a plastic worm gear that forces a linear rack forward or backward.
That linear stroke mechanically throws the latch pawl, locking or unlocking your door without physical key rotation.
General Motors pickups see severe duty cycles, environmental extremes, and rough daily vibration on job sites and highways alike.
Over tens of thousands of operating cycles, fine carbon brush dust builds up on the internal electric motor commutator.
This microscopic conductive debris creates severe electrical resistance across the armature windings.
When high resistance develops, the tiny motor can no longer draw sufficient current to generate enough mechanical torque.
The motor tries to turn, but it lacks the muscular power needed to shove the mechanical latch levers against friction and spring resistance.
Moisture intrusion accelerates this wear cycle dramatically across four-season driving climates.
Rainwater, road salt slush, and car wash spray seep naturally past outer window beltline weatherstripping into the door belly.
While drain holes evacuate standing water, high internal door humidity attacks the unsealed motor shafts and grease lubricants.
Factory lithium grease degrades into a sticky, gummy paste that binds the nylon reduction gears.
If you own an older platform like a 2008 chevy silverado, the factory grease has likely hardened into useless adhesive after years of summer heatwaves.
Mechanical wear on adjacent linkages places further stress on tired actuator drive gears.
When owners repeatedly yank an unyielding door handle, internal plastic levers bend or fracture microscopically.
If your exterior latch refuses to catch the door striker bolt securely, you may need a targeted chevy silverado door latch repair rather than an electrical motor replacement alone.
Knowing how each mechanical component interacts prevents you from replacing good parts while ignoring the true root cause of latch failure.
Advanced Diagnostics: Actuator Motor, Door Wiring, or BCM Failure?
Far too many driveway mechanics rush out to buy brand-new parts before verifying where the circuit fault actually originates.
An unresponsive door lock can stem from a blown fuse, a broken wire inside the rubber hinge boot, or a master switch failure.
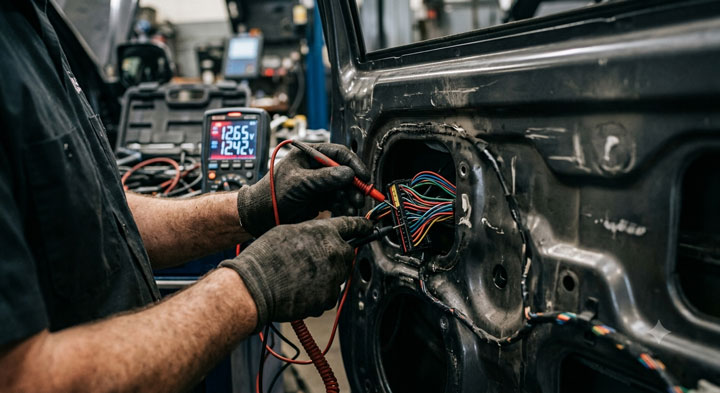
You can execute foolproof electrical diagnostics in under twenty minutes using a standard digital multimeter and an automotive test light.
Systematic troubleshooting prevents you from wasting money on parts you do not actually need.
| Failure Symptom | Most Probable Root Cause | Diagnostic Verification Test |
|---|---|---|
| Single door will not lock or unlock via switch or fob | Burned-out internal actuator motor brushes | Probe harness with 12V test light during switch actuation |
| All doors fail to respond to any lock input | Blown door lock fuse or failed system relay | Inspect 15A/20A lock fuses inside underhood fuse block |
| Lock operates using driver switch but ignores wireless remote | Depleted remote battery or unprogrammed key transmitter | Test remote RF signal output with key fob tester tool |
| Door locks chatter rapidly or click without moving the rod | Stripped nylon reduction spur gears in motor assembly | Listen for high-speed motor whirring sound inside door |
| Intermittent operation only when door is swung wide open | Severed copper wiring inside flexible hinge harness boot | Perform continuous wire wiggle test across door jam hinge |
Start your diagnostic sequence by inspecting the master power door lock fuse located in the engine compartment fuse block.
If every door in your truck went dead at the exact same second, your actuator motors are almost certainly completely fine.
Examine the underhood wiring diagram on the underside of your fuse box lid and pull the corresponding lock and unlock fuses.
Check the tiny fuse filament for thermal breaks or test continuity across the test pins using the ohms setting on your multimeter.
If only one single door actuator acts dead, remove the interior door panel to expose the actuator wiring harness plug.
Attach the ground alligator clip of your test light to a bare metal bolt inside the door structure.
Probe the power feed cavity of the two-wire actuator motor harness while an assistant presses the lock button on the driver door.
If your test light flashes bright for a split second, strong voltage is arriving at the component and the motor itself is dead.
When the test light remains dark, backtrack your electrical circuit upstream toward the door hinge boot.
Heavy truck doors flex the rubber wiring conduit thousands of times over the life of the vehicle.
Work-hardened copper wires frequently snap clean in half inside that thick rubber accordion tube while the outer insulation remains intact.
Pull back the rubber boot and perform a gentle tug test on each wire to locate broken internal copper strands.
Modern pickup trucks route locking command signals through the vehicle central body control computer module.
In rare instances where replacement modules refuse to communicate with power hardware, professional chevy silverado bcm programming is required to sync factory security parameters.
If your vehicle struggles exclusively with wireless remote operations, diagnose your handheld transmitter before touching the door wiring.
A dead transmitter battery or worn button pad on your chevy silverado key fob mimics an unresponsive actuator motor from across the parking lot.

Step-by-Step Diagnostic Tree for Power Lock Malfunctions
Follow this structured diagnostic workflow to eliminate guesswork when isolating door latch electrical failures.
First, test manual lock knob operation by physically pressing and lifting the plastic lock rod at the top of the door trim.
If the rod resists movement or binds completely, inspect the latch assembly for jammed mechanical levers or bent linkage rods.
If the rod glides up and down with normal mechanical resistance, proceed immediately to electrical input verification.
Second, listen closely at the door skin while cycling the interior lock toggle switch back and forth.
A faint clicking sound indicates the onboard relay is firing and delivering power, but the motor lacks the torque to throw the lock.
Complete silence indicates an open electrical circuit, blown fuse, failed master switch, or severed door jamb wiring harness.
Third, verify the health of your passenger-side door switch by attempting to cycle the locks from both front seating positions.
If the system works from the passenger switch but fails completely from the driver door, the driver switch contact pads are corroded.
Isolating the issue using simple elimination logic keeps your diagnostic time short and your parts bill low.
Practical Application Guide and Pro-Mechanic Tips
Executing an actuator replacement in your garage is one of the most rewarding mechanical repairs you can tackle on a weekend.
To guarantee factory-grade reliability, always apply a light coating of synthetic non-melting grease to the new latch pivot points.
Avoid petroleum-based spray lubricants because standard aerosol fluids attract airborne grit and wash away after the first rainstorm.
Clean out the bottom edge of the metal door frame using a shop vacuum and a dry cloth before closing the panel up.
Clear out leaves, road grit, and metal rust flakes that plug the factory water drain slots along the lower sheet metal seam.
Inspect the plastic linkage rod clips thoroughly whenever you disconnect manual metal push rods from the latch arms.
These nylon swivel clips turn brittle after years of seasonal temperature swings and easily shatter during removal.
Keep a multi-pack of assorted automotive door rod clips on hand so a cracked twenty-cent plastic tab does not halt your progress.
When installing a replacement unit, perform a full chevy silverado door lock actuator replacement on the opposite door if it exhibits the same sluggish behavior.
Actuators operate in pairs, meaning the companion passenger unit has endured identical operating cycles and likely faces imminent motor brush failure.
Overcoming DIY Installation Risks and Common Mistakes
The single most dangerous DIY mistake during this repair is closing the vehicle door before testing the latch linkages thoroughly.
If you misalign the latch release rod or install the cable backward, the door can lock itself permanently shut against the striker bolt.
Opening a mechanically deadlocked truck door with the interior trim installed is a nightmare that requires destroying your door panel.
Always test the latch mechanism using a heavy screwdriver to simulate the vehicle striker pin while the door remains wide open.
Push the latch jaws closed with the tool shaft, then verify that both interior handles, exterior handles, and power locks release smoothly.
Another frequent mistake is tearing the clear plastic vapor barrier or discarding it completely during disassembly.
That plastic sheet is not simple packaging trash; it plays an indispensable engineering role in your truck cab health.
The vapor barrier prevents rainwater from blowing past the door sheet metal directly into the cab carpeting and sound-deadening insulation.
Discarding the shield leads to moldy floorboards, foggy windshields during rain, and rotted floor pans down the road.
If the original butyl adhesive no longer sticks, seal the perimeter with fresh 5/16-inch butyl tape to preserve a watertight cab seal.
Take extra care when handling plastic door trim retainers during cold winter weather repairs.
Cold plastic snaps instantly when subjected to prying force, leaving you with annoying door panel rattles at highway speeds.
Warm your truck interior with a portable space heater or work inside a heated garage before prying against brittle trim clips.
If a retainer pin snaps off inside the metal door frame, extract the broken shaft completely before pressing the finished panel back on.

“I’ve driven a Silverado for 5 years and didn’t know this existed.”
— The most common reaction when this article is shared
Did you know there’s a hidden storage compartment behind your rear seats? Or the button combo that switches your digital cluster to a completely different layout?
bryansgarage.com · July 28, 2026
Frequently Asked Questions
Can I replace just the small electric motor inside the plastic actuator housing?
Yes, experienced hobbyists can split open the plastic housing to replace the tiny internal 12-volt DC hobby motor.
However, modern factory actuator assemblies are sonically welded or glued together at the factory to keep out moisture.
Prying the case apart often fractures the delicate alignment pins and internal plastic gear axles permanently.
For long-term reliability, installing a complete pre-assembled replacement latch unit is safer and saves hours of tedious bench work.
How much money will I save by doing this door lock repair myself?
A commercial dealership or independent repair shop typically charges between $350 and $550 per door for this specific repair.
The vast majority of that total bill stems from expensive hourly labor rates charged to remove the interior door panel.
A high-quality aftermarket or OEM replacement actuator assembly generally costs between $45 and $120 online.
Tackling this repair in your driveway puts up to $400 of hard-earned money right back into your household budget.
Why does my Silverado door lock peg buzz loudly or chatter when I press the button?
A loud buzzing or machine-gun clicking sound indicates that the internal electric motor is spinning normally under full power.
However, the small teeth on the nylon reduction spur gear or worm drive have stripped clean off under mechanical load.
The high-speed motor spins without traction, skipping across the broken gear teeth rather than driving the latch lever.
This stripped gear condition cannot be lubricated away and requires full replacement of the actuator unit.
Do I need to disconnect my truck battery to change an actuator?
Yes, disconnecting the negative battery post is an essential safety precaution whenever working inside your vehicle doors.
Accidentally shorting the master door switch harness against the metal door frame can blow fuses or damage control modules.
Disconnecting power also prevents accidental window regulator cycling while your hands are deep inside the door shell cavity.
How do I know if my problem is a bad actuator or a broken latch cable?
Pay close attention to how the manual interior handle feels when you pull it toward you.
If the handle pulls completely limp with zero mechanical spring resistance, the internal steel release cable has snapped.
If the handle retains firm spring tension but the door stays locked electronically, the actuator motor is the true culprit.
Conclusion
Fixing a stubborn truck door yourself restores everyday security and eliminates daily driving frustration.
Ready to transform your car maintenance from a stressful chore into a breeze? Explore more tips at Bryan’s Garage.
Have questions? Our team can help you find the best solutions for your car problems and avoid costly mechanic visits.
Note: Individual results may vary depending on individual vehicle makes, models, year of manufacture, and overall condition. This article is intended for general automotive reference purposes only and does not replace official manufacturer service manuals or advice from a certified mechanic.