I still remember the sinking feeling in my stomach when my truck started making that infamous chirping noise every morning.
What began as a mild tick during cold startups quickly turned into a deafening roar under heavy acceleration. Like thousands of truck owners, I was suddenly battling a severe ford f150 ecoboost exhaust manifold leak.
Here at Team Bryan’s Garage, we have helped countless drivers diagnose this exact issue, save thousands on repair costs, and fix it permanently using proven mechanical strategies.
In This Article
- A step-by-step repair guide for removing warped manifolds and extracting sheared cylinder head studs.
- An engineering deep-dive explaining why factory twin-turbo cast iron manifolds fail around 60,000 to 80,000 miles.
- A comprehensive cost and durability comparison between stock Ford castings, heavy-duty BD Diesel upgrades, and performance headers.
- Proven diagnostic methods to detect exhaust leaks early before hot gas damages nearby engine components.
- Essential torque sequences, anti-seize strategies, and safety protocols to protect delicate aluminum engine heads.
Your F-150 has a secret slot that starts the truck when your key fob dies.
And 8 other things Ford never told you.
Dead fob fix · Remote window trick · 7.2 kW generator hiding in your bed · Tailgate ladder · and 5 more.
▶ Read Now — Show Me Everything
bryansgarage.com · Bryan Mark · 2026

How to Repair a Ford F150 EcoBoost Exhaust Manifold Leak: A Complete Step-by-Step Guide
Before jumping into this involved repair, you must prepare the right environment and toolset.
Working on a twin-turbocharged engine requires patience, organized hardware bins, and proper safety equipment.
You will be working near delicate aluminum cylinder heads, hot exhaust lines, and pressurized coolant circuits.
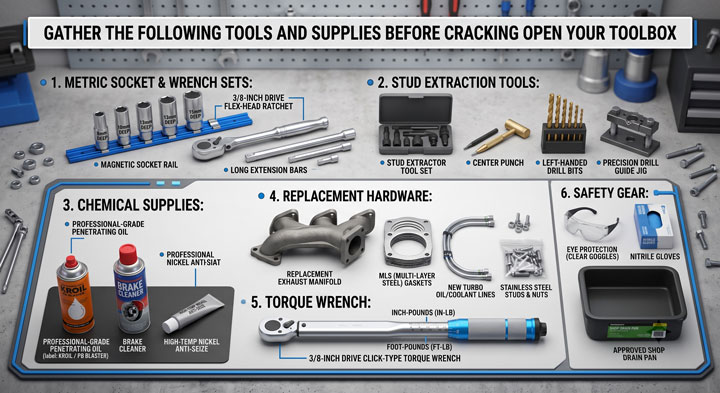
Gather the following tools and supplies before cracking open your toolbox:
- Metric Socket & Wrench Sets: 8mm, 10mm, 13mm, and 15mm deep sockets with flex-head ratchets and extensions.
- Stud Extraction Tools: A quality stud extractor tool set, center punch, left-handed drill bits, and a precision drill guide.
- Chemical Supplies: Professional-grade penetrating oil (Kroil or PB Blaster), brake cleaner, and high-temp nickel anti-seize.
- Replacement Hardware: Heavy-duty replacement manifold, multi-layer steel (MLS) gaskets, new turbo oil/coolant lines, and stainless steel studs.
- Torque Wrench: A calibrated 3/8-inch drive torque wrench reading in inch-pounds and foot-pounds.
- Safety Gear: Eye protection, nitrile gloves, and an approved shop drain pan for engine coolant.
Once your workspace is clear and your tools are ready, follow this detailed manual sequence to resolve your f150 ecoboost exhaust manifold leak safely.
Step 1: Disconnect Power, Drain Coolant, and Disassemble Intake Plumbing.
Safety is your top priority when performing complex engine bay work on turbo vehicles.
Begin by disconnecting the negative battery terminal and securing it away from the post.
Place a clean drain pan under the radiator petcock and release the engine coolant completely.
Loosen the worm-gear clamps securing the air intake tubes and remove the air cleaner assembly.
Disconnect the quick-release vacuum lines and mass airflow sensor wiring harnesses carefully.
Remove the plastic inner fender liner using an 8mm socket to open up side access to the engine bay.
Label all electrical connectors with masking tape so reassembly remains organized and smooth.
Cover all open intake ducting with clean shop towels to stop dust and debris from falling into the turbo impeller.
Step 2: Unbolt Downpipe Connections and Remove the Turbocharger Assembly.
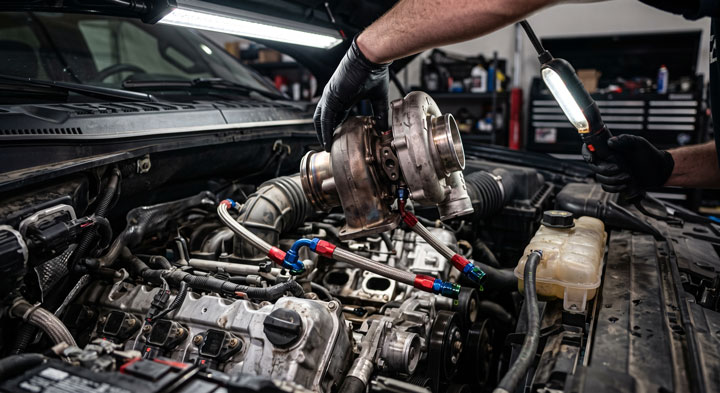
To reach the engine’s exhaust manifold, you must first clear away the turbocharger and exhaust downpipe.
Spray penetrating oil liberally onto the exhaust downpipe flange nuts and allow it to soak for twenty minutes.
Unbolt the downpipe fasteners using a 15mm socket attached to a long breaker bar.
Disconnect the turbocharger oil feed, oil drain, and coolant supply lines using line wrenches.
Be prepared for minor fluid drippage, and immediately cap the open fluid ports on the turbo housing.
Remove the three turbocharger mounting bolts that secure the unit to the exhaust manifold structure.
Support the weight of the turbocharger carefully as you slide it off its alignment dowels.
Inspect the turbo impellers for side-play or oil contamination while the assembly rests on your workbench.
Step 3: Unbolt Exhaust Manifold and Identify Broken Hardware.
With the turbocharger out of the way, you now have full visual access to the factory cast iron manifold.
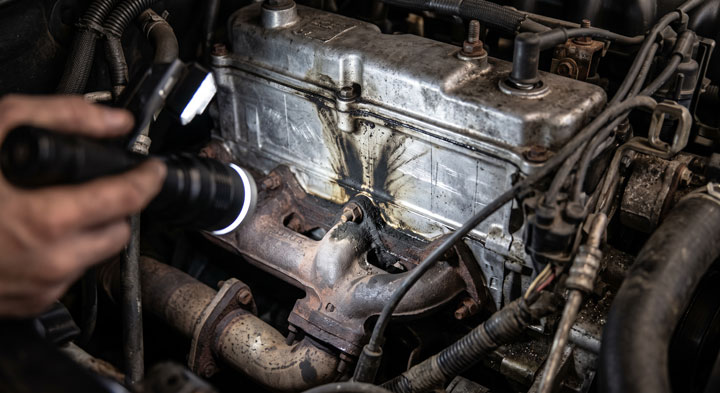
Look closely at the rear cylinder exhaust ports for telltale black soot deposits signaling blown gaskets.
You will frequently discover that the rearmost manifold stud heads have already snapped off flush.
Spray all remaining manifold nuts with penetrating fluid to prevent rounding off rusty threads.
Remove the intact manifold nuts slowly using a 6-point 13mm socket applied with steady pressure.
Pull the old manifold off the cylinder head and discard the crushed single-use metal gasket.
Count every mounting stud left in the head to confirm how many broken fasteners require extraction.
Clean the aluminum cylinder head mating surface using plastic scrapers and brake cleaner.
Step 4: Extract Broken Manifold Studs from the Aluminum Head.
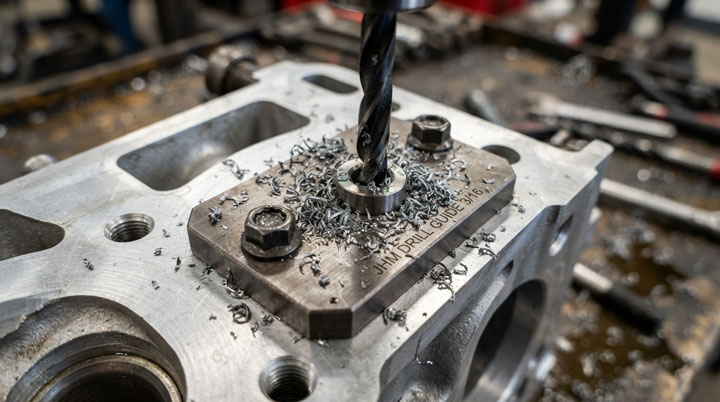
Extracting broken hardware from soft aluminum cylinder heads demands maximum precision and control.
If a broken stud extends beyond the head deck, lock two jam nuts together or use a roller extractor tool.
For studs snapped flush or below the surface, mark the exact center using an automatic center punch.
Mount an aligned drilling guide plate over the cylinder head exhaust port to keep your drill bit perfectly perpendicular.
Begin drilling through the broken stud using a small left-handed drill bit set to low speed.
Often, the heat and counter-clockwise bite of a left-handed bit will back the broken stud right out.
If the stud remains stuck, step up bit size incrementally and insert a spiral flute screw extractor tool.
Tap the extractor firmly into the pilot hole, apply steady counter-clockwise torque, and back the stud out safely.
Thread an M8 x 1.25 tap into the head threads gently to clean out rust without removing good metal.
Step 5: Install Upgraded Heavy-Duty Manifold and Torque to Specification.
Never reinstall a warped factory manifold, as thermal memory will cause it to leak again quickly.
Apply a microscopic film of high-temperature nickel anti-seize to the new stainless steel cylinder head studs.
Thread the new studs into the aluminum head by hand until they seat fully without binding.
Position a fresh multi-layer steel (MLS) gasket onto the head dowels with the correct orientation marked.
Slide your upgraded heavy-duty replacement manifold over the studs and seat it flush against the gasket.
Install new hardened washers and locking nuts onto each stud finger-tight.
Using a torque wrench, tighten the nuts in a spiral pattern starting from the center and moving outward.
Torque all fasteners to the manufacturer specification of 122 inch-pounds (14 Nm) on the first pass.
Pro Mechanic Tip: Perform a second torque pass at 22 foot-pounds (30 Nm) across all studs after waiting fifteen minutes to allow hardware settling.
Reinstall the turbocharger with new oil feed filters, fresh coolant quick-connect fittings, and new gaskets.
Reconnect the exhaust downpipe, inner fender liner, intake ducting, and battery terminals in reverse order.
Refill the cooling system with fresh approved coolant and bleed trapped air using a vacuum refill tool.
Start the engine and check for whisper-quiet idle operation while inspecting for liquid leaks.
Completing this repair yourself preserves your hard-earned money and keeps your truck running smoothly for miles.
If you encounter unusual stud clearance issues or need advanced diagnostic diagrams during your build, explore our full library of repair walk-throughs at Bryan’s Garage.
The Root Cause Behind 3.5L EcoBoost Broken Manifold Studs
To prevent repeated failures, truck owners must understand why the factory manifold system breaks down.
The 3.5L EcoBoost engine produces incredible low-end torque by utilizing high turbocharger boost pressures.
These turbochargers spin up to 170,000 RPM, generating extreme exhaust gas temperatures exceeding 1,500 degrees Fahrenheit.
Because the heavy turbocharger mounts directly to the cast iron manifold, the manifold bears severe mechanical weight and vibration.
Furthermore, cast iron and aluminum possess vastly different thermal expansion rates under heavy towing conditions.
When you pull a heavy trailer up a steep grade, the cast iron manifold expands rapidly across its horizontal length.
The softer aluminum cylinder head beneath it expands at a different rate, creating extreme shearing forces on the steel studs.
Engineering analysis reveals a fundamental constraint in the original First-Generation (2011–2016) EcoBoost exhaust design.
Although the cylinder head featured eleven tapped stud holes, factory engineers only utilized eight stud locations.
This left the rearmost exhaust port unsupported against the heavy leverage of the hanging turbocharger.
Over thousands of heating and cooling cycles, thermal expansion forces warp the rear flange outward like a banana.
As the cast iron curls away from the head, extreme bending fatigue snaps the rearmost M8 steel studs.
Once the stud snaps, high-pressure exhaust gas blows past the metal gasket, creating that notorious ticking noise.
The resulting leak isn’t just an annoying auditory distraction during your morning commute.
Escaping exhaust gas bypasses the turbocharger turbine wheel completely, causing severe loss of boost pressure and sluggish acceleration.
Engine sensors detect inaccurate air-fuel ratios due to fresh air reversion entering through the leak point.
Data Highlight: Certified shop records indicate that over 68% of First-Gen 3.5L EcoBoost trucks experience manifold warping between 60,000 and 90,000 miles.
In addition, superheated exhaust flames escaping the open flange blast directly against nearby plastic wiring looms and brake lines.
Addressing 3.5L ecoboost broken manifold studs promptly prevents dangerous engine bay heat damage and restores full engine power.
Comparing Repair Options: OEM Castings vs Heavy-Duty Aftermarket vs Headers
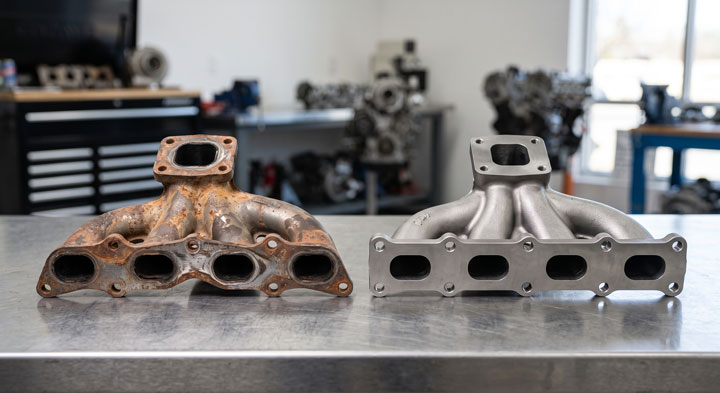
When repairing your exhaust system, selecting the right replacement component dictates how long the fix will last.
Installing cheap factory-style replacement manifolds often leads to repeat failures within two to three years.
Modern aftermarket manufacturers have developed heavy-duty solutions specifically re-engineered to resolve Ford’s original factory flaw.
Let’s evaluate the primary replacement options available to truck owners today.
| Comparison Attribute | OEM Ford Factory Manifold | BD Diesel Heavy-Duty Upgrade | Stainless Steel Performance Headers |
|---|---|---|---|
| Material Composition | Standard Ductile Cast Iron | Thick-Wall High-Silicon Ductile Iron | 304 Stainless Steel Tubing |
| Stud Clamping Pattern | 8-Stud Configuration | Full 11-Stud Configuration | Full 11-Stud Configuration |
| Average Lifespan | 50,000 – 80,000 Miles | 150,000+ Miles (Permanent Fix) | 100,000+ Miles (Varies by Weld Quality) |
| Part Cost (Per Pair) | $250 – $350 | $500 – $650 | $800 – $1,200 |
| Warp Resistance | Low (Prone to curling) | Exceptional (Thick casting walls) | Moderate (Subject to thermal weld cracking) |
| Exhaust Flow Gain | Baseline Flow (~110 CFM) | +25.9% Increased Flow (~139 CFM) | +30% High Velocity Flow |
Replacing broken studs with another standard OEM manifold usually results in wasted labor hours over time.
Standard Ford replacement manifolds retain the thin casting walls that curl under heavy towing heat.
Heavy-duty options, such as the BD Diesel manifold kit, redesign the casting to utilize all eleven head mounting holes.
By spreading clamping force across eleven thick stainless studs, stud stress drops below critical yield limits.
Thicker casting walls absorb extreme exhaust heat without warping out of flat plane alignment.
Performance stainless steel headers offer great exhaust flow gains but introduce potential weld cracking risks under heavy engine movement.
For daily drivers and towing vehicles, heavy-duty ductile iron multi-stud manifolds represent the best balance of cost and permanent durability.