I still remember the sinking feeling when a stray deer jumped onto a dark rural road and nearly demolished my truck’s front end.
After spending weeks repairing radiator core supports and headlight housings, I vowed never to drive unprotected again.
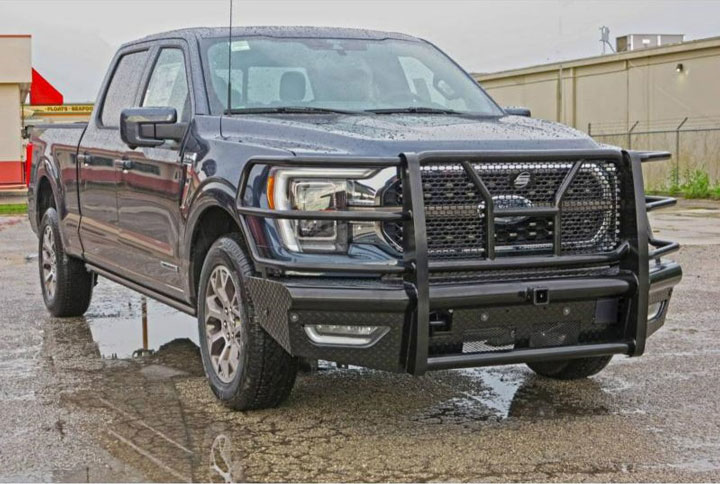
At Team Bryan’s Garage, we created this ford f150 brush guard install guide to walk you step-by-step through mounting heavy-duty front protection right in your home driveway without overpaying at a dealership.
In This Article
- How to Install a Front Brush Guard on Ford F150: Step-by-Step DIY Guide
- Frame-Rail Mounting Mechanics and Tow Hook Integration on Modern F-150s
- Navigating Parking Sensors, Adaptive Cruise Control Radar, and Front Cameras
- Material Engineering: Carbon Steel vs Stainless Steel Front Guards
- Torque Specifications, Alignment Checks, and Anti-Corrosion Maintenance
- Protecting Airflow, Weight Distribution, and Collision Sensors
Your F-150 has a secret slot that starts the truck when your key fob dies.
And 8 other things Ford never told you.
Dead fob fix · Remote window trick · 7.2 kW generator hiding in your bed · Tailgate ladder · and 5 more.
▶ Read Now — Show Me Everything
bryansgarage.com · Bryan Mark · 2026
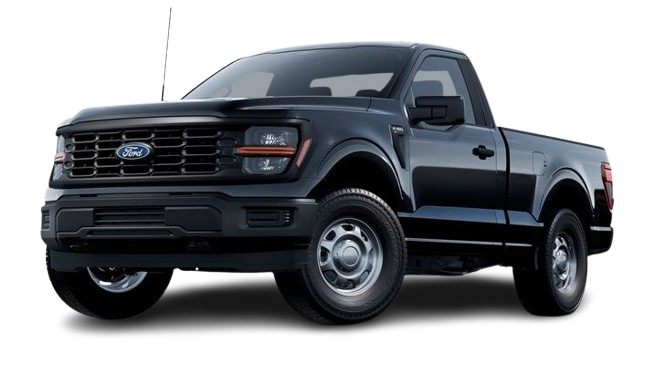
How to Install a Front Brush Guard on Ford F150: Step-by-Step DIY Guide
Installing a heavy-duty front bumper guard transforms your pickup truck into an off-road utility vehicle capable of handling harsh terrain and highway debris.
Before beginning your installation project, organizing the necessary tools and preparing your garage workspace ensures a smooth mechanical process.
Prerequisites and Required Tools
Having the proper tools on hand prevents unnecessary delays and keeps your installation completely safe from start to finish.
- Metric Socket Set: 10mm, 13mm, 15mm, 18mm, and 21mm deep sockets with 1/2-inch drive ratchet.
- Torque Wrench: Heavy-duty torque wrench capable of reaching up to 120 ft-lbs.
- Trim Removal Tool: Plastic pry tool for removing factory rubber air dam shrouds and push pins.
- Safety Gear: Protective eye glasses, mechanic gloves, and sturdy work boots.
- Support Equipment: Hydraulic floor jack or an assistant to hold the heavy steel guard during bolt alignment.
- Chemicals: Anti-seize lubricant compound and painter’s masking tape to protect front bumper paint finish.
Step-by-Step DIY Guide
- Step 1: Park on Level Ground and Disconnect the Battery
- Park your Ford F-150 on a solid, level concrete surface and engage the parking brake firmly.
- Pop the engine hood and locate the 12-volt starter battery positioned near the passenger side firewall.
- Use a 10mm socket wrench to loosen the negative battery terminal cable nut.
- Tuck the disconnected cable safely away from the battery post to prevent accidental electrical short circuits during installation.
- Disconnecting power protects your truck’s sensitive front bumper parking sensors and adaptive cruise control modules from accidental electrical surges.
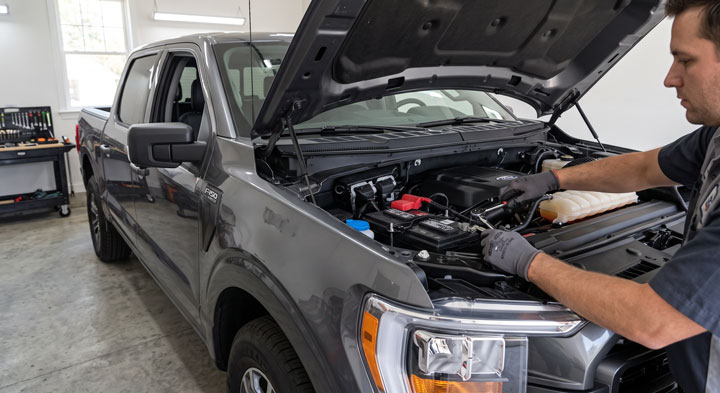
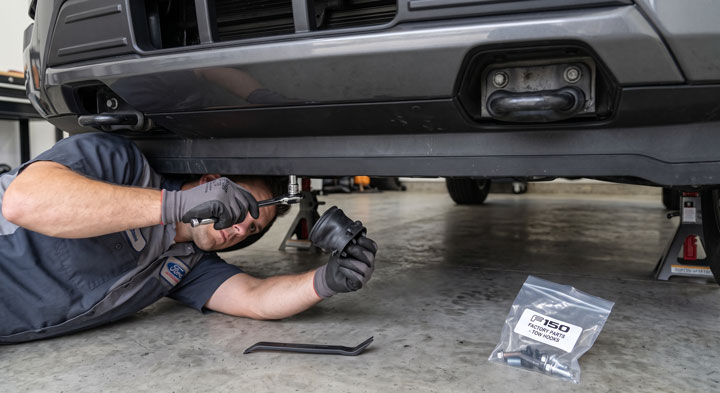
- Step 2: Remove Factory Tow Hooks and Lower Rubber Boot Sleeves
- Crawl beneath the front bumper assembly to access the driver side and passenger side factory steel tow hooks.
- Locate the black flexible rubber boots encasing the tow hooks where they enter the lower bumper cutouts.
- Use your plastic trim removal tool to pop out the retaining push pins securing the rubber boots.
- Slide a 15mm deep socket onto your ratchet handle and loosen the two mounting bolts securing each tow hook to the internal frame rails.
- Remove the tow hooks and threaded double-nut plates from inside the hollow boxed frame section.
- Store these factory parts in a labeled plastic bag in case you ever decide to revert your truck back to stock configuration.
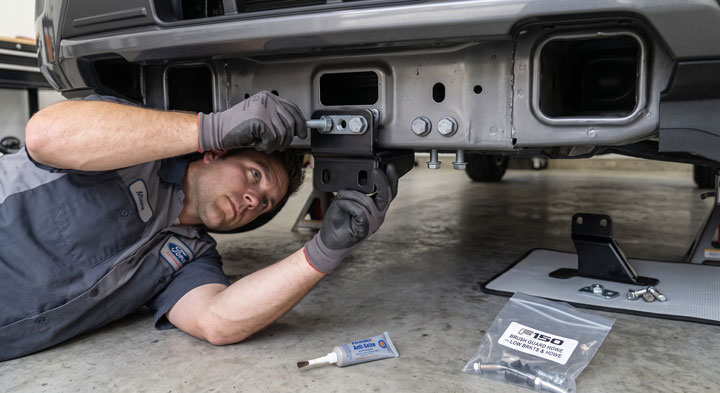
- Step 3: Position Lower Frame Mounting Brackets and Insert Nut Plates
- Identify the driver side and passenger side primary lower mounting brackets included in your brush guard hardware kit.
- Slide the specialized aftermarket double-nut plates inside the opening of the hollow boxed front frame rail.
- Align the slot cutouts on the lower mounting bracket with the factory tow hook holes located underneath the frame.
- Thread the provided heavy-duty Grade 8 hex head bolts into the nut plates by hand to avoid accidental cross-threading.
- Apply a thin layer of anti-seize compound to all exposed bolt threads before driving them home.
- Leave the bracket bolts finger-tight so you can adjust the alignment later during final fitting.
- Step 4: Install Upper Support Frame Brackets Through Grille Gaps
- Open the truck hood to gain clear visual access to the upper radiator support beam and front bumper frame horns.
- Apply strips of painter’s masking tape along the painted edges of your front grille to protect against accidental scratches.
- Locate the upper bracket mounting points situated near the bumper mounting flange bolts behind the main grille.
- Pass the upper support arms through the open horizontal gaps between the lower grille bars.
- Attach the rear bracket flange to the bumper support structure using the supplied carriage bolts and flat washers.
- Keep these upper support arms loosely secured so the main guard assembly can tilt slightly during final positioning.
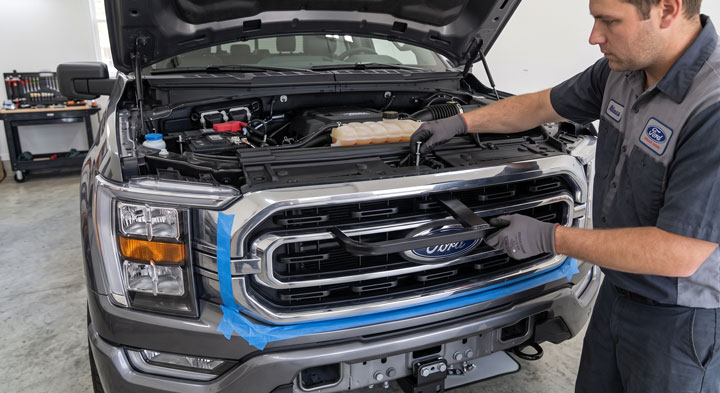
- Step 5: Hoist and Align the Modular Brush Guard Assembly
- Position the fully assembled steel guard directly in front of your truck’s bumper using a mechanical jack or an assistant.
- Carefully lift the guard structure upward until its lower mounting tabs meet the installed frame brackets.
- Pass the large main mounting bolts through the aligned bracket slots on both the driver and passenger sides.
- Attach the upper support arms to the inner vertical uprights of the brush guard frame using button-head Allen screws.
- Step back ten feet from the front of your truck to visually inspect the tilt, symmetry, and height balance of the guard.
- Adjust the guard frame forward or backward in the slotted bracket holes until the steel bars sit completely level with the grille.
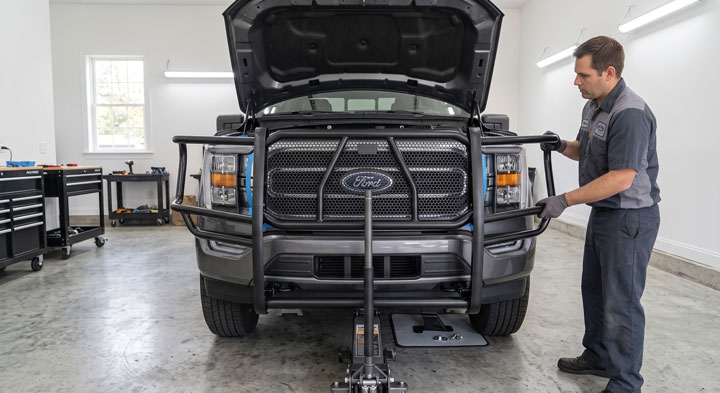
- Step 6: Torque Hardware to Specification and Reconnect Electrical Harnesses
- With the guard perfectly centered, grab your torque wrench to tighten all structural frame fasteners securely.
- Torque the main 1/2-inch lower frame rail bolts to 75 ft-lbs using your calibrated torque wrench.
- Tighten the smaller upper support arm bolts to 35 ft-lbs to lock the uprights firmly in place without crushing sheet metal.
- If your kit included an adaptive cruise control radar relocation bracket or parking sensor extension wiring, plug those harnesses in now.
- Remove the protective painter’s tape from your grille and reconnect the negative battery cable to the battery post.
- Start the engine and verify that no parking sensor fault warnings or front collision radar errors appear on your dashboard screen.
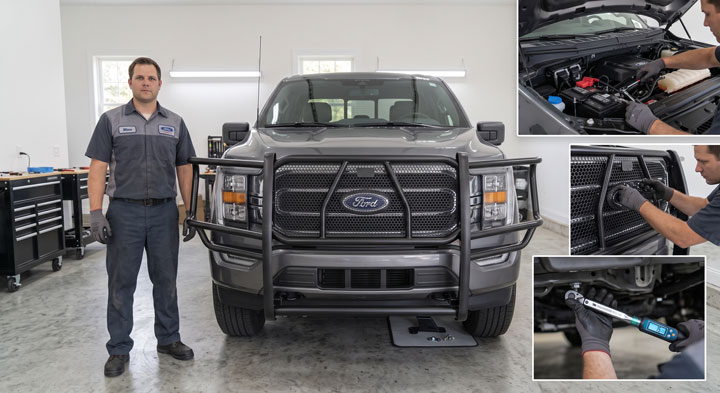
Completing this installation yourself keeps hard-earned money in your wallet while upgrading your vehicle’s front-end defense system.
For more detailed step-by-step DIY automotive repair guides, explore our full library at Bryan’s Garage.
Frame-Rail Mounting Mechanics and Tow Hook Integration on Modern F-150s
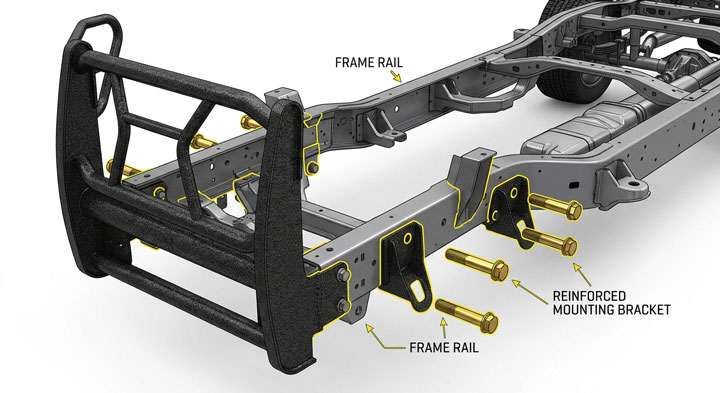
Understanding how aftermarket brush guards attach to modern pickup chassis requires inspecting the structural design of aluminum truck frames.
Since the 2015 model year, Ford half-ton trucks feature high-strength steel frame rails paired with military-grade aluminum alloy body panels.
Because aluminum body panels cannot absorb high structural impacts, heavy steel guards must bolt directly to the fully boxed steel chassis.
Engineering teams design aftermarket mounting brackets to utilize factory tow hook mounting locations situated along the bottom of the frame horns.
These factory frame locations feature pre-drilled pass-through holes engineered to withstand tens of thousands of pounds of pulling force.
When you complete a ford f150 brush guard install, the lower steel mounting brackets sandwich the boxed frame rail using reinforced nut plates.
This sandwich design distributes front impact forces evenly across the main structural frame rather than concentrating stress on thin body sheet metal.
Many truck owners worry that mounting a front guard requires sacrificing their factory recovery tow hooks entirely.
Premium manufacturers design their lower mounting brackets with integrated tow hook attachment slots on the underside.
This allows you to reinstall your factory steel tow hooks directly beneath the brush guard bracket using extended Grade 8 bolts.
Retaining your tow hooks ensures you maintain full vehicle recovery capabilities when driving off-road or pulling vehicles through deep snow.
Certified ASE mechanics always recommend inspecting frame bolt torque after driving the first 100 miles following installation.
Road vibrations can cause newly installed mounting hardware to settle, requiring a quick retorque to maintain rigid structural stability.
Navigating Parking Sensors, Adaptive Cruise Control Radar, and Front Cameras
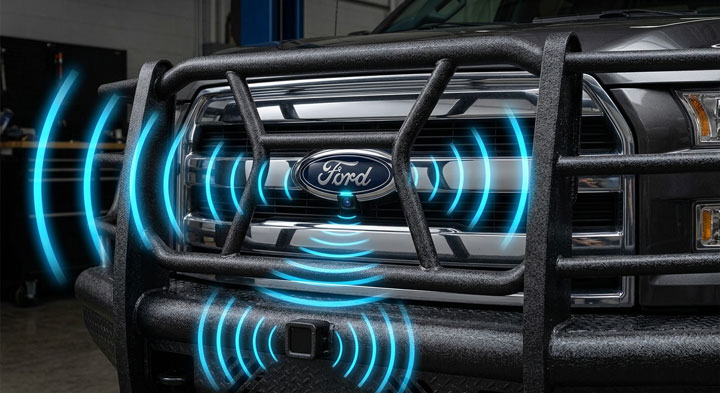
Modern pickup trucks come equipped with sophisticated driver-assist technology designed to prevent front collision accidents.
Installing a heavy front steel guard across the bumper can interfere with these electronic sensors if proper precautions are ignored.
Front parking sensors mounted in the bumper plastic use ultrasonic sound waves to measure distance from nearby objects.
If a thick vertical steel bar sits directly in front of an ultrasonic sensor, the dashboard computer will trigger false obstacle alerts.
To solve this issue, quality grille guards feature removable sensor port plugs or custom sensor relocation brackets.
These mounting kits allow you to pop the factory sensors out of the bumper trim and clip them into pre-cut holes on the guard uprights.
Another critical electronic component found on modern Ford trucks is the Adaptive Cruise Control (ACC) radar module.
This radar sensor sits behind a plastic trim cover on the driver side lower bumper area to track traffic speed ahead.
Solid steel center tubes placed directly over the radar unit block its millimeter-wave signals, causing cruise control system faults.
Manufacturers solve this by offering open mesh center screens or ACC relocation kits that shift the radar unit upward into the grille area.
Similarly, 360-degree camera systems utilize a small wide-angle camera lens embedded directly inside the front Ford emblem.
While upper horizontal guard bars may appear in the top portion of the camera view screen, proper guard alignment keeps the road clear.
Taking time to adjust sensor locations during installation guarantees that your modern electronic safety systems function perfectly.
Material Engineering: Carbon Steel vs Stainless Steel Front Guards
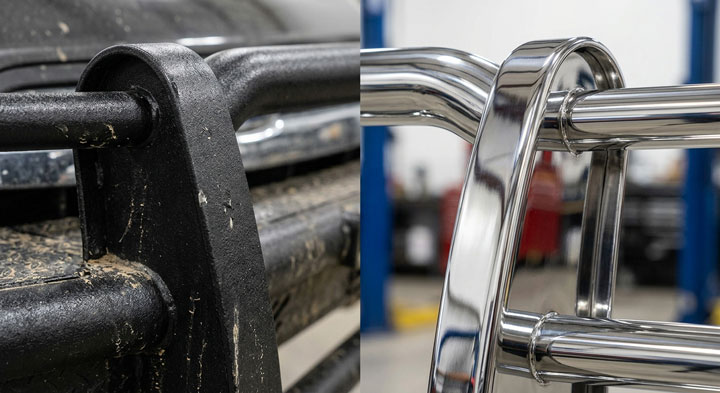
Choosing the correct metal alloy composition for your front protection system determines its strength, weight, and long-term rust resistance.
Manufacturers primarily construct truck grille guards using either heavy-duty mild carbon steel or high-grade stainless steel tubing.
Understanding the performance differences between these two materials helps you select the best product for your driving climate.
| Material & Construction | Corrosion Resistance | Tensile Strength & Durability | Average System Price |
|---|---|---|---|
| Mild Carbon Steel (Black Powder Coat) | Moderate (Requires paint maintenance if scratched) | Exceptional high-impact structural rigidity | $400 to $750 |
| 304 Stainless Steel (Polished Chrome Finish) | Superior (Resists road salt and severe moisture) | High durability with flexible impact absorption | $650 to $1,200 |
| Modular Steel / Aluminum Hybrid | High (Powder-coated aluminum side wings) | Moderate weight savings with solid center steel protection | $800 to $1,500 |
Black powder-coated mild carbon steel remains the most popular choice among truck enthusiasts due to its rugged look and affordable price.
Carbon steel offers incredible tensile strength, making it ideal for pushing through dense brush or defending against animal strikes.
However, if deep trail scratches penetrate the outer powder-coat layer, raw iron beneath becomes vulnerable to atmospheric rust.
Applying black touch-up paint or rust-inhibiting spray to trail scratches immediately seals the bare metal from moisture damage.
Polished 304 stainless steel guards contain high concentrations of chromium and nickel throughout the molecular structure of the metal.
This chemical composition creates an invisible oxide layer that continuously protects the surface from salt corrosion and rust spots.
Drivers living in northern snow-belt regions where salt brine is used on roads heavily benefit from choosing stainless steel guards.
Selecting the right metal material guarantees your front-end investment survives harsh weather conditions for years to come.