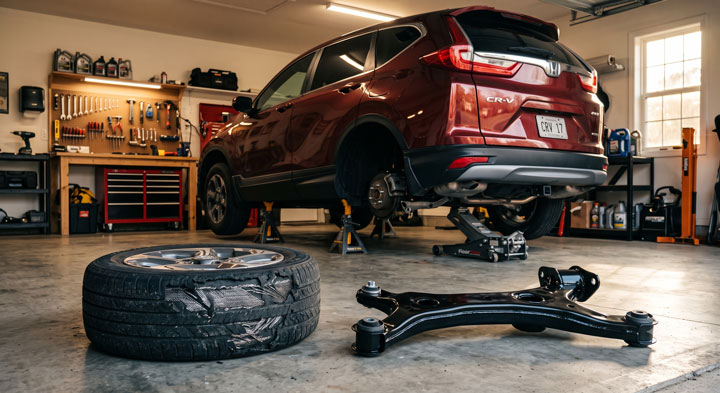
When my own SUV started making a sickening metallic clunk over highway dips while the rear tires wore down to the steel belts in under ten thousand miles, I knew I was facing the dreaded rear suspension collapse.
I was anxious about expensive shop quotes and feared taking my vehicle to an overcharging mechanic, but diagnosing the worn-out bushings on my control arms turned out to be the ultimate turning point.
At Team Bryan’s Garage, we have helped thousands of drivers tackle a complete honda crv trailing arm replacement safely in their own driveway while saving thousands of dollars on labor.
Honda CRV Trailing Arm Replacement Rear Bushing and Suspension Fix
In This Article
Complete DIY Replacement Guide: Step-by-step instructions to safely swap out rear trailing arms and press out failed bushings.
Mechanics of Trailing Arm Failures: Understanding structural frame corrosion, salt belt damage, and safety recall technicalities.
Diagnostic Diagnostics: How to spot squeaks, excessive negative camber, and abnormal tire wear early.
Parts vs. Labor Costs: Comparing DIY bushing pressing against installing complete pre-assembled control arms.
Pro Rust-Mitigation Tips: Safe techniques for extracting seized 17mm bolts without stripping frame anchor nuts.
🔴 MOST OWNERS NEVER FIND THIS
Your CR-V has a secret trick that starts the SUV when your key fob dies. And 14 other things Honda never told you.
Dead fob fix · Global window down trick · The hidden folding picnic table · Walk Away Auto Lock · and 11 more.
How to Perform a Honda CRV Trailing Arm Replacement: Step-by-Step DIY Guide
Replacing a damaged trailing arm requires patience, the proper safety setup, and correct mechanical sequencing.
Before beginning work, park the vehicle on a level concrete surface and engage the parking brake.
You will need a floor jack, heavy-duty jack stands, a 1/2-inch impact wrench, 17mm and 19mm sockets, penetrating oil, a torque wrench, and safety goggles.
If you plan to replace only the rubber insert, secure a dedicated press tool before unbolting the assembly.
Honda CRV Trailing Arm Replacement Rear Bushing and Suspension Fix
Step 1: Lift the Vehicle, Secure Chassis, and Remove Rear Wheels
Loosen the rear lug nuts using a 19mm socket while the tires remain firmly on the ground.
Position your hydraulic floor jack under the reinforced rear crossmember jack point.
Raise the rear of the vehicle high enough to fit heavy-duty jack stands underneath the pinch welds.
Lower the chassis slowly onto the jack stands to ensure rock-solid stability during torque applications.
Unscrew the lug nuts completely, pull the rear wheels off, and slide them underneath the frame for extra backup safety.
Locate the ABS wheel speed sensor wire attached to the top edge of the trailing arm chassis.
Use a 10mm socket to remove the mounting bracket bolts holding the wiring harness loose.
Unbolt the emergency brake cable retaining bracket from the lower trailing arm body.
Unclip the flexible rubber brake hose bracket to prevent stretching hydraulic lines during arm removal.
Inspect all lines carefully to confirm no electrical harness or brake pipe experiences tension during disassembly.
Step 3: Extract Rusted Trailing Arm Anchor Bolts and Linkage Hardware
Apply generous amounts of rust penetrant to the front 17mm trailing arm mounting bolts and rear knuckle connection.
Allow the fluid to soak into the internal frame threads for at least twenty minutes.
Support the rear trailing arm hub section with a secondary floor jack to neutralize spring tension.
Remove the lower control arm bolt, upper camber arm bolt, and lower shock absorber mounting bolt.
Carefully back out the primary 17mm trailing arm frame bolt using a breaker bar or high-torque impact wrench.
Step 4: Press Out Damaged Bushings or Swap the Complete Suspension Arm
Lower the floor jack slowly to remove the heavy trailing arm structure from the wheel wheel.
Inspect the frame mounting pocket closely for structural rust or metal thinning before installing new hardware.
If swapping the complete assembly, transfer your brake backing plate and wheel hub assembly over to the new arm.
If replacing rubber components only, align a specialty honda crv trailing arm bushing tool to press out the old sleeve without bending metal frame walls.
Press the new rubber bushing straight into the housing, ensuring the indexing arrows match original factory alignment marks.
Honda CRV Trailing Arm Replacement Rear Bushing and Suspension Fix
Step 5: Install New Control Arm, Set Suspension Load, and Torque to Specification
Guide the refreshed trailing arm into the body mounting pocket and hand-thread the main 17mm mounting bolt.
Connect the trailing arm to the rear spindle, upper control arm, and lower suspension linkages hand-tight.
Reattach the ABS sensor bracket, emergency brake cable, and hydraulic line retaining hardware securely.
Raise the rear hub with a floor jack until the suspension supports the actual curb weight of the vehicle.
Torque the main trailing arm bolt to 80 lb-ft and trailing arm-to-knuckle hardware to 47 lb-ft under full suspension load.
Executing a successful DIY suspension overhaul keeps your vehicle safe on the road while saving hundreds of dollars in shop labor rates.
At Bryan’s Garage, our mission is to empower vehicle owners with step-by-step guidance so you can tackle complex mechanical projects with complete confidence.
If you want to explore additional maintenance procedures, torque specifications, and tool recommendations, feel free to dive into our repair guides at Bryan’s Garage.
The Hidden Mechanics of CR-V Trailing Arm Rust and Bushing Failure
Honda CRV Trailing Arm Replacement Rear Bushing and Suspension Fix
The trailing arm serves as the primary longitudinal link in Honda’s multi-link rear suspension system.
It controls fore-and-aft movement of the rear wheels while absorbing road forces during acceleration and braking.
At the front of the trailing arm, a heavy-duty vulcanized rubber bushing absorbs road vibrations and allows vertical suspension travel.
Over time, continuous movement, ozone exposure, and heavy loads cause the rubber core to tear and delaminate.
When the internal rubber tears, the metal pin shifts off-center within the outer sleeve.
This unwanted movement causes dynamic alignment instability, causing the rear tires to twist inward or outward under load.
Environmental factors exacerbate this wear pattern dramatically in snow-belt regions across the country.
Road salt, moisture, and debris wash into the unsealed frame rails through factory drainage cutouts.
This toxic mixture settles directly inside the trailing arm mounting pockets and internal unibody frame channels.
Severe corrosion weakens the structural metal surrounding the primary 17mm anchor bolt threads.
If left unaddressed, the internal frame structure deteriorates until the trailing arm bolt rips out of the chassis entirely.
This structural failure led to official safety recalls on vehicles including the 3rd gen crv produced between 2007 and 2011.
During a safety inspection, mechanics check whether the body mounting pocket can safely support suspension loads.
If structural integrity remains solid, technicians install a heavy-duty metal support brace to reinforce the frame channel.
Owners of affected models should research the official honda crv subframe rust recall to verify structural eligibility before purchasing new replacement parts.
Diagnosing Rear Suspension Noise, Bad Alignment, and Uneven Tire Wear
Honda CRV Trailing Arm Replacement Rear Bushing and Suspension Fix
Identifying worn trailing arm bushings early prevents severe tire degradation and costly structural frame damage.
The earliest symptom of bushing degradation is a persistent squeaking or creaking noise from the rear suspension over bumps.
As the internal rubber degrades further, the squeak transforms into a loud metallic clunk during heavy braking or acceleration.
This sound occurs because the central steel pin impacts the outer metal housing under heavy load transfers.
Driving on degraded bushings causes severe rear tire scrubbing while cruising on straight highways.
You may notice the rear end of your vehicle feeling loose or squishy when changing lanes at higher speeds.
This wallowing sensation happens because the rear wheels alter toe angles dynamically as the trailing arm shifts position.
Visual tire inspections often reveal inner shoulder wear, severe diagonal cupping, or feathered tread blocks.
Elevate the rear of the vehicle safely on jack stands to perform a manual mechanical shake test.
Grasp the rear tire firmly at the three o’clock and nine o’clock positions and push violently back and forth.
If you observe lateral play or movement at the front mounting bracket, the internal rubber sleeve has separated completely.
A failed bushing prevents alignment shops from establishing correct toe-in and camber specifications.
If you drop your vehicle off for service, technicians will refuse to perform a professional honda crv wheel alignment until flexible suspension bushings are replaced.
Purchasing a used honda crv requires checking these bushings carefully to avoid inherits pre-existing suspension issues.
Bushing Replacement vs. Complete Trailing Arm Assembly: Cost and Labor Analysis
When fixing your rear suspension, you must choose between pressing new rubber bushings or installing complete pre-assembled arms.
Replacing only the rubber bushing is cheaper in parts cost but demands specialized mechanical tools and high labor effort.
Pressing out an old rusty rubber sleeve requires a heavy-duty puller, C-clamp tool, or hydraulic shop press.
If you lack specialized tools, extracting a rusted rubber sleeve using hammers and torches can take hours per side.
In contrast, installing a pre-assembled replacement arm provides a brand-new body structure, factory bushing, and fresh ball joints.
This approach eliminates the tedious process of pressing old metal sleeves out of corroded housings.
Pre-assembled trailing arms cost slightly more upfront but cut project completion time in half for home mechanics.
Replacing the complete assembly is strongly recommended if your original arm shows surface scale, rust thinning, or structural distortion.
If your vehicle was registered in salt-belt states, dealer service departments can perform an official honda crv trailing arm rust recall repair under warranty guidelines.
However, if your chassis falls outside recall parameters, executing a complete DIY honda crv suspension replacement remains the most cost-effective long-term solution.
Pro-Grade DIY Tips for Rust Mitigation and Torque Specifications
Honda CRV Trailing Arm Replacement Rear Bushing and Suspension Fix
Rusted suspension bolts present the single greatest hurdle when servicing older vehicle frames.
Forcing a seized 17mm mounting bolt without proper preparation can snap the bolt head or break internal frame weld-nuts.
Begin applying high-performance penetrating oil to all visible thread exposure areas three days prior to performing work.
Reapply penetrating spray twice daily to allow the fluid to creep deep into frozen internal threads.
If bolts refuse to budge with a standard breaker bar, apply controlled heat using an induction heater or propane torch.
Heat the surrounding metal mounting pocket to expand the frame threads while keeping heat away from fuel lines.
When inserting fresh mounting hardware, apply high-temperature anti-seize compound to all exposed bolt threads.
This simple step protects internal threads against future chemical corrosion and simplifies routine maintenance down the road.
Never tighten suspension pivot bolts while the vehicle hangs freely on jack stands with suspension fully extended.
Torquing bolts without weight on the tires locks the rubber bushing into an unnatural twisted resting angle.
When the vehicle is lowered back onto the ground, the pre-twisted rubber tears apart within a few hundred miles.
Always place a jack under the rear brake knuckle to compress suspension springs up to normal ride height before final torquing.
Common Pitfalls in Honda CR-V Rear Suspension Repair and How to Avoid Them
One common DIY mistake is failing to index the new trailing arm bushing prior to pressing it into the arm socket.
The central rubber housing features specific void slots and metal mounting pins that must orient at precise factory angles.
Installing a bushing upside down or misaligned restricts vertical suspension travel and causes immediate rubber tearing.
Always mark the position of original mounting tabs on the metal arm using a paint marker before removing old parts.
Another major mistake is ignoring ABS wheel speed sensor wiring during trailing arm extraction.
Allowing the heavy trailing arm to hang by its electrical harness snaps delicate copper wires internally, triggering ABS warning lights.
Always unbolt wiring brackets completely and secure sensors safely to upper body structures using zip ties.
Finally, never skip a four-wheel alignment immediately following trailing arm or bushing replacement.
Even minor variations in bushing seat depth alter rear toe and camber angles dramatically.
Driving without a professional alignment destroys fresh rear tires and destabilizes highway vehicle handling.
Comparison of DIY Repair Approaches
Repair Method
Estimated Parts Cost
Labor Complexity
Recommended For
Pressing OEM Rubber Bushings
$30 – $60 per side
High (Requires Press Tool)
Budget DIYers with Rust-Free Trailing Arms
Replacing Pre-Assembled Arms
$90 – $160 per side
Moderate (Standard Hand Tools)
Fast DIY Installers & Mildly Corroded Arms
Dealer Safety Recall Brace
$0 (If Eligible Under Recall)
Professional Dealer Repair
Salt Belt Vehicles Meeting Recall Inspection Criteria
🟢 Going viral on CR-V Owners Club & Reddit
“I’ve driven a CR-V for 4 years and didn’t know this existed.” — The most common reaction when this article is shared
15
features
1997+
models
15 min
read
Free
no signup
Did you know your backup camera has a hidden top-down ‘drone view’? Or that your cruise control automatically downshifts on steep mountain hills to save your brakes?
How do I know if my Honda CR-V trailing arm needs replacement?
Look for loud clunking noises over bumps, uneven rear tire wear, squishy highway handling, or visible rubber tearing at the front bushing mount.
If severe frame rust is visible near the front mounting bracket, replacement or recall reinforcement must be performed immediately.
Can I replace trailing arm bushings without a hydraulic shop press?
Yes, you can use a specialized portable trailing arm bushing press tool designed for Honda suspension geometry.
This tool allows you to extract and install fresh bushings directly on the vehicle without removing the entire trailing arm assembly.
Is it safe to drive with a worn rear trailing arm bushing?
Driving short distances with minor squeaks is manageable, but severely damaged bushings allow unpredictable rear wheel movement.
In extreme cases, complete bushing separation or rusted frame failure can cause loss of vehicle control.
How long does a DIY trailing arm replacement take?
Replacing complete pre-assembled trailing arms takes roughly 1.5 to 2.5 hours per side for experienced home mechanics.
Pressing out old rubber bushings manually can add an extra 1 to 2 hours per side depending on hardware rust levels.
Do I need a wheel alignment after replacing trailing arms?
Yes, a four-wheel alignment is mandatory after unbolting rear suspension components.
Replacing trailing arms alters rear toe and camber angles, which will cause rapid tire wear if left uncalibrated.
Conclusion
Replacing worn rear trailing arms restores sharp vehicle handling, eliminates suspension clunks, and protects expensive tires from ruin.
Whether you press fresh bushings or install pre-assembled arms, setting full suspension load before torquing hardware guarantees long-lasting reliability.
Ready to transform your car maintenance from a stressful chore into a breeze? Explore more tips at Bryan’s Garage.
Have questions? Our team can help you find the best solutions for your car problems and avoid costly mechanic visits.
Note: Individual results may vary depending on individual vehicle makes, models, year of manufacture, and overall condition. This article is intended for general automotive reference purposes only and does not replace official manufacturer service manuals or advice from a certified mechanic.