
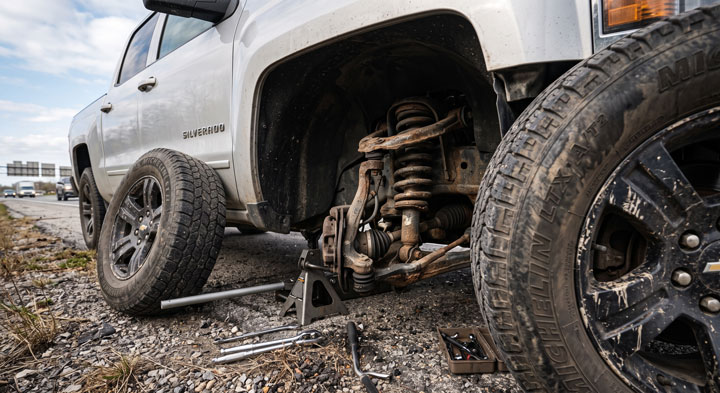
I still remember the sudden metallic pop under my front bumper while towing down a rough highway back in 2018. That jarring noise led me down an expensive rabbit hole of worn components, loose steering, and ruined front tires on my truck.
After dealing with failing chevy silverado ball joints firsthand, our team at Bryan’s Garage created this master guide to save you thousands in unnecessary dealer fees and keep your vehicle safe on the road.
In This Article
- How to identify failing ball joint symptoms like metallic popping and feathered tire wear.
- A complete step-by-step DIY guide for pressed and bolt-on upper and lower replacement.
- Critical suspension play tolerance checks recommended by ASE mechanics.
- Detailed comparison between pressing individual joints and replacing whole control arm assemblies.
- Essential post-installation checks including mandatory wheel alignment procedures.
Your Silverado has a secret compartment hiding above your glove box.
And 8 other things Chevy never told you.
Hidden dash storage · Key fob window trick · Auto 4WD mode · Buckle to Drive · and 5 more.
▶ Read Now — Show Me Everything
bryansgarage.com · Bryan Mark · 2026

How to Replace Chevy Silverado Ball Joints: A Step-by-Step DIY Guide
Replacing worn front suspension joints on a full-size truck requires proper preparation and the right gear.
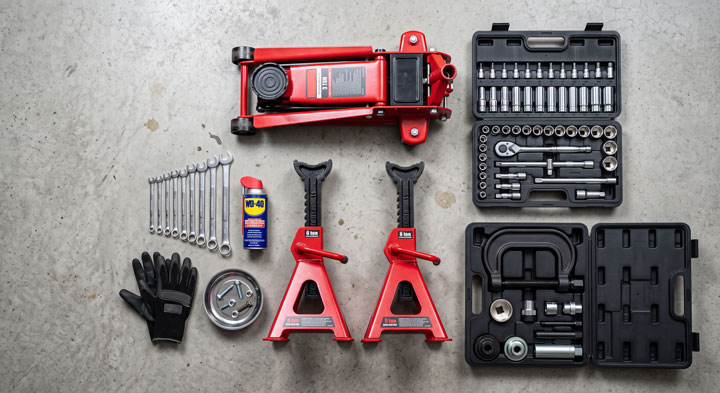
Before lifting your vehicle, gather a heavy-duty hydraulic floor jack, jack stands, wheel chocks, and safety eyewear.
You will need a standard metric socket set ranging from 18mm to 24mm, a torque wrench, and a breaker bar.
A specialized chevy silverado ball joint press tool kit with C-clamp adapters is essential for pressing out pressed-in units.
Have penetrating oil, a heavy brass hammer, a pickle fork or ball joint separator tool, and fresh cotter pins ready.
- Step 1: Secure the Vehicle and Elevate the Front End
- Park your Chevrolet Silverado on a firm, level concrete floor and engage the emergency parking brake securely.
- Loosen the front lug nuts slightly using a breaker bar before lifting the front wheels off the ground.
- Lift the front axle using your floor jack positioned under the frame rails or designated crossmember jack points.
- Position heavy-duty 3-ton or 6-ton jack stands directly under the frame and carefully lower the truck onto them.
- Chock the rear tires securely to prevent any rolling movement while working underneath the vehicle.
- Remove the front wheels completely and set them aside to clear work space around the wheel well.
- Step 2: Remove Brake Assemblies and Steering Knuckle Components
- Unbolt the brake caliper bracket bolts using your socket wrench and lift the caliper assembly away.
- Support the heavy brake caliper using a bungee cord attached to the frame to avoid stressing the rubber brake line.
- Slide the brake rotor off the wheel hub assembly and set it face-up on a clean rag.
- Disconnect the ABS wheel speed sensor wire clip to prevent accidental stretching during component removal.
- Remove the cotter pin or retaining nut from the outer chevy silverado tie rod end connection.
- Separate the tie rod end from the steering knuckle using a tie rod puller or a direct hammer strike on the knuckle boss.
- Step 3: Unbolt Upper and Lower Ball Joint Stud Nuts
- Spray all exposed ball joint threads thoroughly with high-grade penetrating fluid to dissolve rust and road grime.
- Remove the upper ball joint pinch bolt or retaining nut located at the top of the steering knuckle.
- Loosen the lower ball joint nut until it sits flush with the end of the threaded stud.
- Leaving the lower nut partially installed prevents the heavy steering knuckle from dropping abruptly upon separation.
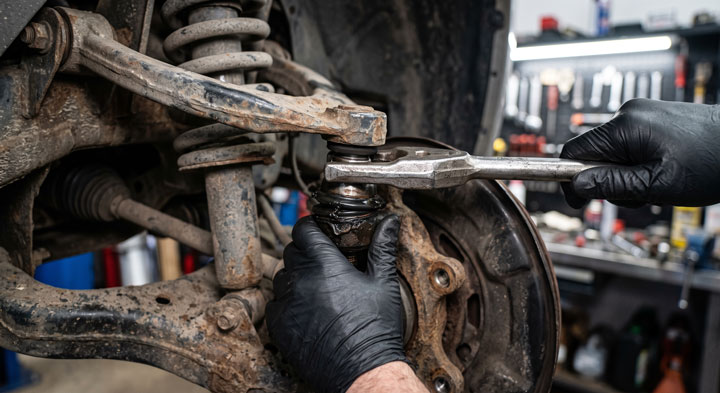
- Insert a ball joint separator tool between the knuckle arm and the control arm mount.
- Tighten the separator tool until the joint taper pops free from the knuckle mounting hole with a clear snap.
- Step 4: Remove the Steering Knuckle and Support the Axle Shaft
- If working on a 4×4 model, remove the axle nut and gently slide the outer CV shaft out of the hub assembly.
- Support the front axle shaft using mechanic wire so it does not pull out from the front differential housing.
- Carefully unbolt the remaining lower ball joint retaining nut while supporting the weight of the steering knuckle.
- Lift the steering knuckle off the vehicle entirely and set it on a flat work bench.
- Inspect the mounting bores inside the steering knuckle for gouges, severe corrosion, or excessive ovaling wear.
- Step 5: Press Out the Old Ball Joints and Press In New Replacement Units
- Remove the snap ring retainer from the base of the lower ball joint housing using snap ring pliers.
- Position the C-clamp press tool with the correct receiver cup over the lower ball joint socket.
- Turn the lead screw clockwise with a ratchet until the worn ball joint presses completely out of the arm.
- Clean the internal bore of the arm with fine emery cloth to remove rust deposits and burrs.
- Position the new ball joint into the bore, ensuring it sits perfectly square before applying press pressure.
- Tighten the press tool evenly until the shoulder of the new ball joint seats flush against the control arm face.
- Install the new retaining snap ring into its groove and verify full perimeter seating with a flathead screwdriver.
- Step 6: Reassemble Suspension Components and Torque Fasteners to Spec
- Guide the steering knuckle back into position over the lower and upper ball joint tapered studs.
- Thread the lower ball joint nut onto the stud by hand to prevent cross-threading the fresh threads.
- Guide the upper stud into the upper arm receiver and start the upper nut manually.
- Torque the lower ball joint nut to manufacturer specification using a calibrated torque wrench.
- Torque the upper ball joint fastener to specification and insert a fresh stainless steel cotter pin.
- Reinstall the outer tie rod end, brake rotor, brake caliper, bracket bolts, and ABS sensor harness clips.
- Mount the front wheel, snug the lug nuts, lower the truck to the ground, and torque lug nuts in a star pattern.
Completing your own chevy silverado ball joint replacement provides immense personal satisfaction while keeping repair costs manageable.
Our team at Bryan’s Garage provides detailed mechanical advice to help truck owners master DIY repairs safely.
Recognizing Bad Chevy Silverado Ball Joint Symptoms Before Critical Failure
Ball joints act as critical pivot points connecting your vehicle steering knuckles to its suspension control arms.
These spherical bearings bear massive vertical loads while allowing your front wheels to steer left and right smoothly.
When the internal steel ball and nylon socket wear out, dangerous suspension play develops rapidly.
One of the earliest warning signs is an annoying, intermittent chevy silverado suspension clunk when driving over small bumps.
This knocking sound occurs because excessive internal clearance allows the steel stud to bang against its outer housing.
As wear progresses, you may hear metallic popping or squeaking noises when turning the steering wheel while parking.
Dry spherical joints lack lubrication, causing metal-to-metal friction that generates harsh groaning sounds during turns.
Steering instability is another major red flag that demands immediate mechanical attention from truck owners.
Your Silverado may wander across highway lanes, requiring constant tiny steering wheel corrections to stay straight.
Worn joints alter front wheel alignment geometry continuously while driving down uneven road surfaces.
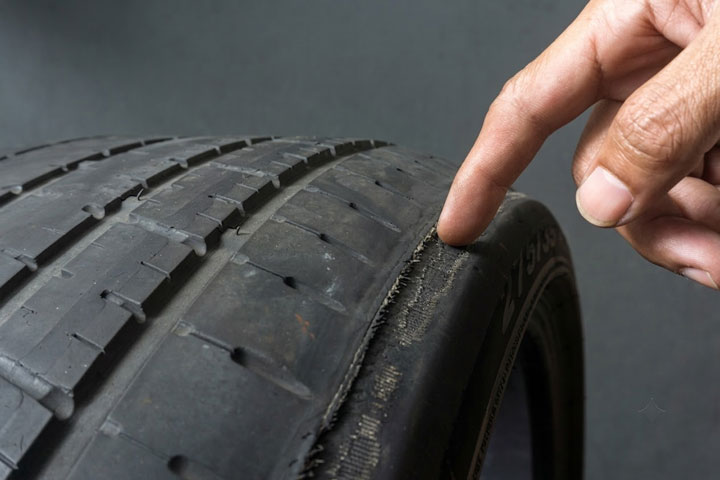
Uneven front tire wear is a costly symptom caused by shifting camber and toe angles on worn joints.
Look for severe tread feathering or heavy edge wear on the inner shoulder of your front tires.
Left uncorrected, a completely failed ball joint can snap or pull out of its socket entirely while driving.
This catastrophic separation causes the front wheel to collapse outward, damaging fenders, axle shafts, and brake lines.
Understanding Suspension Play Tolerance and Mechanical Diagnostics
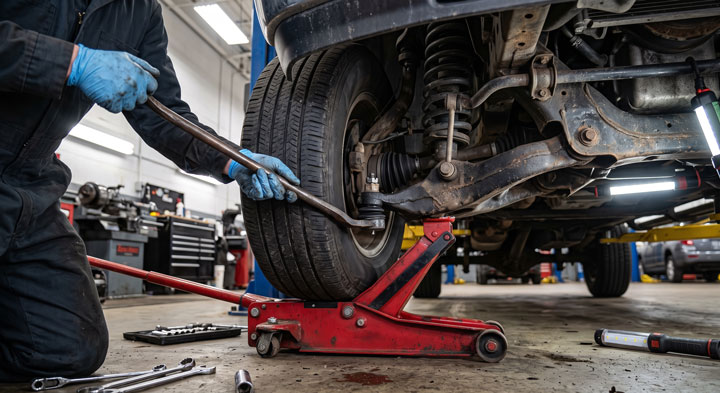
Diagnosing worn front suspension components requires systematic testing rather than guessing based on noise alone.
ASE certified mechanics use precise play tolerance checks to determine if a ball joint requires immediate replacement.
To check lower joints on torsion bar or coil spring Silverados, support the lower control arm with a jack.
Lifting under the arm unloads joint tension, allowing true internal play to be measured accurately.
Place a sturdy pry bar underneath the tire and pry straight upward while watching the joint housing.
If you observe noticeable vertical movement exceeding 0.060 inches, the lower joint has passed safe operating limits.
To check the chevy silverado upper control arm ball joint, grab the top of the tire firmly with both hands.
Push and pull the tire rapidly in and out along the horizontal plane while watching the upper joint stud.
Any visible side-to-side slop or clunking feeling indicates internal socket failure that mandates component replacement.
| Suspension Component | Maximum Allowed Play Tolerance | Primary Symptom of Failure |
|---|---|---|
| Upper Ball Joint | 0.020 in (0.5 mm) Radial Play | Highway wandering, upper tread shoulder feathering |
| Lower Ball Joint (Loaded) | 0.060 in (1.5 mm) Axial Play | Deep metal clunk over bumps, lower arm separation risk |
| Outer Tie Rod End | 0.000 in (Zero Play Allowed) | Loose steering wheel play, high-speed front shimmy |
Modern Silverado trucks utilize direct bolt-on or press-fit designs depending on the exact model year and trim package.
Factory service manuals state that zero axial slop is ideal for maximum steering precision and safety.
When inspecting high-mileage trucks, always check both sides because wear typically occurs symmetrically across the axle.
Replacing joints in pairs ensures balanced handling characteristics and prevents premature tire wear on new rubber.
Our research at Bryan’s Garage highlights that over 70% of front-end noise complaints stem from neglected ball joints.
Regular visual inspections during oil changes can spot torn rubber dust boots before water and grit enter the socket.
Pressing Individual Ball Joints vs. Replacing Complete Control Arm Assemblies
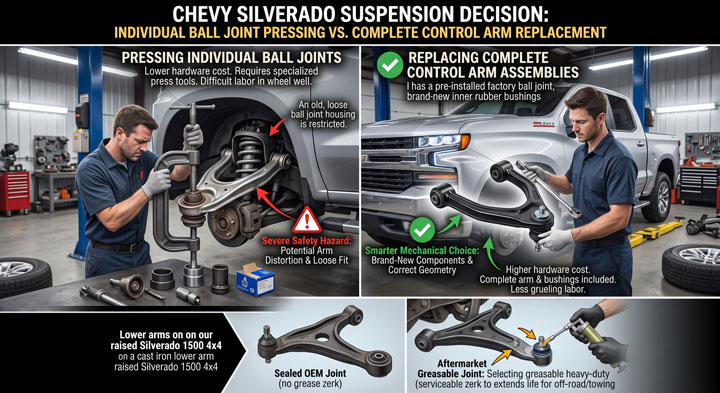
When performing replacing ball joints on chevy silverado trucks, DIYers face a major structural choice.
You can press individual replacement joints into original arms or install pre-assembled upper and lower arms.
Pressing individual joints is lower in hardware cost, making it attractive for budget-conscious mechanics.
However, pressing requires renting or buying specialized heavy-duty press tools and receiver cups.
Stamped steel upper arms on many Silverado models can stretch or distort after pressing out old joint housings.
If the arm bore stretches, the new replacement joint will fit loosely, creating a severe safety hazard.
Replacing the complete chevy silverado upper control arm is often the smarter mechanical choice.
Complete arm assemblies include pre-installed factory ball joints and brand-new inner rubber control arm bushings.
Installing complete arms eliminates the grueling labor of pressing tight metal housings in restricted wheel wells.
It also restores crisp suspension geometry by replacing aged, cracked inner control arm rubber bushings at once.
When servicing the lower suspension, inspecting the chevy silverado lower control arm is equally critical.
Cast iron lower arms handle immense stress, especially on lifted or heavy-duty ball joints chevy silverado 1500 4×4 applications.
Many aftermarket replacement joints feature a serviceable chevy silverado ball joint grease zerk fitting for manual maintenance.
Greasable joints allow you to flush out contaminants during routine oil changes using a standard grease gun.
Sealed OEM joints require no greasing but degrade faster when exposed to road salt, mud, and heavy water immersion.
Selecting greasable heavy-duty steel joints extends component service life significantly for off-road and towing use.

Practical Installation Tips for Maximum Silverado Ball Joint Lifespan
Executing a successful DIY suspension overhaul requires attention to technical details that standard manuals often overlook.
Always clean the receiver bores thoroughly with wire wheels before pressing new joints into place.
Apply a thin coating of anti-seize compound or clean chassis grease to the outer metal casing of the joint.
This light lubrication prevents galling during press installation and eases future service removal.
Ensure that press adapters push only against the solid outer metal flange of the ball joint housing.
Never apply pressing force directly to the top cover or rubber boot, which damages internal plastic liners.
When installing control arms with rubber bushings, do not torque pivot bolts while the truck is airborne.
Tightening control arm bushing bolts with suspension hanging in full rebound creates extreme rubber twisting stress.
Lower the truck completely onto its tires under normal curb weight before torquing inner arm mounting bolts.
This practice ensures inner rubber bushings sit in a neutral position at rest, preventing premature tearing.
If your new joints include grease fittings, pump chassis grease carefully until the rubber dust boot expands slightly.
Do not over-fill grease boots to the point of tearing or popping the elastic sealing ring off its groove.
Use high-quality synthetic marine grease or heavy-duty lithium complex grease for maximum water resistance.
Common DIY Mistakes to Avoid During Silverado Ball Joint Replacement
One common mistake during chevy silverado ball joint replacement is using a sledgehammer improperly.
Striking the threaded ball joint stud directly mushrooms the threads, making nut removal or installation impossible.
Always strike the thick cast side metal of the steering knuckle boss to shock and release tapered joint studs.
Another frequent error is reusing old cotter pins or damaged castle nuts during front suspension reassembly.
Always install brand-new hardened steel cotter pins to lock castle nuts securely into place.
Reusing old hardware risks nut back-off due to high road vibration, leading to dangerous joint separation.
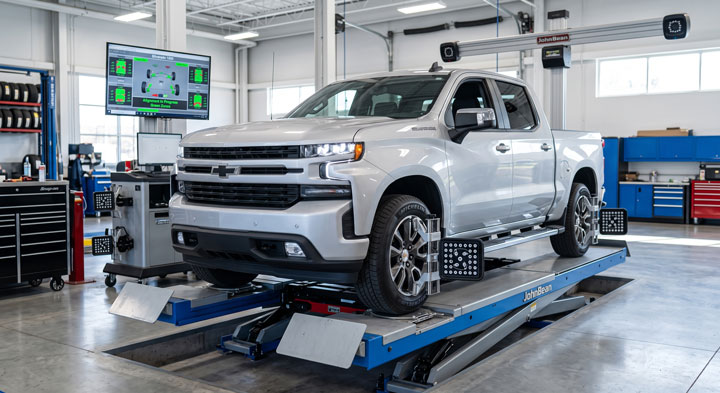
Skipping a professional wheel alignment after replacing suspension joints is another costly mistake for truck owners.
Even identical replacement joints alter wheel camber and total toe settings by fractions of a degree.
Driving without a complete chevy silverado wheel alignment destroys fresh tires within just a few thousand miles.
Schedule a professional four-wheel or front-end alignment immediately after completing any front-end rebuild.
Verify that your alignment technician adjusts caster, camber, and toe back to factory GM specifications.
Following proper torque specs prevents thread stripping and guarantees fastener clamping force under load.

“I’ve driven a Silverado for 5 years and didn’t know this existed.”
— The most common reaction when this article is shared
Did you know there’s a hidden storage compartment behind your rear seats? Or the button combo that switches your digital cluster to a completely different layout?
bryansgarage.com · July 28, 2026
Frequently Asked Questions About Chevy Silverado Ball Joints
How long do factory Silverado ball joints usually last under normal driving conditions?
Factory original ball joints on Chevy Silverado trucks typically last between 80,000 and 120,000 miles.
Lifespan depends heavily on driving conditions, vehicle payload, oversized tires, and off-road driving exposure.
Is it safe to drive with a loose or clunking ball joint on a Silverado 1500?
No, driving with a loose joint is extremely dangerous and should be addressed without delay.
A worn joint can snap or separate from its socket unexpectedly, causing loss of vehicle steering control.
Should I replace upper and lower ball joints at the same time?
Yes, mechanics strongly recommend replacing upper and lower joints together on both front sides.
Since both joints endure equal mileage and load, the remaining old joint usually fails shortly after.
Is replacing the complete control arm better than pressing individual joints?
Replacing the complete control arm assembly saves labor time and includes fresh inner arm bushings.
It eliminates the risk of distorting stamped control arms during the press-out and press-in process.
Why does my truck pull to one side after installing new ball joints?
A side pull indicates that front wheel alignment geometry changed during joint installation.
New joints restore original ride height angles, requiring an immediate professional wheel alignment.
Conclusion
Replacing worn ball joints restores crisp steering response, eliminates dangerous suspension play, and protects your tires.
Team Bryan’s Garage is your trusted automotive partner for reliable DIY maintenance advice and step-by-step repair guides.
Ready to transform your car maintenance from a stressful chore into a breeze? Explore more tips at Bryan’s Garage.
Have questions? Our team can help you find the best solutions for your car problems and avoid costly mechanic visits.
Note: Individual results may vary depending on individual vehicle makes, models, year of manufacture, and overall condition. This article is intended for general automotive reference purposes only and does not replace official manufacturer service manuals or advice from a certified mechanic.