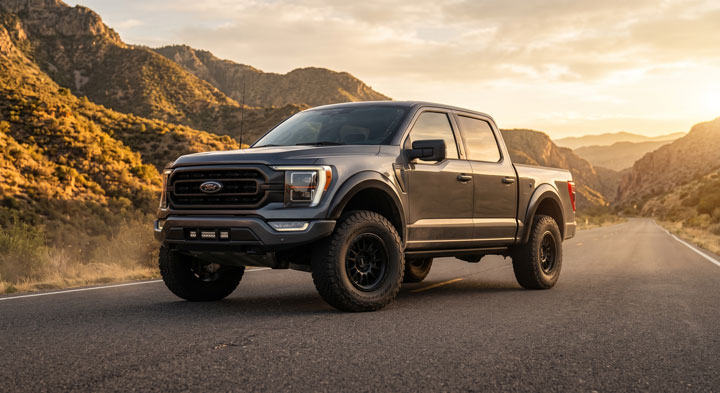
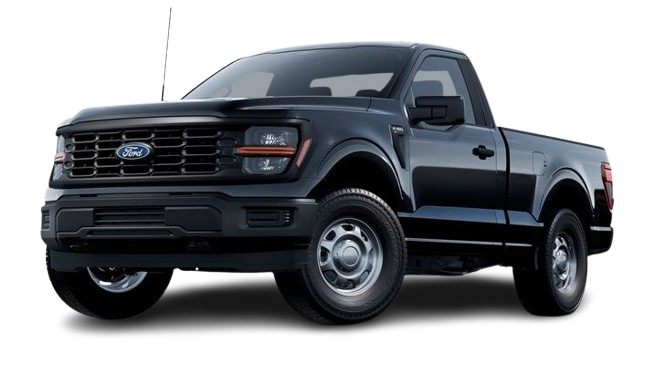
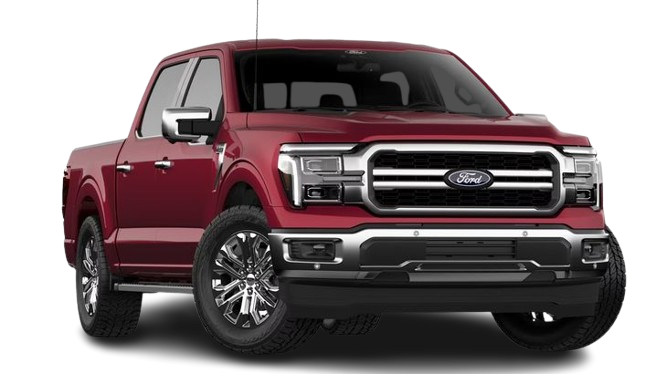
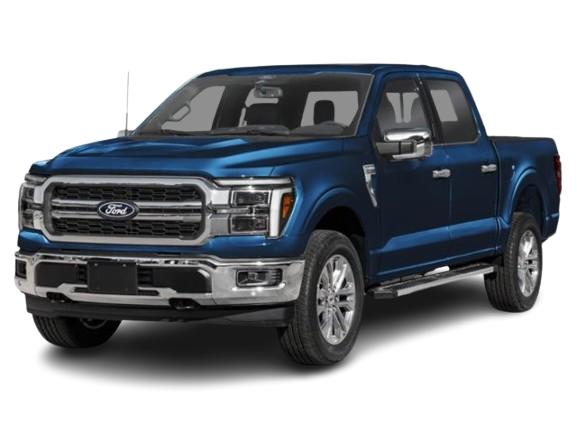
When I bought my first Ford F150, that annoying factory nose-down slant drove me crazy every single morning. I hated looking at the awkward rake, but I was terrified of paying a dealership thousands of dollars for a basic lift kit.
After spending a long weekend crawling under my rig with a floor jack and a socket set, I mastered the exact ford f150 leveling spacer install steps that can give your truck an aggressive level stance for a tiny fraction of the cost.
Ford F150 Leveling Spacer Install Steps and Guides
In This Article
Step-by-Step Leveling Spacer Installation: A complete mechanic-guided walkthrough from lift setup to final torquing.
Suspension & Steering Geometry: How front leveling spacers alter upper control arm angles, ball joint wear, and factory spring compression.
IWE Vacuum Hub Protection: Critical mechanical tricks to protect your 4WD Integrated Wheel Engagement actuators from catastrophic damage.
Post-Install Optimization: Professional tire clearance limits, headlight aiming, and suspension torque specifications.
🔴 MOST OWNERS NEVER FIND THIS
Your F-150 has a secret slot that starts the truck when your key fob dies. And 8 other things Ford never told you.
Dead fob fix · Remote window trick · 7.2 kW generator hiding in your bed · Tailgate ladder · and 5 more.
How to Install a Ford F150 Leveling Spacer: A Complete Step-by-Step Guide
Leveling your truck eliminates the factory stink-bug rake where the rear end sits significantly higher than the front end.
Ford designs this nose-down rake from the factory so the truck sits level when carrying heavy payload in the bed.
However, daily drivers and off-road builders rarely haul heavy cargo at max capacity every day.
Installing top strut extension spacers levels out the front height to match the rear axle height cleanly.
This repair takes roughly 2 to 4 hours in a standard home garage with basic hand tools.
Before beginning the work, you must gather the proper equipment and clear a flat workspace.
Required Tools and Equipment Checklist
Required Tools and Equipment Checklist
You need a high-lift hydraulic floor jack and two heavy-duty 3-ton or 6-ton jack stands.
Wheel chocks are mandatory to lock the rear tires firmly against the ground.
Gather a metric socket set ranging from 8mm up to 30mm.
You will need deep sockets in 15mm, 18mm, 21mm, and 27mm sizes.
A heavy-duty 1/2-inch drive torque wrench is essential for structural suspension fasteners.
You need a large breaker bar to loosen stubborn factory suspension bolts easily.
Keep a brass drift punch and a 3-pound sledgehammer nearby to unseat tight ball joint tapers.
A heavy-duty pry bar helps maneuver the lower control arm into place during reassembly.
Bungee cords or mechanic wire are necessary to support the heavy wheel knuckle assembly.
Keep penetrating rust oil on hand to soak rusted suspension threads before loosening them.
Step 1: Vehicle Preparation and Safety Setup.
Park your Ford F150 on a solid, level concrete surface before starting any work.
Engage the mechanical parking brake firmly to prevent rear wheel movement.
Place heavy-duty wheel chocks behind and in front of both rear tires.
Break the front wheel lug nuts loose by one turn using a 21mm socket while the tires touch the ground.
Raise the front frame of the truck using your hydraulic floor jack placed directly under the main frame rails.
Lower the vehicle securely onto two heavy-duty jack stands placed under the frame behind the front wheels.
Remove the front wheel lug nuts completely and pull both front wheels off the hubs.
Step 2: Disconnecting Brake Lines and ABS Sensor Wiring.
Locate the ABS wheel speed sensor wire clips attached to the front upper control arm and knuckle.
Unclip the wiring harness carefully using a plastic trim tool to avoid snapping fragile plastic tabs.
Locate the brake line bracket bolted to the side of the steering knuckle housing.
Remove the 10mm bracket bolt to grant full movement to the rubber brake line.
Disconnect the vacuum line attached to the back of the wheel hub if your truck features 4WD.
Freeing these wiring harnesses prevents accidental wire stretching when dropping the lower control arm.
Step 3: Unbolting the Outer Tie Rod and Sway Bar End Links.
Locate the outer tie rod end nut connected to the steering knuckle assembly.
Remove the 21mm tie rod nut using a socket or ratcheting box wrench.
Strike the solid iron boss of the steering knuckle sharply with a sledgehammer to break the tapered stud loose.
Never strike the threaded stud of the tie rod directly with a hammer to avoid ruining the threads.
Move to the sway bar link nut located near the lower strut mount.
Loosen and remove the 18mm sway bar end link nut on both the left and right sides of the vehicle.
Disconnecting both sway bar links allows the front stabilizer bar to swing freely out of your way.
Ford F150 Leveling Spacer Install Steps and Guides
Step 4: Separating the Upper Ball Joint Taper.
Position your floor jack under the lower control arm to support the heavy hub assembly weight.
Loosen the 18mm nut connecting the upper control arm ball joint to the top of the knuckle.
Leave the ball joint nut threaded on by three full turns to prevent the knuckle from falling down wildly.
Strike the upper knuckle casting firmly with a hammer until the ball joint stud pops free from its taper.
Remove the nut completely once the tapered joint breaks free from the steering knuckle arm.
Secure the heavy knuckle to the truck frame using a bungee cord to protect the inner brake line.
Step 5: Unbolting the Lower Strut Mounts and Upper Strut Hat.
Locate the two lower strut mounting studs protruding through the bottom of the lower control arm.
Remove the two 18mm or 21mm lower strut nuts using a deep socket and breaker bar.
Mechanic Insight: On 2015 and newer F150 models, press-in bar pin studs are used at the bottom of the factory strut assembly. You may need to tap them upwards gently with a brass punch to clear the lower control arm pocket completely.
Open the engine hood to gain access to the top strut tower hat mounting area.Locate the three 15mm or 18mm upper strut hat mounting nuts surrounding the center tower stud.
Remove two of the upper nuts completely using a ratcheting wrench or socket.
Support the heavy strut with your hand from underneath while removing the final upper nut.
Lower the complete strut assembly straight down out of the upper shock tower pocket.
Step 6: Attaching the Leveling Spacer to the Strut Assembly.
Ford F150 Leveling Spacer Install Steps and Guides
Clean all rust, dirt, and debris off the top surface of the factory strut top hat.
Position the billet aluminum or heavy steel leveling spacer on top of the factory strut studs.
Align the spacer mounting holes with the factory top studs cleanly.
Thread the provided kit hardware onto the factory studs and tighten them down flush.
Torque these internal spacer hardware nuts to 35 foot-pounds using a calibrated torque wrench.
Verify that the spacer sits perfectly flat against the factory strut hat without any visible air gaps.
Step 7: Reinstalling the Strut Assembly and Leveling Spacer.
Guide the complete strut assembly with attached top spacer back into the upper frame pocket.
Rotate the strut assembly 180 degrees if required by your specific kit instructions to align top studs.
Push the upper studs of the leveling spacer through the vehicle frame holes.
Thread the three upper mounting nuts loosely onto the top studs to hold the heavy strut in place.
Pry down on the lower control arm to align the lower strut bar pin with the lower control arm mounting holes.
Insert the lower strut bolts through the mounting holes and thread the lower nuts on loosely.
Step 8: Final Suspension Reassembly and Critical Torque Specs.
Raise the lower control arm using your floor jack to lift the suspension into normal ride height posture.
Guide the upper control arm ball joint stud back through the top hole of the steering knuckle.
Thread the upper ball joint nut back onto the stud and tighten it down securely.
Reconnect the outer tie rod end to the steering knuckle arm and thread its mounting nut.
Reconnect the sway bar end link stud through the sway bar arm and thread its nut.
Torque all suspension fasteners strictly to factory shop manual specifications using your torque wrench:
Upper Strut Top Nuts: Torque to 35-40 ft-lbs.
Lower Strut Mounting Bolts: Torque to 66 ft-lbs (2004-2014) or 80 ft-lbs (2015+ models).
Upper Ball Joint Nut: Torque to 46 ft-lbs.
Outer Tie Rod End Nut: Torque to 85 ft-lbs.Sway Bar Link Nut: Torque to 59 ft-lbs.
Reattach the 10mm brake line bracket bolt and reconnect all ABS sensor wiring clips securely.Mount the front wheels back onto the wheel hubs and hand-tighten all lug nuts in a star pattern.Lower the truck off the jack stands onto the ground and torque wheel lug nuts to 150 ft-lbs.
Completing these ford f150 leveling kit install steps at home gives you complete control over your build quality while keeping your hard-earned money in your wallet.
🔧 Hidden F-150 Features — Confirmed by real owners
Understanding Suspension Geometry and Upper Control Arm Angles
Ford F150 Leveling Spacer Install Steps and Guides
Installing top-hat strut extension spacers alters the operational geometry of your front double-wishbone independent suspension.
Understanding these mechanical changes helps you maintain long-term component durability and smooth vehicle handling.
Key Mechanical Principle: A spacer thickness does NOT equal the actual lift height on an F150. A 1.5-inch thick metal spacer yields roughly 2 inches or 2.5 inches of total front lift height due to suspension motion ratios.
The lower control arm acts as a swinging mechanical lever around its inner frame mounting pivots.
Because the strut mounts mid-way along the control arm lever, multiplying motion ratios increase height at the tire hub.
When you push the top strut assembly down using a spacer, the upper control arm pivots downward permanently.
This structural shift increases the resting angle of the upper ball joint stud inside its greased socket housing.
If you install leveling spacers larger than 2.5 inches, factory ball joints operate near their maximum articulated limits.
Running extreme ball joint angles speeds up rubber boot tearing, grease contamination, and catastrophic joint play.
Spacer Thickness
Effective Front Lift Height
Upper Ball Joint Stress
Recommended Usage
1.0 Inch Spacer
1.5 Inches Front Lift
Minimal / Near Factory OEM Specs
Daily driving, light leveling, mild tire upgrades
1.5 Inch Spacer
2.0 Inches Front Lift
Moderate / Safe Factory Ball Joint Range
Perfect dead-level stance, 33-inch to 34-inch tires
2.0 Inch Spacer
2.5 Inches Front Lift
Elevated / Monitor Ball Joint Boots Annually
Maximum safe spacer height, 35-inch tire clearances
2.5+ Inch Spacer
3.0+ Inches Front Lift
Severe / High Risk of Binding & Boot Rupture
Requires aftermarket tubular UCAs with upgraded joints
Automotive engineers design factory front coil springs to support precise curb weight and baseline rebound rates.
Top-hat strut extension spacers sit outside the spring assembly, leaving factory spring rate compression completely unchanged.
This external design preserves your comfortable factory ride quality better than internal coil spring preload spacers.
However, lowering the strut body reduces downward suspension droop travel during severe off-road articulation.
When the front tire falls into a deep pothole, the internal strut piston reaches full extension sooner.
Understanding these mechanical trade-offs guarantees you select the ideal spacer thickness for your daily driving style.
Safely Handling IWE Vacuum Actuators and CV Axles During Installation
Four-wheel drive Ford F150 trucks feature Integrated Wheel Engagement (IWE) vacuum-operated hub actuators at the front wheels.
These delicate mechanical units disengage the front CV axles when driving in 2WD mode to maximize fuel economy.
Improper handling of the steering knuckle during a leveling install ruins these expensive internal vacuum bladders easily.
The IWE actuator utilizes plastic teeth, thin rubber bladders, and diaphragm return springs inside the wheel hub.
When engine vacuum is applied, the internal gear pulls away from the outer wheel hub to free the axle shaft.
When you shift into 4WD, vacuum releases, and internal springs force the plastic splines into engagement.
If you reassemble the knuckle while the CV axle splines bind against the hub, you shatter the fragile plastic IWE gears instantly.
Broken IWE teeth create horrible ratcheting grinding noises whenever you accelerate down the highway in two-wheel drive.
Pro Mechanic Tip: Before torquing the center CV axle nut, use a hand vacuum pump to draw 15 inches of vacuum on the IWE port. This pulls the plastic gear back safely, preventing gear tooth binding when sliding the spindle back into place.
Ford F150 Leveling Spacer Install Steps and Guides
If you lack a handheld vacuum pump, manually verify that the CV shaft splines rotate freely before tightening spindle hardware.
Turn the front brake rotor by hand while sliding the outer axle shaft into the hub assembly smoothly.
Confirm that the axle shaft protrudes fully through the hub bearing before starting threads on the spindle nut.
Torque the small spindle hub nut carefully to just 18 foot-pounds using an accurate 1/4-inch drive torque wrench.
Over-torquing this delicate center axle nut snaps the threaded shaft stub or crushes the internal wheel bearing unit.
Taking ten extra minutes to check spline engagement protects your 4WD system from thousands in unnecessary repairs.
Practical Application Guide and Post-Install Optimization
Completing the physical installation under the truck is only half the battle when leveling your Ford F150.
You must perform three essential post-installation optimizations to ensure highway safety, tire longevity, and proper night visibility.
Step 1: Schedule an Immediate Professional Wheel Alignment.
Lifting the front suspension pulls the tie rod ends inward, causing severe positive toe-in misalignment.
Positive toe pushes the front tire tread inward, scrubbing the outer shoulder blocks away within 500 miles.
Spacer installations also introduce slight positive camber angles, tilting the top of the tires outward.
Drive your truck directly to a reputable alignment shop immediately after finishing your driveway spacer installation.
Instruct the technician to reset total front toe angles to zero degrees and correct caster sweep.
Step 2: Re-Aim Factory Headlight Beams Correctly.
Raising the front end 2 to 2.5 inches tilts your headlight projection angle directly into eyes of oncoming traffic.
Blinding oncoming drivers creates extreme road hazards and guarantees getting flashed by frustrated motorists nightly.
Park your leveled truck on flat ground 25 feet away from a light-colored vertical wall at night.
Locate the plastic vertical adjustment screw positioned on top of each factory headlamp assembly.
Use a long Phillips screwdriver to turn the adjustment gear counter-clockwise to lower the beam cut-off line.
Adjust the top of the bright light beam until it sits roughly 3 feet above the ground on the wall surface.
Ford F150 Leveling Spacer Install Steps and Guides
Step 3: Verify Max Tire Clearances and Wheel Offset Limits.
Leveling your front end opens up valuable wheel well clearance for larger all-terrain or mud-terrain tires.
On standard factory 18-inch or 20-inch wheels, a 2-inch leveling kit allows clear fitment for 33-inch to 34-inch tires.
A 2.5-inch leveling kit clears 35×11.50R20 tires on factory offset wheels without severe bumper trimming.
Avoid buying aggressive negative offset aftermarket wheels that push the tires outward past the wheel arches.
Deep negative wheel offsets cause severe tire rub against the rear crash bars during full steering wheel turns.
If you want more detailed maintenance guides or hands-on suspension tips, check out our resource library at Bryan’s Garage.
Overcoming Risks and Common DIY Installation Pitfalls
Modifying heavy truck suspension components carries real risks if critical safety precautions are ignored during installation.
Working without professional hydraulic lifts requires total commitment to vehicle support stability in your home garage.
Safety Warning: Never work underneath a vehicle supported solely by a hydraulic floor jack. Floor jack internal hydraulic seals can blow out unexpectedly without warning, causing the heavy frame to crush down instantly.
Always place heavy-duty jack stands under primary frame boxed rails and test truck stability before pulling off wheels.
Shake the truck firmly with your hands while it rests on jack stands to verify complete mechanical stability.
Another major mistake home mechanics make is tightening rubber suspension bushings while the suspension hangs unloaded in the air.
If you torque the upper control arm frame bolts while wheels droop, rubber bushings twist into extreme permanent stress.
Once you lower the vehicle onto the ground, those pre-twisted rubber bushings tear apart prematurely under vehicle weight.
Always wait until the full weight of the truck rests on all four tires before performing final suspension bushing torquing.
Rushing through installation steps often leads to over-torquing small aluminum threads or stripping upper strut hat studs.
Use a calibrated torque wrench rather than guessing tightness with an air-powered impact gun.
Over-tightening top spacer studs snaps hardware instantly, forcing you to pull the complete strut assembly back out.
Following strict step-by-step procedures prevents costly component destruction and keeps your DIY project totally safe.
🟢 Going viral on F150Forum & Reddit
“I’ve driven an F-150 for 4 years and didn’t know this existed.” — The most common reaction when this article is shared
9
features
2015+
models
11 min
read
Free
no signup
Did you know which button on your fob opens the tailgate when your hands are full? Or the button combo to reset CarPlay in 15 seconds without turning off the engine?
Does installing a leveling spacer ruin my factory ride quality?
No, top strut extension leveling spacers do not ruin your baseline spring rates or factory shock valving.
Because the spacer mounts on top of the strut hat, factory coil spring compression remains unchanged during normal driving.
Will a 2-inch leveling kit void my Ford factory powertrain warranty?
Installing a leveling spacer does not automatically void your entire vehicle factory bumper-to-bumper warranty.
Under federal law, dealerships can only deny warranty claims on specific parts directly damaged by aftermarket components.
If an upper ball joint fails, the dealer may decline that specific repair while your engine warranty stays intact.
Do I need to replace my rear shocks after leveling the front end?
You do not need to replace rear shocks if you are only leveling the front suspension to match factory rear height.
Factory rear shocks feature sufficient stroke length to manage baseline rear axle travel without topping out.
How long does it take to install a front leveling kit on an F150?
For an experienced home mechanic with air tools and a floor jack, installation takes roughly 2 to 3 hours total.
First-time DIY installers should budget 4 to 5 hours to work safely, follow steps, and torque fasteners properly.
Should I choose billet aluminum, steel, or polyurethane leveling spacers?
Billet aluminum and welded structural steel spacers offer superior long-term durability and precise geometric height consistency.
Polyurethane spacers can compress slightly over years of heavy off-road pounding, leading to minor front height sagging over time.
Conclusion
Leveling your Ford F150 eliminates factory nose-down slant, improves stance, and clears larger all-terrain tires easily.
By following strict mechanical procedures and respecting safety guidelines, you can achieve professional garage results right at home.
Ready to transform your car maintenance from a stressful chore into a breeze? Explore more tips at Bryan’s Garage.
Have questions? Our team can help you find the best solutions for your car problems and avoid costly mechanic visits.
Note: Individual results may vary depending on individual vehicle makes, models, year of manufacture, and overall condition. This article is intended for general automotive reference purposes only and does not replace official manufacturer service manuals or advice from a certified mechanic.