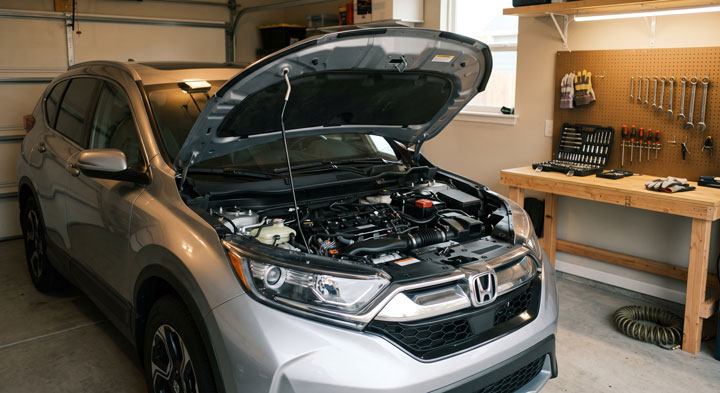
When my SUV started shuddering violently between twenty and forty miles per hour on my morning commute, I felt sick to my stomach thinking about a five-thousand-dollar transmission overhaul.
I was terrified of being taken advantage of by an aggressive repair shop, but diving into the exact honda crv transmission fluid interval saved my vehicle and my savings account.
At Team Bryan’s Garage, we want to help you master this simple fluid service so you can preserve your transmission and enjoy stress-free driving for years.
Honda CRV Transmission Fluid Change Interval Schedule and Specs
In This Article
Step-by-Step DIY Drain & Fill Guide: Complete procedure to change transmission fluid safely in your garage.
Generational Service Schedules: Mileage recommendations for traditional automatics, CVTs, and manual transmissions.
How to Perform a Honda CRV Transmission Fluid Drain and Fill: Step-by-Step Guide
Performing a proper transmission fluid service requires basic hand tools, clean workspace conditions, and correct fluid measuring techniques.
Before starting, confirm you have purchase-approved fluid specifically formulated for your generation of CR-V.
You will need a 3/8-inch drive ratchet, a new 18mm aluminum crush washer, a long funnel with a narrow neck, a drain pan, clean rags, and safety glasses.
Never perform this service on an inclined driveway, as an unlevel chassis creates false fluid level readings during refill.
Step 1: Elevate Vehicle, Level the Frame, and Ensure Mechanical Safety
Step 1
Drive your vehicle for ten minutes to warm the transmission fluid to normal operating temperature.
Park the vehicle on a flat, level concrete surface and set the emergency parking brake firmly.
Raise the front of the SUV using a hydraulic floor jack positioned under the front subframe jack point.
Support the vehicle safely on heavy-duty jack stands placed underneath the left and right frame rails.
Check with a bubble level along the door sill to ensure the vehicle remains perfectly level front-to-rear.
Step 2: Locate the Transmission Drain Plug and Clean Surrounding Components
Step 2
Slide under the driver side of the engine bay to locate the transmission case housing.
Identify the 3/8-inch square drive drain plug recessed into the lower transmission housing.
Do not confuse the engine oil pan drain bolt with the transmission drain plug located further back.
Wipe all dirt, road grime, and loose debris away from the plug using a clean shop towel.
Position your catch pan directly underneath the plug to capture the fast-flowing fluid stream.
Step 3: Extract the Drain Plug and Analyze Sediment on the Internal Magnet
Step 3
Insert the square tip of your 3/8-inch drive ratchet directly into the transmission drain plug head.
Turn counterclockwise to loosen the plug, taking care not to strip the square internal recess.
Unscrew the plug by hand while applying inward pressure to keep fluid from spilling early.
Pull the plug away quickly and allow the dark fluid to drain completely into your catch pan.
Inspect the magnetic tip of the drain plug for excessive metallic debris, fine paste, or coarse metal shavings.
Step 4: Install a New Aluminum Crush Washer and Torque Plug to Factory Spec
Step 4
Clean the magnetic tip of the drain plug thoroughly using brake cleaner and a lint-free cloth.
Remove the old crushed washer and slide a fresh 18mm replacement aluminum crush washer onto the plug threads.
Thread the drain plug back into the aluminum transmission case by hand to avoid cross-threading.
Attach a torque wrench to your 3/8-inch ratchet and tighten the drain plug to exactly 36 lb-ft of torque.
Wipe the surrounding aluminum housing clean so you can easily spot potential fluid leaks later.
Step 5: Refill Transmission via Dipstick or Fill Hole with Official Honda Fluid
Step 5:
Locate the yellow-handled transmission dipstick or upper fill plug in the engine compartment.
Insert a clean long-reach funnel directly into the fill tube to prevent accidental engine bay spills.
Pour in precisely three quarts of recommended Honda fluid slowly to allow air displaced inside to escape.
Remove the funnel, reinsert the dipstick fully, start the engine, and shift through all gears slowly.
Recheck the fluid level on the hatch marks while the vehicle rests idle on level ground.
Completing this simple maintenance routine preserves precise hydraulic pressure and shifting smoothness across all speed ranges.
At Bryan’s Garage, we believe every owner can save hundreds of dollars by tackling routine maintenance in their own driveway.
For more detailed technical walkthroughs, maintenance checklists, and owner guides, explore our full library at Bryan’s Garage.
Honda CR-V Transmission Fluid Intervals and Specs Across All Generations
Understanding your vehicle’s specific maintenance timeline is essential for preventing premature gear wear and valve body clogging.
Honda has utilized three distinct transmission designs across different production years of the CR-V compact crossover.
First-generation through fourth-generation early models featured conventional four-speed and five-speed torque-converter automatic transmissions.
These traditional automatic transmissions require Honda ATF DW-1 fluid, which replaced the older, discontinued ATF Z1 formulation.
For normal driving, standard factory automatic fluid service should occur every thirty thousand to forty thousand miles.
Starting with the 2015 model year, Honda introduced Earth Dreams Continuously Variable Transmissions across the lineup.
CVTs utilize a heavy-duty steel push belt riding between variable pulleys rather than fixed planetary gear sets.
This design demands specialized Honda Genuine HCF-2 fluid to maintain micro-friction between the steel belt and pulley faces.
Never substitute traditional ATF DW-1 in a CVT system, as missing friction modifiers cause catastrophic belt slippage.
The recommended crv cvt fluid change interval is thirty thousand miles under normal driving conditions.
If you regularly tow trailers, drive in mountainous terrain, or experience stop-and-go city traffic, change fluid every twenty thousand miles.
Modern vehicles equipped with Honda’s Maintenance Minder system track driving habits and display Sub-Item 3 on the dashboard display.
When Sub-Item 3 illuminates alongside primary codes, schedule an immediate fluid drain and fill routine.
Drivers completing a comprehensive maintenance service often perform a honda crv b123 service to refresh engine oil, filters, and transmission fluid simultaneously.
If your crossover features a manual gearbox, use dedicated honda crv manual transmission fluid every thirty thousand to sixty thousand miles.
Checking factory manual documentation helps confirm overall vehicle dimensions and drivetrain capacities found in official honda crv specs.
The Chemistry of Honda Transmission Fluid: Why Flushes Cause Catastrophic Failure
Honda CRV Transmission Fluid Change Interval Schedule and Specs
Automatic and CVT fluids are highly engineered chemical compounds designed to perform multiple critical functions simultaneously.
Transmission fluid acts as a hydraulic power transmitter, friction modifier, gear lubricant, and thermal heat dissipate medium.
Over thousands of thermal cycles, internal shear forces tear down polymer viscosity index improvers in the fluid chemistry.
As viscosity degrades, fluid loses its ability to maintain protective film thickness between high-pressure metal contacts.
Oxidation leads to varnish accumulation on internal control solenoid valves, causing erratic gear shifts and delayed engagement.
Many quick-lube facilities promote high-pressure mechanical flushes using universal fluids and chemical solvent detergents.
Automotive engineers strictly advise against forced mechanical flushes on high-mileage Honda transmission assemblies.
Commercial flush machines force high-pressure fluid backward through internal passages, dislodging varnish and clutch material.
These loose debris particles circulate directly into delicate internal fluid channels and fine wire solenoids, clogging valves permanently.
Additionally, chemical flushing solvents destroy internal rubber lip seals and cause clutch friction plates to swell and disintegrate.
Honda factory service manuals mandate the low-pressure gravity drain and fill method exclusively for all transmission maintenance.
Draining the sump removes roughly three to three-and-a-half quarts of old contaminated fluid safely without disturbing settled internal varnish.
If you purchase high-mileage pre-owned vehicles, determine the used honda crv transmission fluid interval before performing maintenance.
Always insist on using genuine factory-formulated honda crv transmission fluid to protect delicate internal friction materials.
Diagnosing Low Fluid, Torque Converter Judder, and Repair Costs
Honda CRV Transmission Fluid Change Interval Schedule and Specs (Internet)
Recognizing early symptoms of fluid degradation prevents minor hydraulic issues from escalating into major mechanical failures.
A classic indicator of fluid breakdown in five-speed automatics is torque converter judder or vibration around thirty miles per hour.
This subtle shutter feels like driving over rumble strips and occurs when degraded fluid loses lockup clutch friction capability.
In CVT models, degraded fluid causes hesitation during acceleration, engine RPM surges, or high-pitched whining noises under load.
If fluid levels drop low, you may experience delayed engagement when shifting from Park into Drive or Reverse.
Regularly check fluid condition using the dipstick located on older models or the side check plug on newer CVTs.
Healthy fluid displays a clear pinkish-red hue for ATF or translucent amber color for HCF-2 fluid without burnt odours.
If fluid appears dark brown or pitch black with strong burnt smells, immediate drain and fill services are required.
Pulling the honda crv transmission dipstick while the engine is warm allows immediate visual inspection of fluid levels and clarity.
Pro-Grade Maintenance Tips for Long-Term Honda Transmission Health
Executing preventative care with professional attention to detail extends drivetrain lifespan well beyond two hundred thousand miles.
If your fluid is severely discolored, utilize the three-times drain and fill technique recommended by master technicians.
This process involves draining three quarts, refilling with fresh fluid, driving ten miles, and repeating three consecutive times.
Because the torque converter holds half total fluid capacity, three successive drains refresh over eighty-five percent of fluid volume.
Never open transmission fill ports in dusty or windy outdoor environments where airborne grit can enter the sump.
A single particle of sand can score precision spool valves inside hydraulic control valve bodies, causing sticky shifts.
Always verify fluid level on level ground after bringing the transmission up to full operating temperature.
In CVT models without dipsticks, remove the side level-check plug while engine idles; fluid should just drip out slowly.
Establishing a disciplined honda crv transmission service schedule prevents costly unexpected repairs down the road.
Critical Transmission Maintenance Mistakes and How to Prevent Them
Honda CRV Transmission Fluid Change Interval Schedule and Specs
The most common DIY disaster occurs when owners accidentally drain engine oil instead of transmission fluid.
The engine oil pan is located closer to the front bumper and utilizes a standard hex bolt head.
The transmission drain plug sits further back toward the driver side and features a distinctive 3/8-inch square socket drive.
Draining engine oil while pouring three quarts of transmission fluid into an already full gearbox destroys both components quickly.
Always trace drain plug locations visually and confirm oil color before allowing fluid to pour into your catch pan.
Another severe mistake is using aftermarket multi-vehicle universal fluids that claim to meet all manufacturer specifications.
Universal fluids lack exact friction coefficients required by Honda wet clutches and CVT steel push belts.
Using improper fluids leads to premature clutch plate wear, belt slipping, seal swelling, and eventual transmission destruction.
Knowing how often to change transmission fluid honda crv prevents fluid thermal breakdown before damage occurs.
Monitoring your cumulative honda crv transmission fluid mileage ensures you never miss critical service intervals.
Summary Comparison of Transmission Fluid Specifications
Generation & Model Years
Transmission Type
Recommended Fluid Spec
Standard Drain & Fill Interval
1st – 4th Gen (1997 – 2014)
4-Speed / 5-Speed Automatic
Honda ATF DW-1
30,000 – 40,000 Miles
4th – 6th Gen (2015 – Present)
Earth Dreams CVT
Honda Genuine HCF-2
25,000 – 30,000 Miles
All Manual Models (1997 – 2006)
5-Speed Manual
Honda Genuine MTF
30,000 – 60,000 Miles
🟢 Going viral on CR-V Owners Club & Reddit
“I’ve driven a CR-V for 4 years and didn’t know this existed.” — The most common reaction when this article is shared
15
features
1997+
models
15 min
read
Free
no signup
Did you know your backup camera has a hidden top-down ‘drone view’? Or that your cruise control automatically downshifts on steep mountain hills to save your brakes?
What happens if I use regular ATF fluid in my Honda CR-V CVT transmission?
Using conventional ATF in a CVT causes immediate belt slippage, rapid internal component wear, and catastrophic transmission failure.
CVT systems require Honda HCF-2 fluid specifically formulated to provide micro-friction traction for steel drive belts.
Can I just add new fluid without draining the old transmission fluid?
Adding fresh fluid only tops off fluid volume and does not remove accumulated metal particles or thermal contaminants from the system.
A complete gravity drain and fill is necessary to remove suspended debris and refresh additive chemistry.
Why does my Honda CR-V shudder when accelerating at low speeds?
Low-speed shuddering or judder between twenty and forty miles per hour typically indicates broken-down fluid in torque converter clutches.
Performing a complete fluid drain and fill routine usually restores smooth clutch lockup engagement immediately.
Is a transmission flush better than a drain and fill service?
No, high-pressure mechanical flushes are dangerous for Honda transmissions because they force dislodged varnish into delicate valve solenoids.
Honda factory service bulletins strictly mandate low-pressure gravity drain and fill procedures exclusively.
How much fluid is needed for a standard CR-V transmission drain and fill?
A standard drain and fill procedure requires approximately 3.3 to 3.7 quarts of fluid depending on model year.
Always purchase four quarts of fluid so you have enough to adjust level height accurately during final checks.
Conclusion
Maintaining proper transmission fluid freshness is the most effective way to guarantee smooth shifting and long-term drivetrain reliability.
Following correct fluid specifications and avoiding dangerous mechanical flushes keeps your vehicle running like new for hundreds of thousands of miles.
Ready to transform your car maintenance from a stressful chore into a breeze? Explore more tips at Bryan’s Garage. Have questions? Our team can help you find the best solutions for your car problems and avoid costly mechanic visits.
Note: Individual results may vary depending on individual vehicle makes, models, year of manufacture, and overall condition. This article is intended for general automotive reference purposes only and does not replace official manufacturer service manuals or advice from a certified mechanic.