I still remember driving down the highway when a sudden loud popping noise erupted from under my hood, sounding like a gunfire blast paired with a terrible engine misfire.
Pulling onto the shoulder to find a spark plug ripped entirely out of the aluminum cylinder head left me completely shocked and terrified of a multi-thousand-dollar repair bill.
At Team Bryan’s Garage, we created this ford f150 spark plug blowout guide to give you reliable mechanical solutions, step-by-step thread insert repair instructions, and proven torque specifications to fix your truck safely at home.
In This Article
- How to Fix a Ford F150 Spark Plug Blowout: Step-by-Step DIY Thread Repair
- The Engineering Root Cause Behind Ford Triton V8 Spark Plug Blowouts
- Comparing Thread Repair Kits: Solid Steel Inserts vs Wire Coils
- Cost Analysis: DIY Thread Repair vs Dealership Cylinder Head Replacement
- Torque Specifications and Anti-Seize Guidelines for 2V Triton Engines
- Common DIY Maintenance Pitfalls and How to Protect Your Engine
Your F-150 has a secret slot that starts the truck when your key fob dies.
And 8 other things Ford never told you.
Dead fob fix · Remote window trick · 7.2 kW generator hiding in your bed · Tailgate ladder · and 5 more.
▶ Read Now — Show Me Everything
bryansgarage.com · Bryan Mark · 2026

How to Fix a Ford F150 Spark Plug Blowout: Step-by-Step DIY Thread Repair
Repairing stripped cylinder head threads right on the vehicle requires methodical attention to detail, patience, and specialized machining tools.
By installing a steel thread insert, you create permanent steel threads inside the aluminum spark plug well that are far stronger than the original factory casting.
This repair restores full cylinder compression without requiring you to remove the intake manifold or unbolt the cylinder head from the engine block.
Prerequisites and Required Tools
Gathering all necessary tools before opening the engine bay ensures a smooth repair process and protects internal cylinder walls from metallic debris.
- Professional Thread Repair Kit: Cal-Van 38900 or Time-Sert 5553 kit specifically designed for Ford 4.6L, 5.4L, and 6.8L 2V Triton engines.
- Air Compressor & Hose: Compressed air blow gun with a long thin extension nozzle for clearing metal shavings.
- Heavy Petroleum Grease: Thick axle grease or bearing grease to catch metal chips on tap threads.
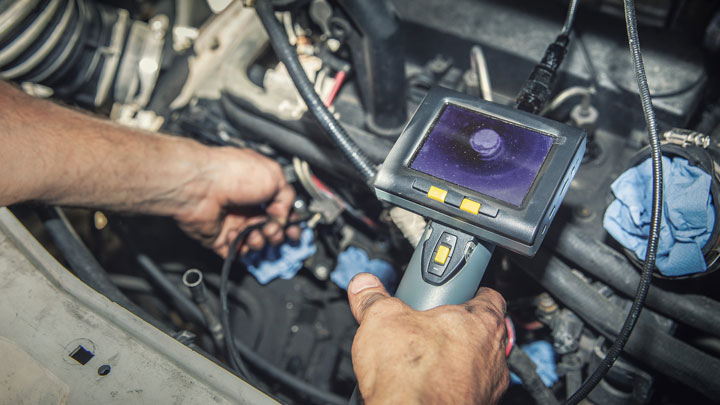
- Flexible Borescope Camera: USB or handheld inspection camera to verify that the piston top is completely clean.
- Socket Set & Torque Wrench: 3/8-inch drive ratchets, extension bars, 5/8-inch spark plug socket, and calibrated foot-pound torque wrench.
- Chemical Compounds: High-temperature thread locker compound and brake cleaner spray.
- Step 1: Isolate the Blown Cylinder and Disconnect Ignition Hardware
- Disconnect the negative terminal cable from the starter battery to safeguard vehicle electronics during repair.
- Locate the affected cylinder where the spark plug and ignition coil pack were ejected.Unplug the electrical wiring harness connector from the ignition coil pack and fuel injector.
- Remove the 7mm mounting bolt securing the coil-on-plug (COP) unit and lift the damaged ignition boot out of the well.
- Use compressed air to blow dirt, sand, and rubber fragments out of the deep spark plug port before inserting tools.
- Step 2: Position Piston to Bottom Dead Center (BDC) and Seal the Cylinder
- Rotate the crankshaft manually using a socket on the front harmonic balancer bolt until the target piston reaches Bottom Dead Center (BDC).
- Verifying that both intake and exhaust valves are completely closed prevents metal shavings from entering valve seats.
- Insert a small rubber hose attached to a leak-down tester or blow air into the spark plug hole to confirm both valves are sealed.
- Insert a clean cotton rag into the lower spark plug well to catch preliminary debris while preparing upper metal surfaces.
- Step 3: Ream Damaged Aluminum Threads and Cut New Oversized Threads
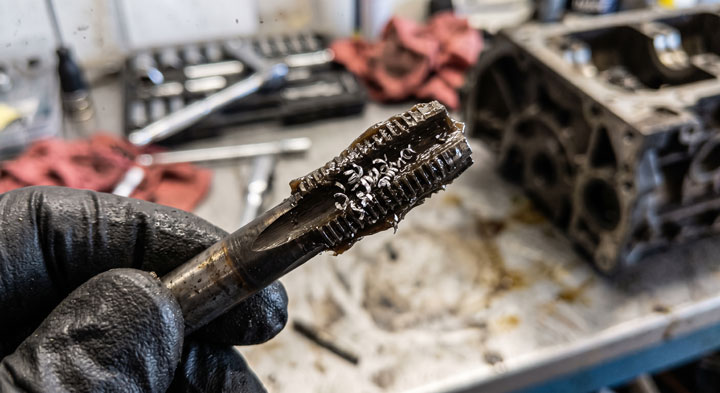
- Apply a generous layer of thick bearing grease into the flutes of the kit reamer bit to catch aluminum shavings.
- Insert the guide pilot tool into the spark plug well to ensure the reamer cuts perfectly straight down the center axis.
- Turn the reamer handle slowly clockwise using steady downward pressure until it finishes cutting away the damaged threads.
- Remove the reamer frequently to clean off aluminum chips and reapply fresh grease before completing the pass.
- Next, coat the thread tap tool with heavy grease and tap new oversized outer threads into the reamed hole until it bottoms out against the stop shoulder.
- Step 4: Vacuum and Blow Out All Internal Aluminum Metal Shavings
- Remove the guide tools and vacuum out the spark plug well using a narrow plastic tube attached to a shop vacuum.
- Insert a long blow gun nozzle into the cylinder through the newly tapped hole and blow compressed air into the combustion chamber.
- Air pressure forces remaining aluminum chips upward and out through the spark plug well opening.
- Lower your flexible borescope inspection camera down into the combustion chamber to inspect the top of the piston.
- Verify that zero metal filings remain on the piston crown before proceeding to insert installation.
- Step 5: Apply Thread Locker and Permanently Cold-Form the Steel Insert
- Clean the newly cut aluminum threads thoroughly using a lint-free swab soaked in quick-drying brake cleaner.
- Apply two drops of high-temperature red thread locker or green sleeve retainer compound onto the outer threads of the steel insert.
- Thread the steel insert onto the kit installation driver tool and screw it down into the cylinder head by hand until seated firmly.
- Turn the driver tool clockwise with a wrench to force the expanding cold-form tool through the inner steel threads.
- This expanding process expands the bottom of the steel insert into the aluminum casting, locking it permanently into place.
- Step 6: Install Fresh Spark Plug and Coil Pack to Updated Torque Specs
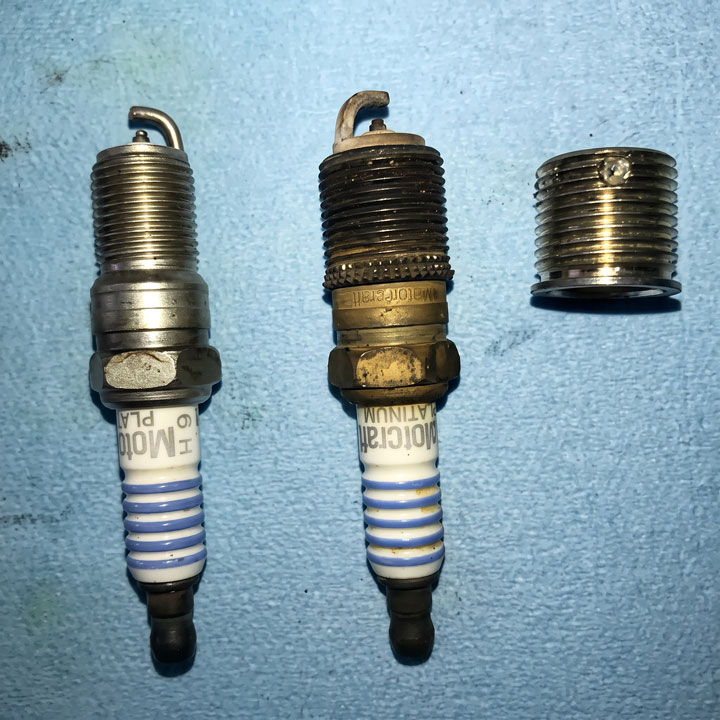
- Thread a brand-new Motorcraft spark plug into the newly installed steel insert by hand to verify smooth thread engagement.
- Attach your calibrated torque wrench and tighten the dry spark plug threads to exactly 28 to 32 ft-lbs.
- Install a new ignition coil pack and rubber boot to replace the boot damaged during the blowout event.
- Secure the coil mounting bolt, plug in the electrical harness connectors, and reconnect the negative battery cable.
- Start the engine and listen for a smooth idling sound to confirm complete compression sealing.
Completing this permanent thread repair at home restores factory compression while saving you thousands over dealership repair quotes.
For more expert step-by-step DIY automotive repair guides, explore our full library at Bryan’s Garage.
The Engineering Root Cause Behind Ford Triton V8 Spark Plug Blowouts
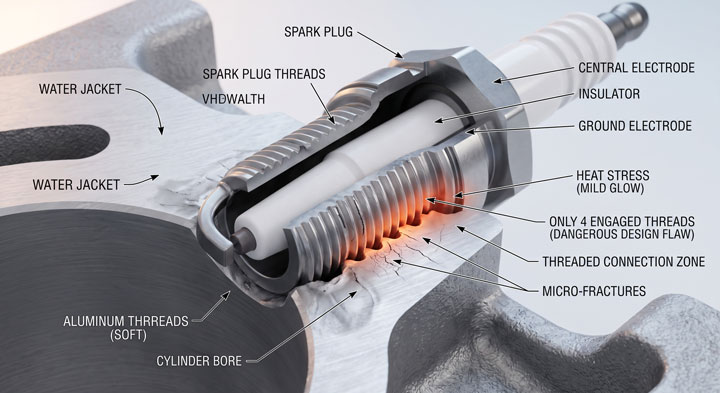
Understanding why spark plugs unexpectedly blow out of Ford Modular engines requires examining the metallurgy and cylinder head architecture of 2-valve Triton V8s.
Between 1997 and 2003, Ford equipped 4.6L, 5.4L, and 6.8L V8 and V10 engines with aluminum cylinder heads featuring extremely thin spark plug ports.
Factory engineering drawings reveal that early 2-valve aluminum heads contained only 3.5 to 4 threads engaging the spark plug.
In contrast, standard cast-iron or modern aluminum cylinder heads feature 8 to 10 full threads of engagement to hold spark plugs under pressure.
Compounding this short thread engagement is the significant difference in thermal expansion rates between steel spark plug shells and soft aluminum heads.
As the engine heats up during operation, aluminum expands at roughly twice the rate of steel, creating micro-movements along thread contact surfaces.
If spark plugs are under-torqued from the factory or during routine maintenance, combustion gases seep past the spark plug taper seal.
Super-heated combustion gases slowly erode the soft aluminum threads like a blowtorch through a process known as micro-fretting corrosion.
Eventually, cylinder combustion pressure overcomes the remaining weakened aluminum threads, firing the spark plug out of the head like a missile.
When the spark plug blows out, it shatters the plastic ignition coil boot and tears off the hold-down bracket, causing an immediate misfire code P0300 through P0308.
In 2004, Ford addressed this issue by updating 2-valve cylinder head castings to feature 8 full threads of spark plug engagement.
However, millions of early 2-valve trucks remain on the road today, making an effective ford f150 spark plug blowout fix essential knowledge for truck owners.
Installing a solid steel thread insert permanently replaces soft aluminum threads with hardened steel that can easily handle high combustion pressures.
Comparing Thread Repair Kits: Solid Steel Inserts vs Wire Coils
Choosing the correct f150 spark plug thread repair kit determines whether your repair lasts for the lifetime of the truck or fails within months.
Mechanics split thread repair systems into two primary categories: thin wire coil inserts (Helicoil) and thick, solid steel bushing inserts (Time-Sert and Cal-Van).
The table below provides a detailed technical comparison of the three most common thread repair kit options available on the market.
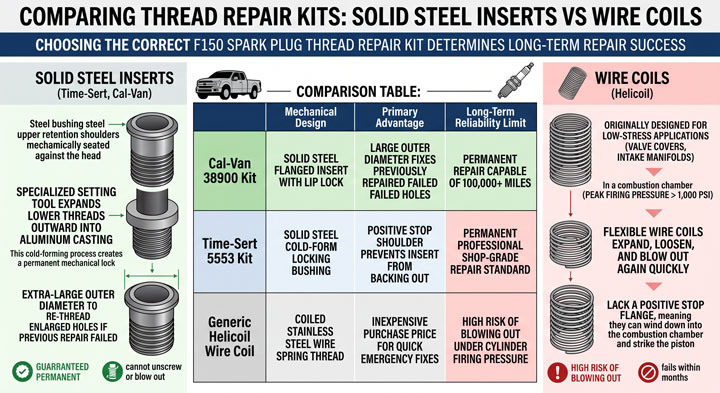
| Repair Kit & Type | Mechanical Design | Primary Advantage | Long-Term Reliability Limit |
|---|---|---|---|
| Cal-Van 38900 Kit | Solid steel flanged insert with lip lock | Large outer diameter fixes previously repaired failed holes | Permanent repair capable of 100,000+ miles |
| Time-Sert 5553 Kit | Solid steel cold-form locking bushing | Positive stop shoulder prevents insert from backing out | Permanent professional shop-grade repair standard |
| Generic Helicoil Wire Coil | Coiled stainless steel wire spring thread | Inexpensive purchase price for quick emergency fixes | High risk of blowing out under cylinder firing pressure |
Generic wire coil inserts like Helicoil were originally designed for low-stress applications like valve covers and intake manifolds.
In a combustion chamber where peak firing pressure exceeds 1,000 PSI, flexible wire coils expand, loosen, and blow out again quickly.
Furthermore, wire coils do not feature a positive stop flange, meaning they can wind down into the combustion chamber and strike the piston.
Solid steel inserts like Time-Sert and Cal-Van utilize thick-walled steel bushings with upper retention shoulders that mechanically seat against the head.
During installation, a specialized setting tool expands the lower threads of the steel bushing outward into the aluminum casting.
This cold-forming process creates a permanent mechanical lock that cannot unscrew or blow out when changing spark plugs in the future.
If your cylinder head was previously repaired with a cheap wire coil that blew out, the Cal-Van 38900 kit features an extra-large outer diameter to re-thread the enlarged hole.
Investing in a solid steel insert system guarantees a permanent repair that allows you to drive with complete confidence.
Cost Analysis: DIY Thread Repair vs Dealership Cylinder Head Replacement
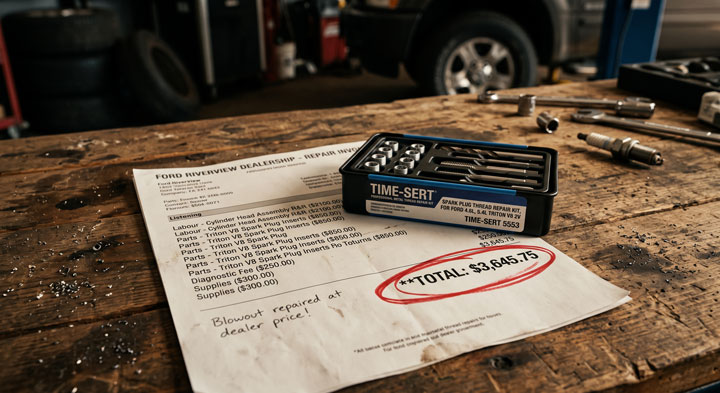
Understanding the financial contrast between repairing threads yourself and paying a commercial repair shop highlights the immense savings of DIY work.
When you take a truck with a blown spark plug to a dealership, service advisors often recommend replacing the entire cylinder head assembly.
Replacing a cylinder head requires removing the intake manifold, front timing cover, timing chains, exhaust manifolds, and head bolts.
This massive repair job requires between 12 and 16 hours of certified shop labor plus expensive OEM parts.
Dealership quotes for replacing a single cylinder head on a 5.4L Triton V8 routinely range from $2,800 to $4,200.
Even independent auto repair shops charging to install an on-vehicle Time-Sert insert bill between $450 and $800 per cylinder.
In contrast, purchasing a professional Cal-Van or Time-Sert thread repair kit costs between $220 and $420 as a one-time tool investment.
Once you own the kit, replacement steel inserts cost less than $15 each to fix additional blown cylinders on your truck or a friend’s vehicle.
Completing the repair yourself in your garage costs less than $300 total, including new spark plugs, coil packs, and chemical locking compounds.
Taking control of this repair saves you over $3,000 while equipping your tool chest with professional-grade engine machining tools.
Torque Specifications and Anti-Seize Guidelines for 2V Triton Engines
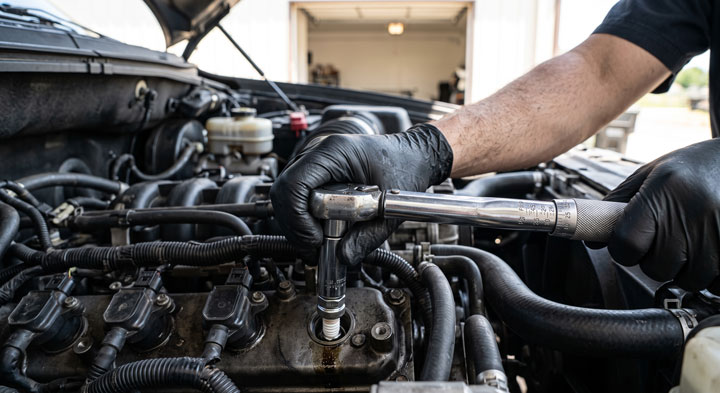
Preventing future spark plug blowouts on 2-valve Triton engines requires updating outdated spark plug torque guidelines.
Original Ford factory service manuals published in the late 1990s specified a spark plug torque rating of only 11 to 14 ft-lbs.
Over two decades of field experience across 18,587 car owners and master technicians proved that 14 ft-lbs is dangerously loose.
At 14 ft-lbs of torque, engine vibration gradually loosens the spark plug over 20,000 miles of driving.
Once the plug vibrates loose, hot combustion gases begin escaping past the taper seal, initiating the micro-fretting process that destroys aluminum threads.
Master ASE technicians and engine builders now universally recommend tightening spark plugs on 2V Triton heads to 28 to 32 ft-lbs dry.
Torquing spark plugs to 28-32 ft-lbs creates sufficient thread clamping force to hold the taper seal tight against combustion pressure, preventing backing out.
Another crucial practice is avoiding the use of anti-seize compound on spark plug threads unless explicitly required by the plug manufacturer.
Anti-seize compound acts as an active liquid lubricant that reduces thread friction significantly during tightening.
When you apply anti-seize and use a torque wrench, you risk over-stretching the few aluminum threads, causing them to strip out immediately.
Always install nickel-plated or iridium spark plugs dry and tighten them with a calibrated torque wrench to exactly 28-32 ft-lbs.