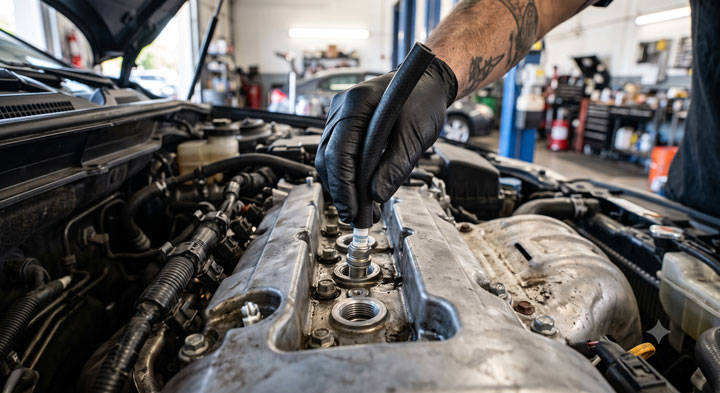
I still remember pulling into my driveway with my Ford F150 stuttering under heavy acceleration, completely terrified of facing a multi-thousand-dollar dealership repair bill.
After pulling off the intake shroud, I realized a worn electrode gap was strangling my engine’s combustion chamber and causing severe ignition blowout.
Finding accurate ford f150 spark plug gap specs saved my truck and my wallet, and Team Bryan’s Garage is here to help you do the exact same thing.
In This Article
- Official Ford F150 Spark Plug Gap Specifications Chart by Engine and Year
- Step-by-Step DIY Guide to Checking, Gapping, and Replacing F150 Spark Plugs
- Diagnosing Ignition Misfires, Spark Blowout, and Coil-On-Plug Failures
- Platinum vs. Iridium Plugs, Maintenance Schedules, and DIY Cost Analysis
- Pro Mechanic Tips to Prevent Damaged Fine-Wire Electrodes
Your F-150 has a secret slot that starts the truck when your key fob dies.
And 8 other things Ford never told you.
Dead fob fix · Remote window trick · 7.2 kW generator hiding in your bed · Tailgate ladder · and 5 more.
▶ Read Now — Show Me Everything
bryansgarage.com · Bryan Mark · 2026

How to Select, Gap, and Replace Ford F150 Spark Plugs: Step-by-Step Guide
Setting the correct spark plug clearance is mandatory for keeping your truck running smoothly.
Before beginning work on your ignition system, ensure you gather the correct tools and workspace equipment.
You will need a 5/8-inch or 9/16-inch thin-wall magnetic spark plug socket depending on your engine model year.
You also need a 3/8-inch drive torque wrench, a wire coin gauge or feeler gauge tool, dielectric grease, and anti-seize compound.
Always perform this maintenance job on a motor that is completely cold to avoid stripping delicate aluminum cylinder head threads.
Step 1: Safely Prepare the Engine Bay and Disconnect Power.
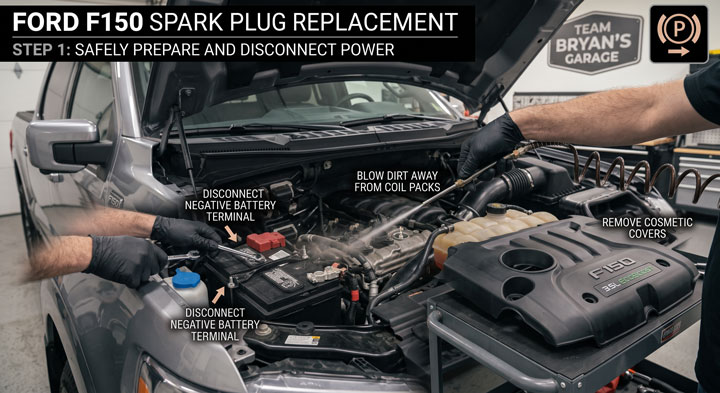
Park your truck on a flat, level surface and engage the emergency parking brake securely.
Pop the hood and disconnect the negative terminal from your vehicle battery to prevent electrical shorting.
Remove any plastic cosmetic engine covers by unscrewing the retaining bolts or pulling gently on the retaining grommets.
Blow away loose dirt around the ignition coil harnesses using compressed air to keep debris out of open cylinders.
Step 2: Remove the Coil-On-Plug Assemblies and Clean the Wells.
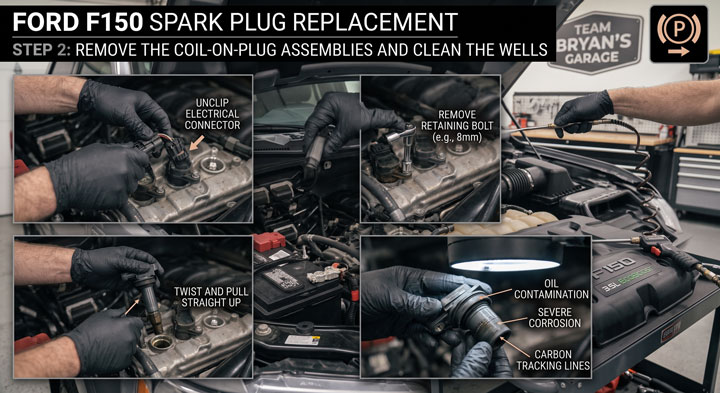
Unclip the electrical locking connector attached to the top of the individual coil-on-plug unit.
Remove the single retaining bolt, typically 8mm or 10mm, holding the ignition coil down against the valve cover.
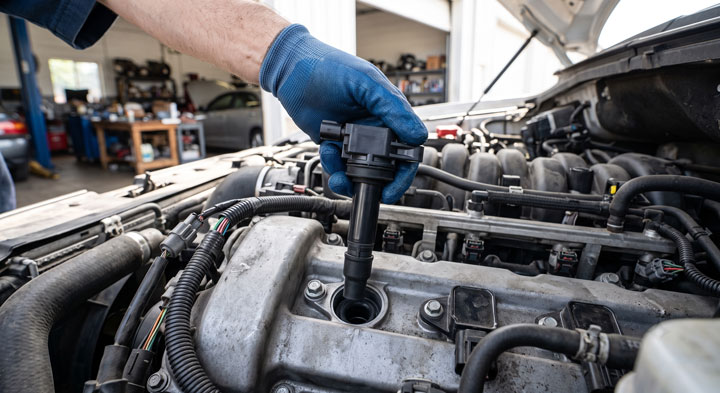
Twist the coil boot slightly to break the heat seal before pulling straight upward to remove the assembly.
Inspect the rubber ignition boot for oil contamination, severe corrosion, or carbon tracking lines.
Step 3: Measure and Adjust Spark Plug Gap Precision.
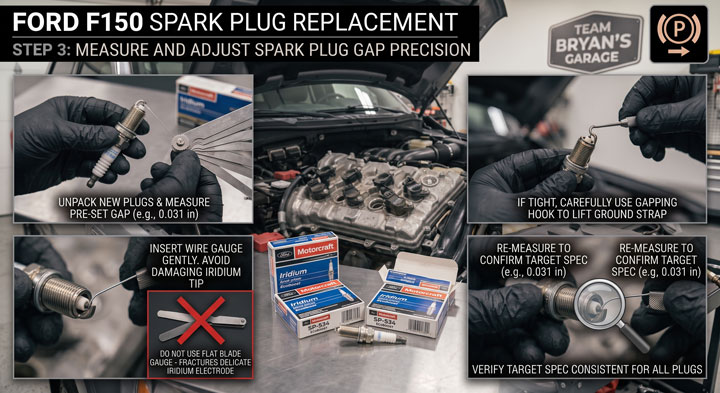
Unpack your new iridium spark plugs and measure the pre-set gap using a precise wire feeler gauge.
Do not force a flat blade gauge against fine-wire iridium tips, as this will fracture the delicate center electrode.
If the gap is slightly tight, carefully use an gapping tool hook to lift the ground strap outward.
Verify that your targeted measurement strictly matches your exact powertrain specification before proceeding with installation.
Step 4: Install and Torque New Plugs to Factory Specification.
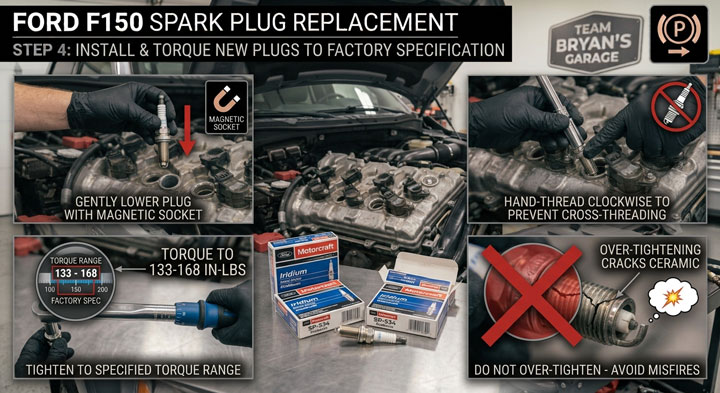
Lower the new plug into the cylinder tube gently using your magnetic spark plug socket.
Hand-thread the plug clockwise to guarantee you do not cross-thread the fragile aluminum head threads.
Tighten the plug with your torque wrench set precisely between 133 to 168 inch-pounds depending on factory specs.
Never over-tighten the plug, because overtightening cracks the ceramic insulator and causes immediate internal misfires.
Step 5: Reattach Ignition Coils and Test Engine Fire.
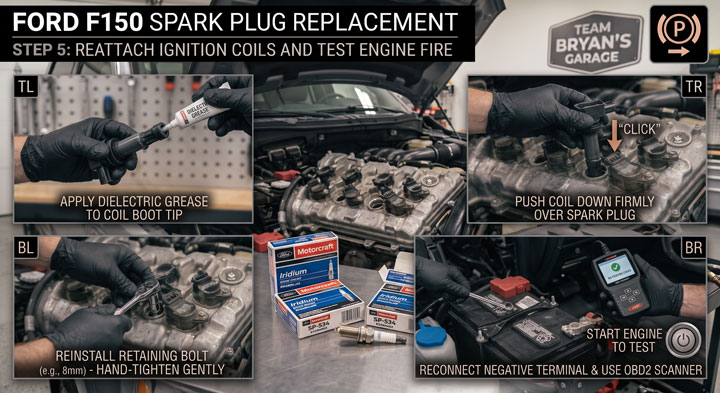
Apply a thin coating of dielectric grease inside the rubber tip of the ignition coil boot.
Push the ignition coil down over the top of the newly installed spark plug until it seats firm.
Reinstall the retaining bolt and tighten it down gently to secure the coil housing.
Reconnect your negative battery terminal, clear any pending codes with an OBD2 scanner, and start the engine.
If you want to handle this maintenance project safely at home without making costly mistakes, check out our complete DIY repair section at Bryan’s Garage.
Official Ford F150 Spark Plug Gap Specifications Chart by Engine and Year
Every generation of the F-Series truck demands specific ignition gap tolerances to achieve proper combustion.
Running a gap that is too wide forces your ignition coils to build excessive voltage, leading to premature coil breakdown.
Conversely, running a gap that is too small creates a weak spark kernel that causes poor fuel vaporization and rough idling.
Check the factory recommendations in the chart below to ensure your engine runs at peak efficiency.
| Engine Configuration & Model Years | Stock Factory Gap Spec (Inches) | Recommended Performance / Tuned Gap |
|---|---|---|
| 3.5L EcoBoost V6 (2011 – 2016) | 0.030″ – 0.033″ | 0.028″ – 0.030″ |
| 3.5L EcoBoost V6 (2017 – 2023) | 0.028″ – 0.031″ | 0.026″ – 0.028″ |
| 2.7L EcoBoost V6 (2015 – 2023) | 0.028″ – 0.031″ | 0.026″ – 0.028″ |
| 5.0L Coyote V8 (2011 – 2017) | 0.049″ – 0.053″ | 0.045″ – 0.049″ |
| 5.0L Coyote V8 (2018 – 2023) | 0.049″ – 0.051″ | 0.045″ – 0.048″ |
| 3.3L & 3.5L Duratec / Ti-VCT V6 (NA) | 0.049″ – 0.053″ | 0.049″ – 0.051″ |
| 3.5L PowerBoost Full Hybrid V6 (2021+) | 0.028″ – 0.031″ | 0.028″ – 0.030″ |
| 6.2L V8 Boss Engine (2010 – 2014) | 0.041″ – 0.047″ | 0.041″ – 0.044″ |
| 5.4L Triton V8 3-Valve (2004 – 2010) | 0.040″ – 0.045″ | 0.040″ – 0.043″ |
Turbocharged EcoBoost motors feature higher cylinder pressures that blowout wide spark gaps easily under load.
Most master mechanics set forced-induction EcoBoost gap tight around 0.028 inches to prevent hesitation under boost.
Checking your owner manual helps confirm exact factory part numbers such as Motorcraft SP-580 or SP-534 plugs.
For naturally aspirated platforms, maintaining the exact coyote f150 spark plug gap ensures clean throttle response across the entire RPM band.
Diagnosing Ignition Misfires, Spark Blowout, and Coil-On-Plug Failures
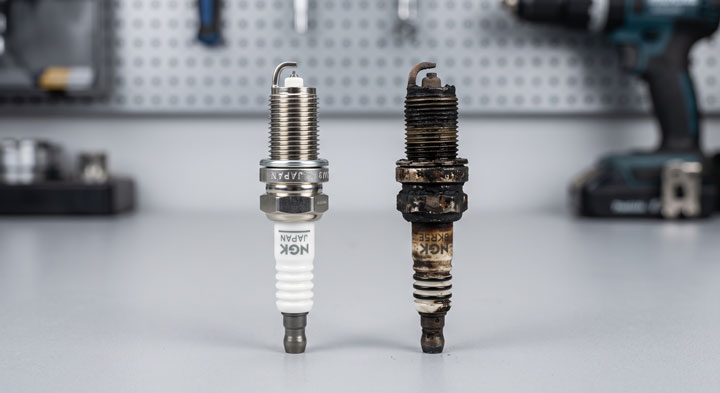
A misfiring engine usually trips a Check Engine Light alongside diagnostic error codes stored in the computer system.
Standard OBD2 diagnostic error codes range from P0300 for random misfires to specific cylinder codes like P0301 or P0304.
When cylinder pressures rise under heavy towing, a widened plug gap prevents the arc from jumping across the electrodes.
This situation is known in the automotive industry as spark blowout and feels like a sharp engine stutter under acceleration.
Inspecting the ignition coil body is just as vital as setting the correct f150 plug gap specs during maintenance.
Primary coil resistance typically measures between 0.5 to 2.0 ohms across the low-voltage primary input terminals.
Secondary winding resistance measures much higher, usually between 6,000 to 15,000 ohms depending on coil architecture.
If you find carbon tracking lines along the ceramic body, replace both the spark plug and the rubber boot immediately.
Failing to replace a damaged boot allows high voltage electrical current to short against the aluminum cylinder head wall.