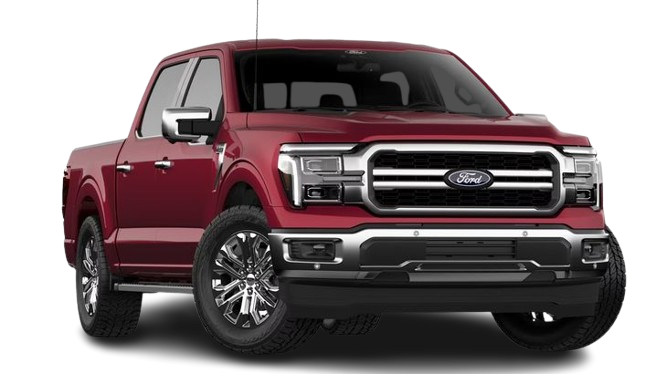
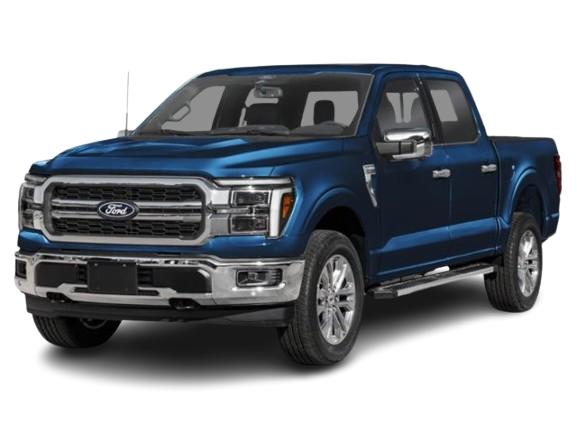
Backing up a heavy travel trailer in a crowded campsite used to leave me soaked in sweat and questioning my driving skills until I finally mastered the ford f150 trailer backup assist system.
As a fellow Ford truck owner, I know how frustrating system setup errors and calibration glitches can be when you just want to get on the road.
Here at Bryan’s Garage, we broke down the entire calibration process so you can reverse with complete confidence every time.
Ford F150 Pro Trailer Backup Assist Calibration Guide
In This Article
Step-by-step setup and physical measurement calibration instructions.
Differences between optical checkerboard stickers and hardwired yaw sensors.
How to execute the automated drive-calibration routine cleanly.
Troubleshooting system connection dropouts and optical target tracking errors.
Ford F-150 trim levels and towing package compatibility breakdowns.
🔴 MOST OWNERS NEVER FIND THIS
Your F-150 has a secret slot that starts the truck when your key fob dies. And 8 other things Ford never told you.
Dead fob fix · Remote window trick · 7.2 kW generator hiding in your bed · Tailgate ladder · and 5 more.
How to Calibrate Ford F150 Pro Trailer Backup Assist: Step-by-Step Guide
Setting up your automated reversing system requires precision before the electronic brain can steer your rig safely.
A single miscalculated inch can cause improper tracking or premature jackknife warnings during tight maneuvering.
Before beginning the electronic process, gather a sturdy steel tape measure and clean rags.
You will need your Ford checkerboard calibration decal or the Ford wired smart yaw sensor module.
Park your truck and trailer on completely flat pavement with the towing vehicle directly aligned with the trailer frame.
Ensure your trailer tires are properly inflated to prevent height variations during calibration.
Turn on your vehicle ignition and ensure your Ford SYNC display screen is fully booted up.
Step 1: Create and Name Your New Trailer Profile
Step 1
Press the pro trailer backup assist f150 center button located in the middle of your dashboard control dial.
Select the option on your SYNC screen to add a new trailer profile.
Type in a clear name for your trailer using the touchscreen keyboard interface.
Select the correct brake type configuration corresponding to your trailer electric or surge braking system.
Confirm the brake effort selection based on the gross weight of your attached trailer.
Step 2: Install the Yaw Sensor or Position the Placement Sticker
Step 2
For sticker-based setups, choose a flat vertical area on your trailer tongue frame beam.
Clean the metal surface thoroughly with isopropyl alcohol to ensure maximum decal adhesion.
Place the decal between 7 inches and 22 inches back from the center point of the hitch ball.
Verify that the sticker sits in clear view of the rear camera mounted in the tailgate handle assembly.
For sensor-based setups, bolt the yaw sensor housing firmly to the trailer tongue header upright section.
Plug the sensor wiring harness firmly into the custom trailer connector socket near your rear hitch assembly.
Step 3: Record the Four Crucial Physical Measurements
Step 3
Take Measurement A from the center point of the hitch ball back to the horizontal center line of the placement sticker.
Take Measurement B from the center point of your tailgate camera lens straight to the target placement sticker center.
Take Measurement C from the center of the rear license plate frame directly back to the center line of the hitch ball.
Take Measurement D from the center of the tailgate camera to the center line of your trailer axle or dual-axle center point.
Write down every measurement in inches carefully to prevent input mistakes in the cockpit screen.
Step 4: Input Technical Data into the SYNC System
Step 4
Return to the truck cabin and follow the screen prompts on your SYNC screen.
Enter Measurement A using the touchscreen increment controls and confirm your entry.
Enter Measurement B and double-check that the decimal points match your actual tape measure readout.
Enter Measurement C and Measurement D into their respective prompt boxes on the display panel.
Review the summarized measurement table on screen before proceeding to the drive stage.
Step 5: Perform the Calibration Drive Protocol
Step 5
Drive your truck and trailer combination to a large open parking lot or straight country road.
Drive straight forward at a steady speed between 4 mph and 25 mph without sharp steering movements.
Watch the instrument cluster display until the progress bar moves from detecting target to calibrating.
Make a gradual 90-degree turn if prompted by the screen to help the optical system calculate turning radius.
Drive straight once more until the cluster displays a green confirmation message showing calibration complete.
Step 6: Test and Verify the Control Dial in an Open Space
Step 6
Bring your vehicle to a complete stop and shift the transmission directly into reverse.
Remove your hands completely from the steering wheel while keeping your foot resting lightly on the brake pedal.
Rotate the dashboard trailer dial slowly to the left and confirm the steering wheel turns automatically to direct the trailer left.
Rotate the dial back to the center position to bring the truck and trailer combination back straight.
Confirm that releasing the dial lets the truck correct steering input without human wheel intervention.
Once you complete these steps, your electronic helper stands ready to take the pain out of tricky maneuvers at campsites and boat ramps. If you want to explore more hands-on repair guides and daily driving maintenance hacks, check out our expansive library at Bryan’s Garage.
🔧 Hidden F-150 Features — Confirmed by real owners
Understanding the Science Behind Pro Trailer Backup Assist
The engineering behind the f150 trailer backup assist ecosystem blends optical computer vision with electronic power-assisted steering module controls.
When you rotate the dashboard knob, you are not directly turning a mechanical steering shaft through hand pressure.
Instead, you send digital position signals directly to the power steering module inside the engine bay.
The high-definition tailgate camera constantly feeds video frames to an advanced image processing module.
This image processor tracks the unique geometric pattern printed on the checkerboard placement decal.
As the angle between truck and trailer changes, the visual perspective of the decal skews across camera pixels.
The system calculates the exact articulation angle between your rear bumper and the trailer tongue in real time.
In newer model years, an electronic yaw rate sensor replaces optical tracking with internal gyroscopes.
This physical sensor measures rotational movement along the vertical axis fifty times per second.
The central gateway module merges wheel speed sensor data, steering angle inputs, and trailer angle readings.
By constantly comparing these variables, the computer calculates the precise counter-steering needed to maintain your path.
If the calculated articulation angle exceeds the safe threshold, the system initiates automatic braking to prevent a jackknife disaster.
This seamless fusion of software algorithms and hardware actuators turns complex reversing trigonometry into simple knob inputs.
Model Year Variations and Ford F-150 Trim Compatibility
Ford F150 Pro Trailer Backup Assist Calibration Guide
Ford introduced trailer steering technology in 2016 and updated the architecture across successive model generations.
Early model years from 2016 through 2020 relied entirely on optical black-and-white sticker decals.
Starting with the 2021 redesign, Ford introduced a smart yaw sensor module that plugs into a dedicated trailer wiring port.
This sensor system eliminates camera tracking issues caused by low light, road mud, or intense sun glare.
Some late-model packages support both sticker decal identification and wired yaw sensor operation simultaneously.
The availability of this feature depends directly on vehicle factory options and trim configurations.
Ford F-150 Trim Level
Standard vs Optional Status
Tracking Method Supported
XL & XLT
Optional (Requires Tow Tech Package)
Sticker Decal or Sensor (Year Dependent)
Lariat & Tremor
Optional / Standard on Higher Packages
Sticker Decal and Smart Yaw Sensor
King Ranch & Platinum
Standard Equipment
Sticker Decal, Sensor & Smart Hitch Integration
Raptor & Lightning
Optional on Select Equipment Groups
Sticker Decal or Smart Yaw Sensor
Trucks equipped with the Max Trailer Tow Package include enhanced cooling systems alongside the steering module electronics.
Models featuring Smart Hitch technology can also calculate tongue weight before you begin your calibration drive routine.
Always verify your truck option sheet to confirm whether your vehicle contains the necessary camera hardware installed.
Troubleshooting Common Pro Trailer Backup Assist Faults
Ford F150 Pro Trailer Backup Assist Calibration Guide
Even robust modern electronics experience temporary glitches when environmental conditions interfere with camera optics.
One common issue occurs when the instrument cluster displays an error stating target sticker lost.
This usually happens when direct harsh sunlight casts dark high-contrast shadows across your trailer tongue frame.
Wiping your camera lens with a microfiber cloth often solves random optical detection dropouts immediately.
If your trailer uses a highly reflective aluminum frame, dull background reflection using flat black tape around the sticker.
Another common warning message tells the driver that calibration drive is taking longer than expected.
This error occurs when drivers make sharp erratic steering wheel movements during the initial straight line drive phase.
Find an empty straight stretch of road and maintain a steady 15 mph speed without touching the steering wheel unnecessary.
If you experience persistent connection loss with a hardwired yaw sensor, check the pin connections inside the bumper plug.
Corrosion or bent pins inside the trailer plug prevent sensor communication with the vehicle gateway computer.
Applying dielectric grease to plug contacts prevents moisture intrusion and maintains solid signal conductivity.
If system errors persist after verifying hardware, delete the trailer profile entirely from your SYNC screen and re-enter inputs.
Resetting the electronic profile clears corrupt temporary calibration files stored in system flash memory.
Expert Tips for Mastering Dial-Based Trailer Maneuvering
Operating a trailer backup assist ford f150 control knob requires a minor shift in muscle memory for experienced drivers.
Keep your hands off the main steering wheel completely once reverse gear engages and the system activates.
Rest your right thumb and index finger gently on the dashboard control dial for smooth incremental inputs.
Remember that turning the dial to the left makes the rear of your trailer swing toward the left side.
Turning the dial to the right makes the rear of your trailer swing toward the right side.
Control your vehicle backing speed strictly with light pressure on your foot brake pedal.
Allowing the truck to idle backward slowly gives the power steering motor plenty of time to execute precise wheel adjustments.
When approaching your desired parking spot angle, center the dial early to straighten out the truck cab smoothly.
Practice reversing around soft turns in empty parking lots before attempting tight campsite maneuvers between trees.
Keep your side mirrors clean so you can verify visual clearance while the truck controls steering orientation.
Trusting the automated steering input saves significant time and eliminates arguments at busy boat ramps.
Avoid These 7 Costly Calibration Mistakes
Ford F150 Pro Trailer Backup Assist Calibration Guide
Skipping basic setup precautions often leads to system tracking errors or awkward steering behavior while reversing.
Avoid taking Measurement A from the bumper trim instead of the true geometric center of the hitch ball.
Placing calibration stickers on curved pipe surfaces causes distortion in the visual checkerboard pattern read by camera software.
Never apply the optical sticker over greasy surfaces, rust spots, or peeling paint finishes.
Avoid conducting your dynamic calibration drive at night or during heavy downpours when vision is reduced.
Do not change hitch drop ball mounts after completing calibration without measuring and updating hitch offset values.
Avoid mounting sensor modules loosely where trailer vibration can shake internal circuit board gyroscopes.
Never ignore trailer tire pressure differences, as low pressure alters tongue height angles relative to the rear bumper.
🟢 Going viral on F150Forum & Reddit
“I’ve driven an F-150 for 4 years and didn’t know this existed.” — The most common reaction when this article is shared
9
features
2015+
models
11 min
read
Free
no signup
Did you know which button on your fob opens the tailgate when your hands are full? Or the button combo to reset CarPlay in 15 seconds without turning off the engine?
What is the primary difference between the sticker decal and the yaw sensor?
The sticker decal uses tailgate camera optics to track trailer movement visually through computer software.
The hardwired yaw sensor attaches directly to the trailer frame to measure rotational movement electronically via internal gyroscopes.
Sensors offer superior performance in nighttime conditions, extreme weather, and direct sunlight glare scenarios.
Why does my F-150 say “Pro Trailer Backup Assist Not Available”?
This message appears when the system detects open doors, unbuckled seatbelts, or uncalibrated trailer profiles.
It also occurs if tailgate camera optics are obstructed by dirt, mud, snow, or direct high-intensity glare.
Ensure your tailgate is fully latched closed and clean all camera lenses thoroughly before engaging reverse gear.
Can I store multiple trailers in the F-150 backup assist memory?
Yes, Ford SYNC systems allow you to store up to ten individual trailer profiles in system memory.
Each profile saves unique physical dimensions, brake gain settings, and calibration profile data.
You can quickly switch between boat trailers, utility trailers, and camper rigs using the center display menu.
How long does the calibration drive actually take?
A typical calibration drive takes between two and five minutes on a flat open stretch of pavement.
Maintaining a steady speed between 10 mph and 15 mph in a straight line speeds up sensor acquisition dramatically.
Making a smooth 90-degree turn when prompted helps the system lock in geometric turning limits rapidly.
Do I need to re-calibrate if I change my trailer hitch ball mount?
Yes, changing your hitch mount alters the critical distance from your bumper camera to the trailer pivot point.
You must measure the new distance and update Measurement A and Measurement C in your SYNC display screen.
Updating these numbers ensures the computer calculates correct wheel angles to prevent jackknife risks.
Conclusion
Mastering your truck trailer steering technology eliminates reversing stress and protects your towing investment.
With accurate physical measurements and a proper calibration drive, backing up becomes second nature.
Ready to transform your car maintenance from a stressful chore into a breeze? Explore more tips at Bryan’s Garage.
Have questions? Our team can help you find the best solutions for your car problems and avoid costly mechanic visits.
Note: Individual results may vary depending on individual vehicle makes, models, year of manufacture, and overall condition. This article is intended for general automotive reference purposes only and does not replace official manufacturer service manuals or advice from a certified mechanic.