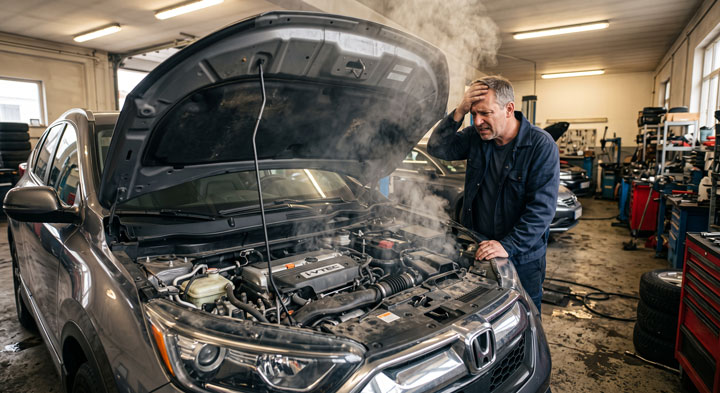
I still remember sitting at a red light on a sweltering July afternoon when my Honda CR-V started emitting an unnerving metallic clicking sound.
That sudden, irritating honda crv ac compressor noise instantly sent a wave of anxiety through me as I worried about getting stranded with an overheated engine or facing a $1,500 repair bill.
Fortunately, after diving deep into the mechanics, our team at Bryan’s Garage discovered that this common issue is often an easy fix.
Honda CRV AC Compressor Noise Clicking at Idle and Clutch Repair
In This Article
How to step-by-step diagnose and repair your Honda CR-V AC compressor clutch and air gap issues.
The mechanical root causes behind clicking, rattling, and grinding sounds at idle.
Factory air gap clearance specifications (0.35 mm to 0.60 mm) and shim adjustment techniques.
How to distinguish between cheap clutch repairs and full compressor failures.
Proven expert tips to save thousands on dealership labor costs and prevent total AC system lockup.
How to Repair Honda CR-V AC Compressor Noise and Adjust Clutch Air Gap: A Step-by-Step Guide
Honda CRV AC Compressor Noise Clicking at Idle and Clutch Repair
Before you begin repairing your vehicle’s air conditioning system, you must gather the proper tools and ensure safety.
You will need a metric socket set with 10mm and 14mm sockets, a clutch holding tool or strap wrench, precision feeler gauges, snap ring pliers, and replacement clutch shims.
Safety glasses and heavy-duty mechanic gloves are essential to protect against flying debris and sharp metal edges.
Park your Honda CR-V on a flat, level surface and engage the parking brake before lifting the front passenger side on jack stands.
🔴 MOST OWNERS NEVER FIND THIS
Your CR-V has a secret trick that starts the SUV when your key fob dies. And 14 other things Honda never told you.
Dead fob fix · Global window down trick · The hidden folding picnic table · Walk Away Auto Lock · and 11 more.
Step 1: Inspect and Measure the Clutch Air Gap Clearance
Start by locating the air conditioning unit accessible through the passenger-side wheel well or front engine bay.
Slide your feeler gauge into the gap between the outer armature plate and the belt pulley face to check the clearance.
According to official Honda service documentation, the standard factory specification for the air gap is between 0.35 mm and 0.60 mm (0.014 to 0.024 inches).
If your gauge reveals an excessive air gap above 0.65 mm, the magnetic clutch coil will struggle to pull the plate in, causing rapid clicking or slipping.
Document your measurement carefully because this exact reading determines how many shims you must remove during reassembly.
Honda CRV AC Compressor Noise Clicking at Idle and Clutch Repair
Step 2: Remove the Passenger Wheel and Plastic Splash Shield
Loosen the front passenger wheel lug nuts slightly before elevating the vehicle securely on heavy-duty jack stands.
Remove the wheel completely to gain unobstructed physical access to the lower engine compartment shield.
Pop out the plastic push rivets and unbolt the inner fender liner using your 10mm socket and trim removal tool.
Fold the splash shield back toward the rear of the wheel well to expose the belt drive system and compressor face clearly.
This assembly consists of three primary components: the electromagnetic stator coil, the belt-driven pulley bearing, and the splined armature drive plate.
When you press the AC button inside the cabin, the engine computer sends 12 volts of direct current through the HVAC relay to the stator coil.
This electrical current generates a powerful magnetic field that pulls the armature plate against the spinning pulley face.
Friction between these two metallic surfaces locks the compressor shaft to the engine belt drive, pressurizing the refrigerant gas.
Over tens of thousands of miles, normal friction wears away the metallic facing on both the armature plate and pulley.
As this surface material steadily erodes, the physical distance between the clutch faces increases beyond factory tolerances.
When the air gap exceeds 0.65 mm, the magnetic field generated by the coil becomes too weak to hold the armature tightly.
This results in rapid slipping, chatter, and repetitive engagement cycles, creating a distinct honda crv ac compressor clicking noise idling.
When engine temperatures rise on hot summer days, thermal expansion increases resistance in the magnetic coil wire windings.
This electrical resistance reduces magnetic pull force further, causing the clutch to slip uncontrollably or fail to engage at all.
Honda addressed this recurring design vulnerability across multiple generations through official bulletins like Service Bulletin TSB 12-072.
This bulletin highlights how heat buildup causes the internal thermal fuse in the stator coil to blow, leaving the AC system inoperative.
Understanding these mechanical dynamics empowers owners to perform a targeted reshimming repair rather than paying for unnecessary unit swaps.
Additionally, keeping track of your specific honda crv specs ensures you select compatible replacement clutches and proper oil viscosity during service.
Diagnostic Matrix for Honda CR-V AC Compressor Noises: Rattles, Whines, and Grinding
Not every sound coming from under your hood points to the exact same component failure.
Performing a precise sound diagnosis saves time and prevents you from replacing healthy parts unnecessarily.
A rapid, repetitive clicking sound that occurs only when climate control is active points directly to air gap slippage.
You will often hear this honda crv ac compressor noise when on while idling at traffic lights or resting in parking lots.
The sound occurs because the electromagnet repeatedly grabs and releases the armature plate as heat builds.
Conversely, a heavy metallic metallic rattling noise indicates physical loose components or severe clutch plate warping.
Recognizing Clutch Pulley Bearing vs Internal Compressor Failure
A loud, continuous grinding or squealing sound that occurs whether the AC is turned ON or OFF signifies a bad pulley bearing.
The pulley bearing spins constantly whenever the serpentine belt runs, regardless of climate control settings.
If the internal double-row ball bearings lose lubrication, they produce a constant high-pitched whine that changes pitch with engine RPM.
Ignoring a dry pulley bearing eventually causes the bearing to seize, throwing the serpentine belt and leaving you stranded.
On the other hand, an internal compressor failure sounds completely different from a surface clutch defect.
Internal failure presents as a deep, rhythmic knocking or heavy clattering sound coming from deep inside the aluminum casing.
This mechanical destruction occurs when internal pistons or wobble plates suffer oil starvation and scuff against housing walls.
This condition, known in the automotive industry as “black death,” scatters micro-fine aluminum metal shavings throughout the entire AC system.
If you inspect your front pulley and notice burnt rubber odor or metallic filings, you likely have a honda crv ac compressor clutch stuck situation.
Similarly, severe thermal stress can degrade internal sealing O-rings, leading to a hidden honda crv ac condenser leak that starves the compressor of vital lubricating oil.
If you hear a deep internal thrashing sound, installing a used honda crv ac compressor noise unit without flushing lines will result in immediate secondary failure.
Financial Breakdown and Repair Strategies: DIY Reshimming vs Replacement
Automotive repair shops often recommend replacing the entire air conditioning assembly regardless of the actual failure cause.
Understanding the financial differences between repair strategies helps you make an economical, informed decision.
A full dealership replacement often costs between $1,200 and $1,800 due to high labor rates and system refrigerant evacuation fees.
However, performing a simple DIY clutch reshimming costs under $20 in basic shims and takes less than two hours in your driveway.
Replacing just the clutch kit and stator coil costs between $80 and $150 for parts, avoiding refrigerant recovery entirely.
Comparing AC Compressor Repair Strategies for Honda CR-V
Honda CRV AC Compressor Noise Clicking at Idle and Clutch Repair
The table below summarizes the key financial and technical differences between common repair options:
Repair Strategy
Estimated DIY Cost
Professional Shop Cost
Complexity & Longevity Risk
Clutch Air Gap Reshimming
$0 – $20
$150 – $250
Low Complexity; High Success if clutch faces and bearings are intact.
Clutch & Coil Replacement Kit
$80 – $160
$450 – $700
Moderate Complexity; Excellent longevity without opening refrigerant lines.
Full Compressor & Condenser Swap
$350 – $650
$1,200 – $1,800
High Complexity; Requires AC evacuation, line flushing, and full recharge.
Evaluating your specific situation using this framework prevents overspending on minor mechanical issues.
If your vehicle’s engine idle drops drastically or stalls when the clutch engages, check for logged honda crv check engine codes.
In many instances, performing a targeted crv ac compressor noise repair restores icy cold air without breaking your budget.
Always review historical service bulletins regarding the official honda crv ac compressor recall to see if your vehicle qualifies for extended coverage.
Practical Application Guide and Hands-On Testing Methods
Diagnosing your vehicle accurately requires methodical testing procedures before disassembling any engine components.
Follow these practical testing steps to pinpoint the precise location of under-hood noises.
Method 1: The Screwdriver Stethoscope Mechanical Test
Method 1: The Screwdriver Stethoscope Mechanical Test
Start your engine, set the emergency brake, and turn the climate control system to maximum cooling.
Carefully touch the metal tip of a long mechanic screwdriver against the non-rotating aluminum housing of the compressor.
Press your ear against the plastic handle end of the screwdriver to isolate mechanical sound vibrations safely.
A smooth, light humming noise indicates healthy internal pistons and intact main body shaft bearings.
A loud, irregular metallic clacking or sharp grinding sound transferred through the handle confirms clutch or bearing failure.
Method 2: The Direct Feeler Gauge Air Gap Inspection
Method 2: The Direct Feeler Gauge Air Gap Inspection
Turn off the engine completely and remove the ignition key to prevent accidental starting during testing.
Reach down into the front engine compartment or through the wheel well with a clean metal feeler gauge.
Insert blades ranging from 0.30 mm up to 0.70 mm into the gap between the armature plate and pulley.
If a 0.65 mm or 0.70 mm blade slides smoothly around the entire circumference without resistance, the gap is out of spec.
This confirms that an air gap reshimming or clutch face renewal is necessary to restore proper magnetic holding force.
Method 3: Electrical Relay and Coil Resistance Verification
Method 3: Electrical Relay and Coil Resistance Verification
Open the under-hood fuse relay box located near the engine air cleaner assembly.
Locate the AC clutch relay and swap it temporarily with the identical horn or rear defroster relay.
If the clicking sound stops and the clutch engages firmly, the original relay contacts were pitted and starving the coil of voltage.
If the relay is functioning properly, disconnect the single-wire harness connector leading directly to the compressor stator coil.
Set a digital multimeter to measure resistance (Ohms) and place the test probes across the coil terminals.
A healthy Honda stator coil should register between 3.9 Ohms and 4.3 Ohms at room temperature.
If your multimeter displays infinite resistance (open circuit), the internal thermal fuse has blown, requiring coil replacement.
Overcoming Risks and Common Mistakes During DIY AC Repair
Working on modern automotive climate control systems presents specific mechanical risks if proper procedures are ignored.
One common mistake made by DIY repairers is over-shimming or under-shimming the clutch armature plate.
If you remove too many shims, the air gap clearance falls below the minimum 0.35 mm threshold.
An overly tight clearance causes the armature plate to drag against the spinning pulley face continuously.
This continuous friction generates intense heat, destroying the front shaft seal and melting the stator coil insulation.
Always recheck clearance with feeler gauges at three separate circular points after tightening the center retaining bolt.
Another major mistake involves ignoring metal debris inside the refrigerant lines following an internal failure.
If your original compressor suffered internal piston scuffing, simply installing a new clutch kit will not fix the problem.
The internal mechanical binding will place excessive torque load on the new clutch, burning it out within days.
Always rotate the center splined shaft by hand using a socket wrench before ordering replacement clutch parts.
The center shaft should turn smoothly with slight, even compression resistance as pistons stroke inside.
If the shaft feels completely seized or turns with a gritty, crunchy resistance, the entire unit must be replaced.
Furthermore, never attempt to disconnect refrigerant hoses without having a licensed facility recover the gas safely.
Venting refrigerant into the atmosphere violates federal environmental laws and presents severe freeze-burn hazards to your skin and eyes.
When working under the vehicle, always use heavy-duty jack stands rated for your vehicle’s weight rather than relying on hydraulic jacks alone.
🟢 Going viral on CR-V Owners Club & Reddit
“I’ve driven a CR-V for 4 years and didn’t know this existed.” — The most common reaction when this article is shared
15
features
1997+
models
15 min
read
Free
no signup
Did you know your backup camera has a hidden top-down ‘drone view’? Or that your cruise control automatically downshifts on steep mountain hills to save your brakes?
Have questions? Our team can help you find the best solutions for your car problems and avoid costly mechanic visits.
Note: Individual results may vary depending on individual vehicle makes, models, year of manufacture, and overall condition. This article is intended for general automotive reference purposes only and does not replace official manufacturer service manuals or advice from a certified mechanic.