Honda CRV Exhaust System Leak Diagnosis Manifold and Muffler Fix

I was driving home from work when my engine suddenly sounded like a loud lawnmower every time I stepped on the gas pedal.

I immediately feared my honda crv exhaust system had rusted completely through or broken apart underneath my vehicle.

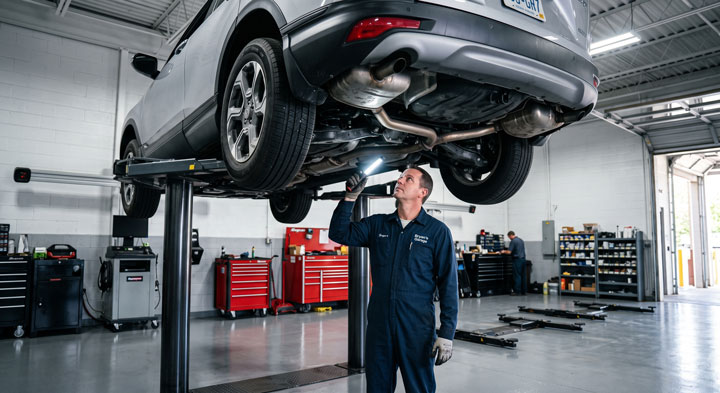
At Team Bryan’s Garage, we have helped thousands of drivers diagnose these annoying exhaust noises, fix hidden leaks, and save serious money by avoiding overpriced dealership repairs.

Honda CRV Exhaust System Leak Diagnosis Manifold and Muffler Fix

In This Article

  • Leak Location Techniques: Learn how to spot hidden cracks, blown flange gaskets, and rusted pipes using simple shop tools.
  • Step-by-Step Repair Instructions: Clear DIY instructions for fixing leaks from the exhaust manifold back to the tailpipe.
  • Exhaust Component Architecture: Detailed breakdown of flex pipes, catalytic converters, mufflers, and sensor locations.
  • Repair Cost Benchmarks: Complete breakdown of DIY replacement part expenses versus professional auto shop estimates.
  • Heat Shield and Hanger Solutions: Practical fixes to eliminate metallic buzzes, vibrations, and sagging exhaust components.
🔴 MOST OWNERS NEVER FIND THIS

Your CR-V has a secret trick that starts the SUV when your key fob dies.
And 14 other things Honda never told you.

Dead fob fix · Global window down trick · The hidden folding picnic table · Walk Away Auto Lock · and 11 more.

▶ Read Now — Show Me Everything

bryansgarage.com · Bryan Mark

Honda CR-V Hidden Features

How to Diagnose and Fix a Honda CR-V Exhaust System Leak: A Complete DIY Guide

Diagnosing an exhausting ticking or roaring sound under your chassis does not require thousands of dollars in shop machinery.

With basic safety equipment and methodical troubleshooting, you can pinpoint exact leak locations in under an hour.

Addressing an exhaust leak promptly prevents hazardous fumes from entering your cabin and restores your engine’s power efficiency.

Prerequisites and Tools Required

Prerequisites and Tools Required

You will need a heavy-duty hydraulic floor jack alongside two sturdy jack stands rated for your vehicle’s weight.

Safety glasses and thick mechanic gloves are critical when working around dirty, rusted underbody piping.

A shop vacuum with a blower outlet or a soapy water spray bottle will make finding pinhole leaks effortless.

Gather a socket set, penetrating lubricant spray, high-temperature exhaust putty, and replacement flange gaskets before starting.

A flashlight or headlamp will help you spot black carbon tracks along hidden pipe seams and manifold flanges.

Step-by-Step Leak Diagnosis and Repair Instructions

Step 1: Perform a Cold-Engine Soap or Vacuum Test

Perform a Cold-Engine Soap or Vacuum Test

Ensure your vehicle engine is completely cold before starting any physical inspection underneath the chassis.

Connect your shop vacuum hose to its exhaust port so it blows air outward instead of sucking air in.

Insert the vacuum hose tightly into your CR-V tailpipe and seal around the edge with a damp microfiber towel.

Turn on the shop vacuum to pressurize the cold piping system with clean air without starting the engine.

Spray a generous coat of soapy water over all pipe joints, flex sections, and flange connections under the car.

Watch closely for growing soapy bubbles that instantly reveal pinhole leaks and cracked seams.

Step 2: Inspect the Exhaust Manifold for Cracks

Inspect the Exhaust Manifold for Cracks

Open the hood and locate the heat shield covering the exhaust manifold on the front or rear of the engine block.

Unbolt the top heat shield retaining screws using penetrating oil to avoid snapping rusted fastener heads.

Examine the cast iron or stainless steel manifold surface for hairline cracks or dark soot stains.

A high-pitched ticking sound on cold startups usually indicates a cracked manifold or a blown head gasket seal.

Check all manifold mounting studs to verify that none have snapped off from thermal expansion stress.

Step 3: Check the Flex Pipe and Flange Gaskets

Check the Flex Pipe and Flange Gaskets

Safely elevate the front of your vehicle using your floor jack and secure it firmly on jack stands.

Locate the braided stainless steel section known as the honda crv exhaust system flex pipe behind the engine manifold.

Inspect the woven metal mesh for frayed wires, severe rust degradation, or heavy soot accumulation.

Grasp the pipe on either side of the flex mesh and check for excessive looseness or physical separation.

Inspect the two-bolt spring flange connections on both sides of the flex section for deteriorating donut gaskets.

Step 4: Examine the Catalytic Converter and Mid-Pipe

Examine the Catalytic Converter and Mid-Pipe
  • Trace the piping rearward from the flex section to locate the underbody emission components.
  • Inspect the front and rear oxygen sensor threads attached directly to the honda crv catalytic converter housing.
  • Look for severe rust scale along the welded seams where the converter body connects to the straight piping.
  • A leaking converter flange can cause incorrect sensor readings and trigger a persistent honda crv code p0420 fault code.
  • Tap the converter housing lightly with a rubber mallet to check for loose internal ceramic substrate rattles.

Step 5: Replace Rusted Piping or Apply Exhaust Patch

Replace Rusted Piping or Apply Exhaust Patch

For small pinholes along straight pipe sections, sand the surrounding metal clean with 80-grit sandpaper.

Apply a thick layer of high-temperature paste over the hole and wrap it tightly with stainless steel exhaust tape.

If a flange gasket is blown, unbolt the flange springs, scrape away old gasket remnants, and install a new crush gasket.

For severely rusted mufflers or torn flex pipes, unbolt the entire section at its nearest factory joint.

Install a direct-fit replacement pipe assembly using new hardware and torque all flange bolts evenly to spec.

Step 6: Secure Loose Heat Shields and Test the System

Secure Loose Heat Shields and Test the System

Inspect all sheet metal heat shields along the center tunnel and rear muffler assembly.

If you hear a high-frequency buzz while revving, look for a honda crv catalytic converter heat shield rattle caused by rusted bolt holes.

Secure loose shields by wrapping large stainless steel hose clamps around both the shield and the inner pipe.

Reconnect all oxygen sensors and verify that no wire harnesses are touching hot exhaust surfaces.

Lower the vehicle to the ground, start the engine, and listen closely for a smooth, quiet exhaust note.

If you want to handle this safely at home, check out our full selection of automotive repair guides at Bryan’s Garage.

Anatomy of the Honda CR-V Exhaust Architecture and Common Failure Points

Honda CRV Exhaust System Leak Diagnosis Manifold and Muffler Fix

Understanding how gas flows through your crossover SUV helps you isolate troublesome noises quickly.

Hot combustion gases leave the engine cylinders through the exhaust manifold at temperatures exceeding 1,200 degrees Fahrenheit.

These gases pass through the upper oxygen sensor before entering the emissions filtration stage.

The flex pipe isolates engine movement from the rest of the underbody tubing to prevent metal fatigue.

Behind the flex pipe sits the primary converter, which neutralizes harmful carbon monoxide and hydrocarbons.

Downstream gases then travel through the mid-pipe resonator, which cancels out harsh sound frequencies.

Finally, gases pass through the main rear silencer, commonly called the honda crv exhaust muffler, before exiting the tailpipe.

In regions with harsh winters, road salt accelerates rust along the lower seams of the rear muffler.

Over time, rust creates severe structural weakness, leading to an unwanted honda crv exhaust leak that worsens under acceleration.

Vehicle dimensions and pipe routing vary slightly between generations, so checking your exact honda crv specs ensures accurate part selection.

The table below highlights the most common failure points, symptoms, and standard repair methods across different piping sections:

Exhaust ComponentPrimary Failure SymptomCommon Cause of LeakRecommended Fix
Exhaust ManifoldLoud ticking on cold engine startThermal stress cracking or broken studsReplace manifold unit & manifold gasket
Flex Pipe SectionHarsh blowing noise under accelerationFrayed wire braid or torn inner bellowsWeld or clamp direct-fit flex assembly
Flange ConnectionsSputtering or popping sound under chassisDeteriorated wire-mesh donut gasketReplace spring bolts and crush gasket
Rear Muffler AssemblyDeep bass drone at highway speedsMoisture condensation rust holesPerform bolt-on rear muffler replacement
Heat ShieldsMetallic vibration or buzzing at 2,000 RPMCorroded mounting eyelets and boltsInstall stainless steel worm-drive clamps

Identifying which specific component is failing prevents you from replacing functional parts unnecessarily.

Most underbody leaks occur at flange connections or flex sections due to constant road movement and thermal expansion.

🔧 Hidden CR-V Features — Confirmed by real owners

15 things your CR-V can do — that the dealer never tells you

  • ① The secret physical key trick to start your SUV when the fob battery dies
  • ② Double-click and hold Unlock: all windows and sunroof open to cool a 150-degree cabin
  • ③ The hidden picnic table — yes, a literal folding table under your cargo floor
  • ④ Walk Away Auto Lock: secures your car automatically when you walk away
  • ⑤ A hidden diagnostic menu that can save you a $300 trip to the dealer
  • ⑥ + 10 more features the service department never mentions →

See full list with photos →

CR-V Tricks

Understanding Repair Costs: DIY vs. Auto Repair Shop Estimates

Exhaust repairs can vary widely in price depending on whether you complete the job yourself or hire a professional shop.

Dealerships often charge premium labor rates ranging from $150 to $220 per hour for underbody welding and fitting.

A complete professional replacement for a honda crv exhaust system cost can range between $800 and $1,800 at an independent repair facility.

By purchasing direct-fit bolt-on components online, DIY mechanics can complete the same repair for a fraction of that price.

For example, a complete DIY honda crv exhaust pipe replacement kit including gaskets and hardware usually costs under $250.

If the manifold is cracked, purchasing an aftermarket manifold assembly with an integrated converter costs roughly $300 to $500.

Owners of older vehicles can save even more money by sourcing a clean used honda crv exhaust system from a verified auto recycler.

When using recycled parts, always inspect the internal catalyst honeycomb and mounting flanges for existing rust damage.

Replacing hardware like spring bolts and rubber insulators during installation ensures your repair lasts for tens of thousands of miles.

Master Guide to Fixing Heat Shield Rattles and Worn Exhaust Hangers

Honda CRV Exhaust System Leak Diagnosis Manifold and Muffler Fix

Not every loud noise underneath your vehicle stems from a gas leak in the piping.

Loose metal heat shields and worn rubber insulators create annoying rattles that sound like major mechanical failures.

As rubber age under your car, heat and ozone cause the isolators to dry-rot, stretch, and tear apart.

Worn hangers allow heavy steel pipes to sag and strike the rear axle or frame crossmembers over bumps.

Experiencing a noticeable honda crv exhaust hanger rattle indicates it is time to replace your rubber supports.

Performing a simple honda crv exhaust hanger replacement takes less than 15 minutes using soapy water and hanger pliers.

Pro Mechanic Tip from Bryan’s Garage: Never use plastic zip ties or coat hangers to support sagging exhaust pipes.

Exhaust tubing easily reaches temperatures high enough to melt plastic ties instantly, creating a major safety hazard.

Heat shield rattles usually occur around mounting bolt holes where galvanic corrosion turns thin aluminum into powder.

Rather than removing the shield entirely, install large stainless steel washer plates under the original bolt heads.

Alternatively, wrap two heavy-duty stainless steel worm-gear hose clamps around both the pipe and the loose shield.

Tightening hose clamps pulls the shield flush against the pipe insulator, eliminating metallic vibration permanently.

Dangerous Pitfalls to Avoid When Repairing Your Exhaust System

Honda CRV Exhaust System Leak Diagnosis Manifold and Muffler Fix

Safety must always remain your top priority when working on vehicle exhaust components.

The most severe danger associated with a honda crv exhaust manifold leak is deadly carbon monoxide gas entering the cabin through HVAC vents.

Carbon monoxide is odorless and colorless, making it impossible to detect without an electronic sensor.

If you suspect an engine bay leak, always drive with your windows rolled down until repairs are completed.

Another major mistake during DIY repairs is snapping rusted flange studs off inside cylinder heads or cast flanges.

Always soak rusted threads with high-quality penetrating oil for several hours before attempting to turn them with a wrench.

Applying gentle heat from a propane torch to rusted nuts expands the metal, making removal significantly easier.

Never apply open flames near fuel lines, rubber brake hoses, or plastic underbody panels.

Always double-check that your floor jack and jack stands sit on solid, level ground before crawling under your vehicle.

Taking proper safety precautions ensures a successful, stress-free repair in your home driveway.

Comparison of Exhaust System Repair Methods

Choosing the right repair strategy depends on the severity of the damage, your budget, and available tools.

The table below compares three common repair approaches across key DIY criteria:

Repair StrategyEstimated Material CostExpected Repair LongevitySkill Level Required
Direct-Fit Bolt-On Replacement$150 – $4005 to 10 Years (Long Term)Intermediate (Basic Hand Tools)
Custom Weld-In Pipe Patch$40 – $1003 to 7 Years (Medium Term)Advanced (Requires Arc/MIG Welder)
Exhaust Putty & Sleeve Wrap$15 – $353 to 12 Months (Temporary Fix)Beginner (No Special Tools)

For long-term reliability, installing direct-fit bolt-on assemblies offers the best balance of simplicity and durability.

Exhaust tape and sealant putties work well as temporary patches to pass state inspections or quiet a daily commuter.

Welding provides a permanent repair for custom shops, but requires expensive machinery and specialized fabrication skills.

CR-V Community
🟢 Going viral on CR-V Owners Club & Reddit

“I’ve driven a CR-V for 4 years and didn’t know this existed.”
— The most common reaction when this article is shared

15
features
1997+
models
15 min
read
Free
no signup

Did you know your backup camera has a hidden top-down ‘drone view’? Or that your cruise control automatically downshifts on steep mountain hills to save your brakes?

I want to know right now →

bryansgarage.com · Bryan Mark

Frequently Asked Questions About Honda CR-V Exhaust Systems

How can I tell if my exhaust leak is coming from the manifold or the muffler?

Exhaust manifold leaks produce a sharp, high-pitched ticking or popping sound that is loudest near the engine bay when cold.

Muffler leaks produce a deep, rumbling roar under the rear passenger seats or trunk floor that grows louder with speed.

Popping your hood and using a cold-engine vacuum test will confirm the exact location of the leak in minutes.

Is it safe to drive my CR-V with an active exhaust leak?

Driving short distances with a minor rear muffler leak is generally safe, though it will be noisy.

Driving with an engine bay or manifold leak is unsafe because poisonous carbon monoxide fumes can seep into your passenger cabin.

Hot exhaust escaping near the engine bay can also melt nearby plastic wiring harnesses and rubber hoses.

Why do exhaust flange bolts break so easily during removal?

Exhaust flange bolts endure extreme thermal cycling from sub-zero temperatures up to red-hot operating conditions.

This intense heat combined with moisture and road salt causes rapid oxidation, fusing the steel threads together.

Generously applying penetrating lubricant and applying torch heat before loosening bolts helps prevent snapped fasteners.

Will fixing an exhaust leak clear my Check Engine light?

Yes, if your Check Engine light was triggered by an exhaust leak near an oxygen sensor, repairing it will resolve the code.

Leaks before or near the catalytic converter draw outside oxygen into the exhaust stream, tricking sensor readings.

Once the system is sealed, clearing the diagnostic code with an OBD2 scanner will keep the warning light off.

How long do factory Honda exhaust components typically last?

Original equipment stainless steel exhaust systems generally last between 7 and 12 years under normal driving conditions.

Vehicles driven in coastal environments or cold regions using road salt may experience flange failure sooner, around 5 to 7 years.

Regularly washing your undercarriage during winter months significantly extends the life of underbody steel piping.

Honda CRV Exhaust System Leak Diagnosis Manifold and Muffler Fix

Conclusion

Diagnosing and repairing an exhaust leak restores cabin quietness, improves fuel efficiency, and keeps your family safe from hazardous fumes.

By taking a systematic approach to troubleshooting, you can tackle manifold, flex pipe, and muffler repairs right in your own garage.

Ready to transform your car maintenance from a stressful chore into a breeze? Explore more tips at Bryan’s Garage.

Have questions? Our team can help you find the best solutions for your car problems and avoid costly mechanic visits.

Note: Individual results may vary depending on individual vehicle makes, models, year of manufacture, and overall condition. This article is intended for general automotive reference purposes only and does not replace official manufacturer service manuals or advice from a certified mechanic.

Leave a Comment


