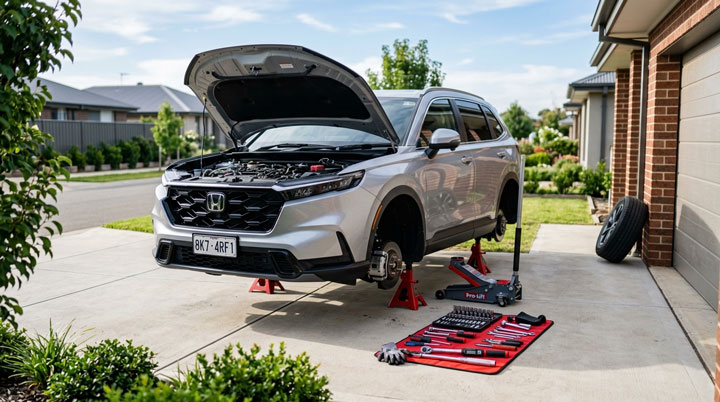
I still vividly remember the morning my trusty old crossover started bouncing uncontrollably over minor highway bumps, squeaking loudly while making simple turns, and leaning dangerously low in the rear as if loaded with heavy concrete blocks.
Like millions of daily commuters, I felt anxious about soaring repair quotes from local repair shops, but tackling a honda crv suspension replacement turned out to be the most satisfying and cost-effective fix I ever performed right in my home driveway under expert guidance from Team Bryan’s Garage.
Honda CRV Suspension Replacement Shocks Struts and Sagging Fixes
In This Article
Step-by-Step DIY Installation: Complete walkthrough for replacing front struts and rear shock assemblies safely at home.
Fixing Honda CR-V Rear Sagging: Mechanical root causes of rear suspension squat and permanent spring/camber correction methods.
Diagnostic Noise Identification: How to tell the difference between worn struts, bad sway bar links, and failing control arm bushings.
Comprehensive Cost Analysis: Detailed market breakdown for DIY parts versus shop labor across multiple CR-V generations.
Essential Safety & Alignment Practices: Crucial post-repair steps to prevent premature tire wear and protect steering geometry.
🔴 MOST OWNERS NEVER FIND THIS
Your CR-V has a secret trick that starts the SUV when your key fob dies. And 14 other things Honda never told you.
Dead fob fix · Global window down trick · The hidden folding picnic table · Walk Away Auto Lock · and 11 more.
How to Perform a Complete Honda CR-V Suspension Replacement: A DIY Step-by-Step Guide
Replacing the suspension components on your SUV restores original ride quality and eliminates hazardous body roll.
Before beginning your overhaul, gather all essential safety gear, hand tools, and replacement hardware.
You will need a floor jack rated for at least two tons, heavy-duty jack stands, wheel chocks, a breaker bar, metric socket sets (14mm, 17mm, 19mm, and 22mm), PB Blaster penetrating oil, a torque wrench, and safety glasses.
Pre-assembled loaded strut towers containing brand-new coil springs, top mounts, and damping shock absorbers are strongly recommended for home mechanics to avoid dangerous spring compressors.
Step 1: Vehicle Preparation and Safety Setup
Step 1: Vehicle Preparation and Safety Setup
Park your vehicle on a flat, level concrete surface and engage the parking brake firmly.
Loosen the wheel lug nuts on the front or rear wheels using a 19mm socket before lifting the car.
Place your hydraulic jack beneath the designated central subframe jacking points designated by the manufacturer.
Elevate the vehicle high enough to clear your work area safely.
Position robust jack stands underneath the unibody pinch welds on both sides.
Lower the vehicle weight fully onto the jack stands to guarantee absolute stability.
Remove the lug nuts completely and take off the wheel assemblies.
Spray all rusted suspension mounting bolts liberally with high-quality penetrating liquid spray.
Step 2: Disconnecting Front Strut Ancillary Components
Step 2: Disconnecting Front Strut Ancillary Components
Locate the brake hose mounting bracket attached directly to the side of the strut housing.
Remove the retaining bolt holding the brake hose bracket using a 12mm or 14mm socket.
Carefully swing the brake line clear of the assembly without straining the rubber hydraulic hose.
Unbolt the ABS wheel speed sensor wire harness bracket to avoid accidentally snapping fragile electrical wiring.
Disconnect the upper stabilizer joint from the strut mounting tab using a metric socket and Allen key.
Inspect the stabilizer joint for torn rubber boots or loose ball joints before setting it aside.
If you discover excessive slop in these joint end connections during teardown, budget for a quick honda crv sway bar links replacement to guarantee silent handling.
Step 3: Unbolting Steering Knuckle Pinch Bolts and Top Tower Mounts
Step 3: Unbolting Steering Knuckle Pinch Bolts and Top Tower Mounts
Support the heavy bottom weight of the lower steering knuckle using a secondary bottle jack.
Remove the two large lower clevis nuts and bolts securing the strut body to the steering knuckle.
Use a brass drift punch and hammer to knock the lower mounting bolts through the knuckle holes cleanly.
Pop open the engine hood to access the upper strut tower mounting nuts located inside the engine bay.
Loosen the three upper retaining nuts while holding the lower strut body securely with your opposite hand.
Never remove the center shaft nut located in the middle of the strut mount plate.
Carefully guide the complete old strut assembly down through the wheel arch without scratching brake lines or body panels.
Step 4: Installing New Quick Strut Assemblies
Step 4: Installing New Quick Strut Assemblies
Lift the new fully assembled strut assembly up into the wheel well housing.
Align the top mounting studs with the three receiving holes in the body sheet metal inside the engine compartment.
Thread the new top mounting nuts on by hand to hold the heavy assembly safely in place.
Align the lower strut bracket holes with the holes in your steering knuckle hub assembly.
Insert the lower clevis bolts from the front toward the rear of the vehicle structure.
Thread on the lower structural nuts and hand-tighten them until snug.
Reattach the brake hose bracket and ABS sensor wire bracket to their factory locations on the new strut body.
Reconnect your stabilizer bar end links securely to the strut mounting bracket.
Step 5: Final Torquing Under Load and Rear Shock Unit Installation
Step 5: Final Torquing Under Load and Rear Shock Unit Installation
Move to the rear suspension by supporting the lower control arm with your floor jack.
Unbolt the lower shock mounting bolt from the lower arm assembly.
Remove the interior cargo area trim panels to access the top rear shock mounting nuts.
Remove the upper nuts and lower the old rear shock absorber out of the chassis framework.
Position the new rear shock unit into place and hand-tighten top and bottom mounting hardware.
Raise your floor jack directly under the lower control arm to compress the suspension to normal ride height before final tightening.
Torque all lower mounting bolts and upper strut tower nuts according to factory engineering torque specifications.
Reinstall the road wheels, tighten lug nuts by hand, lower the vehicle, and torque lug nuts to 80 lb-ft.
Pro Mechanic Tip from Team Bryan’s Garage: Tackling complete suspension replacement at home saves hundreds of dollars in shop labor costs while providing total peace of mind. For comprehensive walkthroughs, torque tables, and component maintenance guides, visit our complete repair library at Bryan’s Garage.
Understanding Rear Suspension Sag in Honda CR-V Models: Causes and Engineering Fixes
Rear suspension squat or pronounced sagging is one of the most common cosmetic and functional issues facing aging compact crossover vehicles.
Over thousands of driving miles, continuous weight transfer weakens stock rear coil springs through steel fatigue.
This progressive coil degradation causes the rear ride height to drop by one to two inches lower than original factory settings.
Driving with excessive rear sag compromises headlight aiming, reduces rear cargo payload capacity, and severely degrades high-speed highway handling.
Furthermore, an uncorrected low rear stance forces extreme negative camber onto the rear tires.
This severe tire tilt causes aggressive inner tread wear, ruining expensive radial tires within just a few thousand miles.
If you are evaluating a used honda crv, inspecting the rear wheel arches for visible sagging is an essential step during pre-purchase checks.
Many owners attempt to fix sagging rear suspension by simply replacing the rear dampening shocks alone.
However, hydraulic shocks control fluid motion and dampening oscillation but do not support vehicle curb weight.
Vehicle height is maintained entirely by the coil springs.
To cure rear squat permanently, you must replace the old fatigued coil springs with brand-new heavy-duty spring assemblies.
Installing complete loaded rear strut units or upgraded heavy-duty replacement springs restores original factory ground clearance instantly.
In cases where age has severely distorted rear suspension geometry, installing adjustable upper control arms allows mechanics to set camber back into alignment.
Replacing worn rear suspension bushings alongside a fresh honda crv control arm replacement eliminates rear wheel tilt and eliminates clunking noises over bumps.
Understanding these distinct mechanical functions prevents wasting money on shock replacements that fail to fix low ride height issues.
Quick Diagnostic Checklist for Rear Sag
Honda CRV Suspension Replacement Shocks Struts and Sagging Fixes
Visual Stance Check: Measure height from fender arch center down to wheel center on all four corners.
Tread Wear Inspection: Look for heavy wear along the innermost tread band of the rear tires.
Bottoming Out: Listen for harsh metal thuds when carrying rear passengers over speed bumps.
Headlight Aim Shift: Notice if nighttime low beam headlights illuminate tree branches instead of pavement.
Diagnosing Front and Rear Honda CR-V Suspension Noise and Wear Symptoms
Suspension components deteriorate gradually over time, making it easy to miss early warning signs of component wear.
A failing suspension system manifests through distinct acoustic noises, visual fluid leaks, and abnormal handling behaviors.
One of the most noticeable red flags is a metallic clunking sound when driving over harsh potholes or speed bumps.
This distinct clunking usually indicates worn strut mount bearings, deteriorated control arm bushings, or blown lower ball joints.
Squeaking noises during low-speed steering maneuvers often point to dry ball joints or dried sway bar mount bushings.
Excessive body float or continuous bouncing after hitting highway dips indicates internal hydraulic shock failure.
When internal piston seals rupture inside the strut cylinder, hydraulic fluid leaks down the main dampening body.
Visually inspect your shock absorbers using a bright flashlight.
A light misting of fine dust is normal, but heavy wet fluid coats mixed with caked dirt confirms active hydraulic fluid leaks.
Another classic warning sign is loose steering response or front-end wheel shimmy at highway speeds.
If your steering wheel feels vague or pulls to one side, inspect steering linkages alongside your dampening components.
A worn steering linkage component can mimic shock absorber play, so completing a honda crv tie rod end replacement may be required to eliminate wandering steering response.
Conducting a simple bounce test helps evaluate shock condition in your driveway.
Push down hard on the front bumper corner of your vehicle and release it abruptly.
A healthy suspension system rebounds once and settles immediately into position.
If the chassis bounces up and down two or three times, your internal dampening valving is completely worn out.
Addressing honda crv suspension noise early prevents excessive stress on surrounding steering rack components and wheel bearings.
Symptom Observed
Probable Root Cause
Recommended Corrective Action
Metallic clunk over bumps
Blown strut mount or sway bar link
Replace quick strut assembly and stabilizer links
Uncontrolled vehicle bouncing
Failed internal hydraulic dampening seals
Install complete front and rear shocks and struts
Extreme inner tire tread wear
Fatigued springs causing negative camber
Install new spring assemblies and alignment kit
Creaking during slow turns
Dry lower ball joint or control arm bushing
Replace control arms and inspect steering joint boot
Honda CRV Suspension Replacement Shocks Struts and Sagging Fixes
Evaluating Costs and Component Selection for Shocks and Struts
Understanding realistic repair estimates allows vehicle owners to budget effectively and avoid inflated service shop fees.
Overall overall repair pricing varies substantially depending on whether you choose DIY installation or commercial mechanic repair.
Commercial dealership repair facilities typically charge top-tier pricing for factory OEM replacement parts and shop labor.
Independent auto repair shops offer mid-tier pricing while utilizing quality aftermarket component brands.
The rear dampening system is generally less complex to disassemble, leading to slightly lower shop labor time.
Owners interested in rear axle expenses can review specific pricing models in our breakdown of honda crv shock replacement cost.
Selecting the right replacement components is key to long-term suspension performance and ride comfort.
Loaded quick-struts include brand-new dampening bodies, tuned coil springs, dust boots, bump stops, and top mount plates.
Installing complete pre-assembled struts saves hours of tedious shop labor and eliminates dangerous spring compression steps.
Reputable aftermarket suspension brands offer premium gas-charged dampening units that meet or exceed original factory ride specs.
Cheaper bare struts require reusing old worn spring units and worn top rubber mounts, which often leads to annoying squeaks shortly after installation.
Investing in high-grade loaded strut assemblies yields far superior long-term reliability and smoother dampening performance.
Honda CRV Suspension Replacement Shocks Struts and Sagging Fixes
Performing vehicle repair in home garages requires careful preparation and adherence to mechanical safety protocols.
Safety must always remain your top priority when supporting heavy vehicles above work areas.
Never rely solely on a hydraulic floor jack to hold up a vehicle while working underneath chassis components.
Hydraulic jack pressure seals can fail unexpectedly, causing structural drop hazards.
Always place heavy-duty jack stands under certified unibody support points and keep your hydraulic floor jack engaged nearby as a secondary backup.
Chock all wheels remaining on the ground securely to prevent accidental vehicle movement during wrenching.
Spray all frozen frame bolts with penetrating liquid hours prior to disassembly.
Rusted suspension bolts require high breakaway torque, making high-quality six-point sockets and breaker bars essential.
Avoid using rounded twelve-point sockets on stubborn structural suspension bolts to prevent stripping bolt heads.
When tightening lower control arm pivot bolts and bottom strut mounting nuts, always compress suspension components up to ride height first.
Tightening rubber suspension bushings while arms hang freely causes excessive rubber twisting when the vehicle is lowered.
This bound rubber stress tears brand-new rubber bushings within a few months of installation.
Supporting lower control arms with a jack to simulate loaded vehicle height before final torquing ensures long bushing life.
Always complete your repair by taking your vehicle straight to a professional alignment shop.
Anytime you unbolt struts or control arms, steering toe angles and camber adjustments shift naturally.
Scheduling a comprehensive honda crv wheel alignment ensures straight tracking, eliminates tire drag, and preserves handling stability.
Safety Warning: Compressed coil springs hold massive stored potential energy. Never loosen top shaft center nuts on bare struts without professional wall-mounted spring compressors. Using pre-assembled quick-struts eliminates this risk completely.
Honda CRV Suspension Replacement Shocks Struts and Sagging Fixes
Overcoming Risks and Avoidable Installation Mistakes
Home mechanics often encounter predictable challenges during major suspension maintenance projects.
Knowing how to prevent common repair mistakes saves time and avoids expensive damaged components.
One major pitfall is ignoring surrounding suspension linkages while replacing worn main struts.
Installing stiff new shock absorbers alongside original worn sway bar links or aged control arm bushings causes remaining weak components to fail rapidly.
Inspect all ball joint rubber boots, tie rod ends, and stabilizer links during teardown to replace worn parts together.
Another common mistake is over-tightening small top mount retaining studs.
Upper strut tower studs are engineered with specific torque values, typically between 30 and 45 foot-pounds.
Applying excessive force with heavy air impact guns can snap top mounting studs off complete strut plates.
Always use an calibrated inch-pound or foot-pound torque wrench to tighten top mounting hardware according to factory specs.
Skipping penetrating oil treatment on rusted lower sway bar link threads often leads to rounded hex centers or sheared mounting studs.
Wire brush exposed threads thoroughly to clean off scale rust before attempting nut removal.
Reusing old stretched mounting hardware can lead to loose components over time.
Use fresh locking nuts or apply medium-strength thread-locking compound on all critical structural suspension bolts.
Taking time to follow these verified shop practices guarantees long-lasting repair results and superior vehicle safety.
🟢 Going viral on CR-V Owners Club & Reddit
“I’ve driven a CR-V for 4 years and didn’t know this existed.” — The most common reaction when this article is shared
15
features
1997+
models
15 min
read
Free
no signup
Did you know your backup camera has a hidden top-down ‘drone view’? Or that your cruise control automatically downshifts on steep mountain hills to save your brakes?
How long do factory Honda CR-V shocks and struts typically last?
Original factory suspension dampening units typically last between 80,000 and 100,000 miles under normal driving conditions.
Frequent travel over rough dirt roads or carrying heavy cargo can shorten overall damper life down to 60,000 miles.
Is it necessary to replace all four shocks and struts at the same time?
While replacing shocks in pairs across the same axle is essential, replacing all four units simultaneously provides optimal handling balance.
Installing new front struts while leaving worn, bouncy rear dampeners causes front-to-rear chassis instability.
Can I fix rear suspension sag using simple spring rubber spacers?
Rubber spacer blocks offer only a temporary cosmetic boost and fail to correct underlying metal coil spring fatigue.
Spacers can also slip out of position or create harsh coil binding under heavy suspension compression loads.
Installing new loaded rear strut assemblies or heavy-duty replacement springs is the only safe, permanent fix for rear sag.
Why is my CR-V making a squeaking noise after installing new suspension components?
Squeaking usually happens when control arm rubber bushings are torqued while the suspension is hanging down unloaded.
Loosen the lower mounting bolts, jack the suspension up to normal ride height, and retorque hardware to eliminate rubber binding.
Do loaded quick-strut assemblies alter ride height or suspension stiffness?
Quality quick-struts are engineered to match original factory suspension geometry and dampening valving precisely.
Your vehicle will feel slightly firmer initially simply because it replaces soft, worn-out components with fresh factory-spec dampening.
Conclusion
Overhauling worn struts and resolving rear squat transforms your driving comfort while safeguarding tire longevity.
By following proper step-by-step DIY techniques, using complete loaded strut assemblies, and getting a professional alignment, you save hundreds on repair costs.
Ready to transform your car maintenance from a stressful chore into a breeze? Explore more tips at Bryan’s Garage.
Have questions? Our team can help you find the best solutions for your car problems and avoid costly mechanic visits.
Note: Individual results may vary depending on individual vehicle makes, models, year of manufacture, and overall condition. This article is intended for general automotive reference purposes only and does not replace official manufacturer service manuals or advice from a certified mechanic.