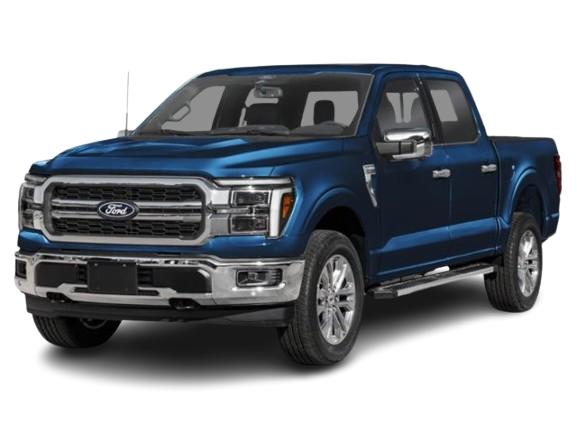
Ford F150 Rear Differential Fluid Change DIY Guide

I still remember kneeling beside my truck with gear oil dripping down my forearm after struggling to break loose a stubborn fill plug.

Experiencing a stressful ford f150 rear differential fluid change firsthand taught me that simple preparation saves hours of frustration under the rig.

Here at Team Bryan’s Garage, we are sharing our field-tested DIY guide so you can service your rear axle smoothly, protect your gears, and keep money in your pocket.
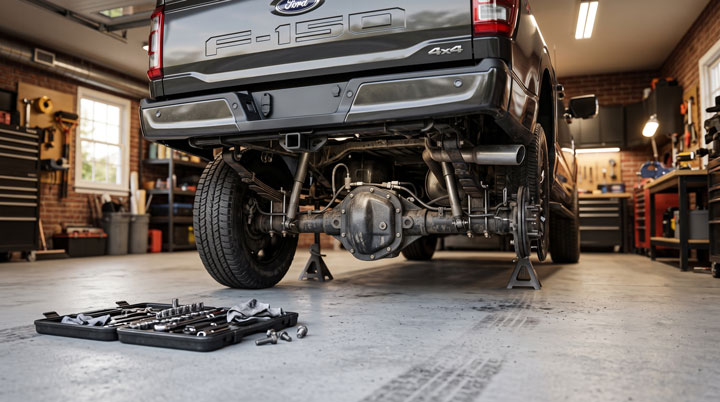
Ideal maintenance space in a well-lit garage

In This Article

  • Step-by-step DIY instructions for draining, cleaning, resealing, and refilling your rear differential.
  • How to select the correct f150 rear differential fluid viscosity grade and friction modifier additive for your exact axle type.
  • The underlying mechanical science of hypoid ring and pinion gears and why fluid breakdown damages axle bearings.
  • Detailed service interval recommendations for daily driving, heavy towing, and severe duty conditions.
  • A comprehensive DIY cost analysis comparing home driveway maintenance against commercial dealership rates.
🔴 MOST OWNERS NEVER FIND THIS

Your F-150 has a secret slot that starts the truck when your key fob dies.
And 8 other things Ford never told you.

Dead fob fix · Remote window trick · 7.2 kW generator hiding in your bed · Tailgate ladder · and 5 more.

▶ Read Now — Show Me Everything

bryansgarage.com · Bryan Mark · 2026
Ford F-150 Hidden Features

How to Perform a Ford F150 Rear Differential Fluid Change: A Step-by-Step DIY Guide

Servicing the rear axle on your truck is one of the most effective preventative maintenance tasks you can complete at home.

Fresh gear lubricant prevents metal-on-metal friction, reduces operating temperatures, and suppresses severe axle noise.

Before beginning the service, gather all required tools and safety equipment near your work area.

You will need a 3/8-inch drive ratchet, a torque wrench, a catch basin, a plastic scraper, brake cleaner spray, fresh synthetic gear oil, friction modifier if equipped, a fluid transfer pump, and an RTV sealant or pre-formed gasket.

  • Step 1: Elevate and Safely Secure the Vehicle.
    • Park your truck on a solid, level concrete driveway or garage bay floor.
    • Set the parking brake firmly and place heavy wheel chocks in front of both front tires.
    • Position a heavy-duty hydraulic jack beneath the rear frame axle support points.
    • Raise the truck until you have ample working room beneath the rear differential housing.
    • Lower the chassis securely onto certified jack stands rated for full vehicle weight capacity.
    • Give the truck a firm push test to verify total stability before crawling underneath.
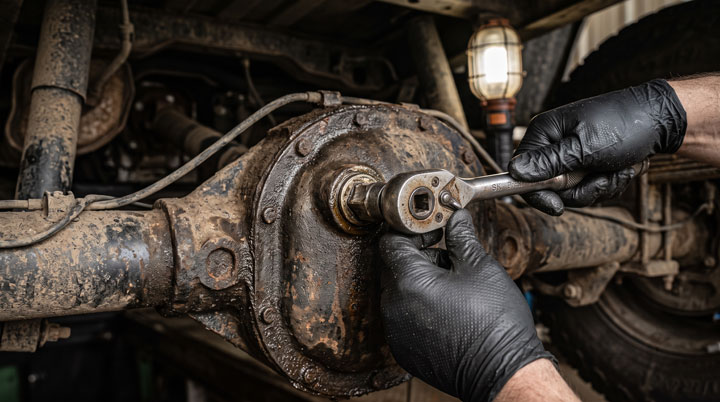
Critical step: removing the fill plug first
  • Step 2: Locate and Remove the Differential Fill Plug First.
    • Locate the square 3/8-inch drive differential fill plug positioned on the front or upper side of the housing.
    • Spray penetrating oil around the fill plug threads if rust or road corrosion is present.
    • Insert your 3/8-inch ratchet breaker bar directly into the square recessed plug socket.
    • Turn counterclockwise to loosen and remove the fill plug before loosening any cover pan bolts.
    • Removing the fill plug first guarantees you can refill the housing after draining out the old oil.
    • Inspect the magnetic tip of the fill plug for metal shavings or heavy sludge accumulation.
  • Step 3: Drain the Used Differential Gear Oil.
    • Position your fluid drain catch pan directly underneath the lowest edge of the rear differential cover.
    • Use a socket wrench to loosen all perimeter cover bolts by two complete turns.
    • Leave the top two cover bolts attached loosely to prevent the metal cover from dropping suddenly into the pan.
    • Insert a flat plastic pry tool between the bottom edge of the cover plate and the main housing.
    • Gently pry outward until the old seal breaks and used ford f150 rear differential oil drains into the basin.
    • Allow all gear oil to drain completely into the catch container for at least ten minutes.
    • Unscrew the remaining top bolts and carefully remove the steel cover plate from the axle assembly.
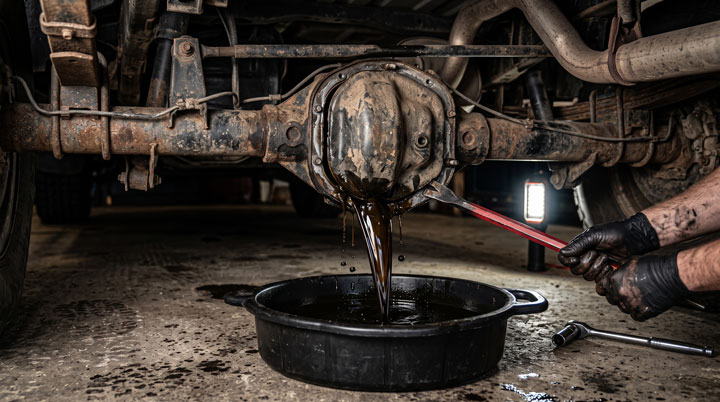
Draining old, grimy gear oil and debris
  • Step 4: Clean the Housing, Magnet, and Mating Surfaces.
    • Inspect the interior gear cavity, ring gear teeth, and differential carrier for visible pitting or damage.
    • Wipe residual gear fluid from the internal floor of the housing using clean lint-free shop towels.
    • Locate the internal housing magnet and clean off all trapped metallic sludge using brake cleaner.
    • Use a stiff plastic scraper or razor blade scraper held flat to remove old RTV sealant from both mating surfaces.
    • Ensure no old gasket material falls into the internal housing cavity during scraping.
    • Spray solvent cleaner on a rag and wipe down both flange mating surfaces until completely bare and oil-free.
  • Step 5: Apply New Gasket Sealant or Position a Reusable Gasket.
    • Select either continuous high-temperature gear oil RTV silicone or a high-performance reusable rubber gasket.
    • If using RTV silicone, apply a continuous 1/8-inch bead around the entire differential cover sealing surface.
    • Circle each bolt hole completely on the inside edge to prevent future fluid weeping around fasteners.
    • Allow the RTV bead to skin over for roughly ten minutes according to manufacturer instructions.
    • If using a pre-formed reusable gasket, align the bolt holes perfectly with the cover plate flange.
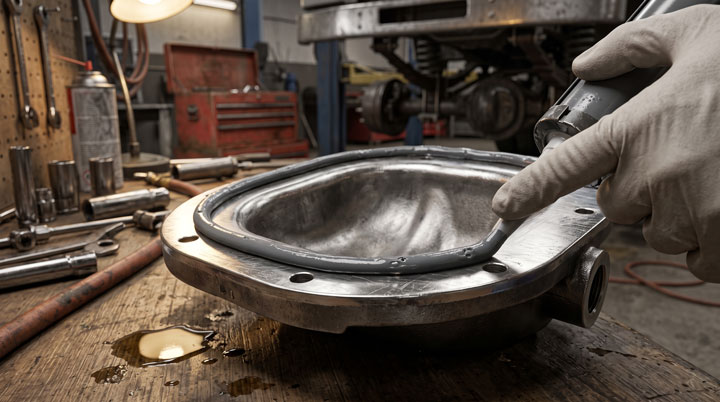
Applying perfect RTV bead for leak-proof seal
  • Step 6: Reinstall the Cover and Torque Bolts to Factory Specification.
    • Align the differential cover plate with the housing bolt pattern and start all bolts by hand.
    • Hand-tighten all bolts until the cover plate sits flush against the housing flange surface.
    • Set your inch-pound or foot-pound torque wrench to the exact factory torque specification for your axle size.
    • Tighten the bolts in a crisscross star pattern to distribute clamping pressure evenly across the flange.
    • Torque 8.8-inch and 9.75-inch differential cover bolts to 33 foot-pounds (45 Nm).
    • Allow the fresh silicone RTV sealant to cure fully before adding fresh gear fluid.
  • Step 7: Refill with Factory Gear Oil and Friction Modifier Additive.
    • Determine whether your rear differential requires a friction modifier additive by verifying your axle door code.
    • If equipped with a mechanical limited-slip Trac-Lok unit, pour four ounces of XL-3 additive into the housing first.
    • Insert the hose of your fluid transfer pump through the upper fill port opening.
    • Pump fresh synthetic gear oil into the housing until fluid reaches the bottom lip of the fill hole.
    • Correct fluid level sits between zero and 1/4 inch below the lower edge of the fill port.
    • Reinstall the fill plug magnetic fastener and torque it securely to 22 foot-pounds (30 Nm).
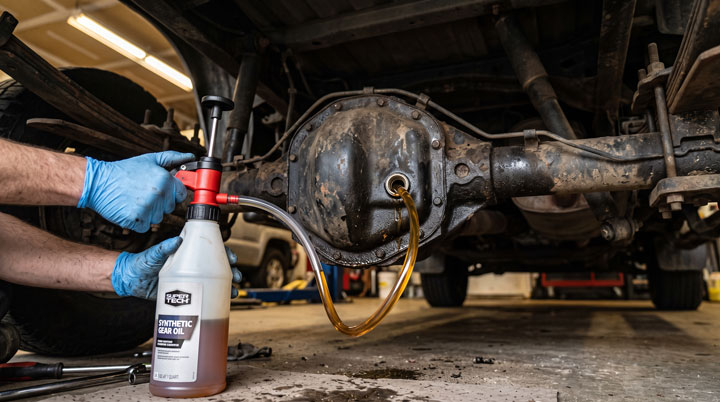
Pumping fresh synthetic oil into the housing
  • Step 8: Inspect for Leaks and Perform a Test Drive.
    • Wipe down the differential cover perimeter and surrounding axle tubes with quick-drying brake cleaner.
    • Remove the jack stands, lower the vehicle carefully back to the ground, and clear your workspace.
    • Drive the vehicle slowly around the block, executing several tight figure-eight turns to circulate fresh lubricant.
    • Inspect the lower flange perimeter and fill plug for any sign of fluid weeping or drops.
    • Recheck the fill port level after the test drive to confirm final gear oil capacity.

Completing this maintenance process at home keeps your rear axle running smoothly without dealership expense.

If you enjoy maintaining your vehicle and want more expert repair resources, visit our blog at Bryan’s Garage.

The Mechanical Science of Ring and Pinion Wear and Fluid Thermal Breakdown
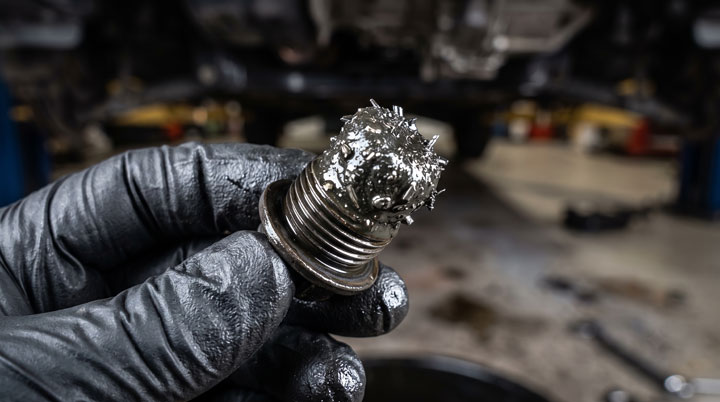
Mechanical wear indications on the magnetic plug

Understanding how differential lubrication works highlights why regular oil replacement is vital for gear longevity.

Your truck rear axle uses hypoid gear geometry, where the drive pinion centerline sits offset below the ring gear center.

Hypoid gear teeth do not simply roll against each other; they slide continuously under tremendous contact pressure.

This sliding action generates intense shearing forces that break down long-chain polymer molecules inside the gear fluid.

Over thousands of miles, mechanical shear reduces fluid film strength and lowers effective operating viscosity.

Exhaust pipes passing near the differential housing also transfer ambient thermal energy directly into the cast iron case.

Continuous extreme temperatures accelerate fluid oxidation, causing thick dark varnish deposits on internal bearings.

As gears mesh under load, microscopic steel particles wear off ring and pinion tooth surfaces naturally.

These metallic particles circulate in unfiltered fluid, acting like liquid sandpaper against precision roller bearings.

Draining degraded oil removes suspended metallic abrasives before they pit bearing cups or cause gear whining noise.

Fresh gear oil restores the high-shear protective film needed to cushion heavy tooth impact under load.
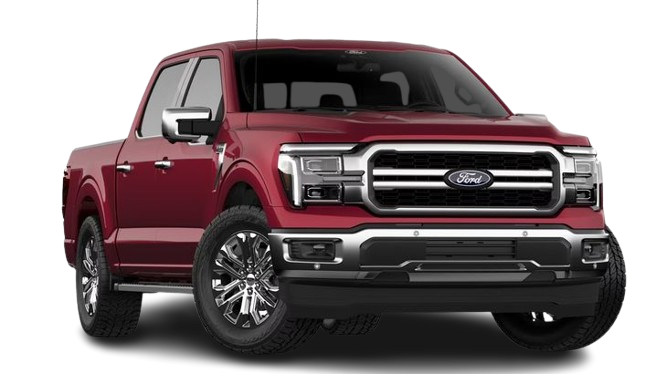
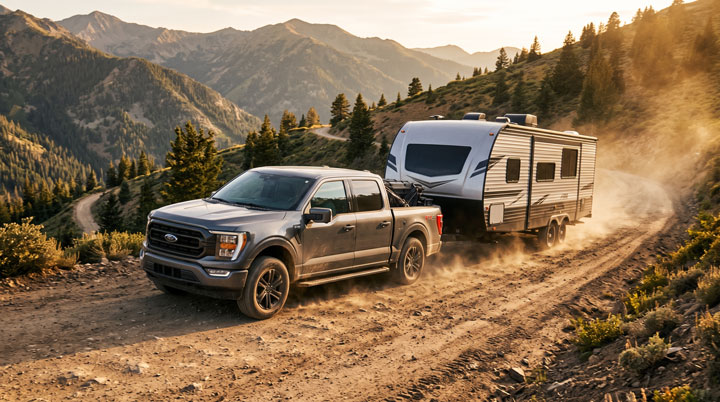
🔧 Hidden F-150 Features — Confirmed by real owners

9 things your F-150 can do — that the dealer never tells you

  • â‘  The secret slot to start your truck when the fob dies — you’re ignoring it every day
  • â‘¡ Hold Unlock for 3 seconds: windows roll down, cabin cools before you step in
  • â‘¢ Pro Power Onboard: 7.2 kW outlet right in your bed — never used it?
  • â‘£ Hidden tailgate ladder + built-in ruler on the workbench
  • ⑤ Auto shifts to P when you open the door — saved thousands of trucks from rolling away
  • â‘¥ + 4 more features the service department never mentions →

See full list with photos →

F-150 Tricks

Selecting the Correct Rear Diff Oil Weight, Axle Types, and Additives

Choosing the correct fluid formulation for your specific truck configuration prevents severe axle chatter and bearing wear.

Ford has equipped F-150 trucks with several distinct rear axle variants depending on engine output and tow package options.

Axle ModelCommon ApplicationsRecommended Fluid WeightFluid CapacityFriction Modifier (XL-3)
8.8-Inch (10-Bolt Cover)3.3L V6, 2.7L EcoBoost, 5.0L V8SAE 75W-85 or 75W-90 Synthetic2.0 – 2.2 Quarts (1.9 – 2.1 L)Required ONLY for Trac-Lok LSD
9.75-Inch (12-Bolt Cover)3.5L EcoBoost, 5.0L Tow PackageSAE 75W-140 Synthetic2.6 – 2.75 Quarts (2.5 – 2.6 L)Required ONLY for Trac-Lok LSD
9.75-Inch Heavy DutyHeavy Payload Package (HDPP)SAE 75W-140 Synthetic3.0 Quarts (2.8 L)Required ONLY for Trac-Lok LSD

Determining your exact rear diff oil weight f150 specification requires checking your vehicle door jamb safety certification safety label.

Older Ford trucks originally specified SAE 75W-140 full synthetic gear oil across almost all heavy-duty towing applications.

Later model trucks transitioned to lighter viscosity SAE 75W-85 gear oils to reduce fluid drag and improve fuel efficiency.

However, if you tow heavy trailers frequently in hot summer climates, high-viscosity 75W-140 provides superior thermal film protection.

It is equally critical to identify whether your truck features an open differential, an electronic locking differential, or a mechanical limited-slip differential.

Electronic locking differentials (E-Lockers) use an electromagnetic collar to lock axle shafts together when activated by the dash switch.

E-Locker differentials and standard open differentials operate smoothly using pure synthetic gear oil without extra additives.

Conversely, Trac-Lok mechanical limited-slip differentials rely on internal clutch packs to transfer torque between rear wheels.

Trac-Lok clutch packs require Motorcraft XL-3 Friction Modifier additive to prevent severe clutch chatter when turning sharp corners.

Failing to add friction modifier to a mechanical limited-slip axle causes aggressive binding and shuddering through the rear drivetrain.

Recommended Mileage Service Intervals and DIY Cost Analysis

Heavy towing – the reason for frequent maintenance

Establishing an accurate service timeline prevents unexpected rear axle repairs over the lifespan of your truck.

Official Ford factory maintenance schedules often list rear differential inspection intervals at 150,000 miles for normal duty.

However, professional mechanics and ASE-certified technicians strongly advise shorter service intervals for real-world driving conditions.

If you use your truck for daily commuting without heavy loads, change gear fluid every 50,000 to 60,000 miles.

If you tow heavy travel trailers, carry heavy bed loads, or drive in dusty off-road environments, service the differential every 30,000 miles.

Trucks used for launching boats at submerged water ramps require immediate fluid inspection if water breaches axle vent tubes.

Water intrusion emulsifies gear oil into a milky tan foam, destroying lubrication properties and causing rapid corrosion.

Performing this service at home provides substantial savings compared to commercial repair shop prices.

Dealership service departments charge between $220 and $380 for a complete rear differential fluid exchange.

Purchasing three quarts of premium full synthetic gear fluid, a bottle of friction modifier, and an RTV sealant costs between $50 and $80 total.

Completing the job in your driveway saves over $150 in labor charges while allowing you to clean internal components thoroughly.

Practical Application Guide and Expert Tips for Clean DIY Assembly

Applying practical mechanics tips ensures your fluid service goes smoothly without annoying mess or oil leaks.

To avoid gear oil mess on your driveway, lay down a wide piece of cardboard beneath your drain catch basin.

Gear oil contains strong sulfur compounds that create pungent odors that linger on clothes and garage concrete.

Wear thick nitrile gloves and eye protection to keep old gear fluid off your skin during pan removal.

When applying RTV silicone, avoid applying excessively thick beads around the inside perimeter of the housing flange.

Excessive silicone squeezes inward when bolts are torqued, breaking off inside the housing and clogging oil passages.

If using an flexible fluid transfer pump, submerge the gear oil bottles in a bucket of warm water before filling.

Warming thick 75W-140 gear oil reduces fluid viscosity, making it significantly easier to pump into the elevated fill hole.

Clean the fill plug magnet thoroughly with brake solvent until all metallic fine sludge is removed.

Checking the fill plug magnet during every service gives you clear early warning of internal component wear.

Avoiding Common Mistakes When Servicing F-150 Rear Axles

Avoiding frequent DIY mistakes ensures your rear axle remains leak-free and fully protected for years to come.

The most common DIY disaster is draining all fluid from the cover plate before attempting to remove the fill plug.

If the fill plug is seized, rusted, or rounded off, you will be left with an empty differential and no way to add new oil.

Always break the fill plug loose and remove it completely before touching a single cover pan bolt.

Another major mistake is over-tightening small 5/16-inch cover bolts using an oversized ratchet handle.

Over-torquing flange bolts deforms the steel cover plate flange, causing persistent fluid leaks around bolt holes.

In extreme cases, excessive force snaps bolt shanks off inside the axle housing, requiring difficult drilling and extraction.

Always use a reliable torque wrench to tighten cover bolts evenly to 33 foot-pounds in a cross pattern.

Never rush the curing time of fresh RTV silicone sealant after reattaching the metal cover plate.

Adding liquid gear fluid immediately after bolting down the cover washes away wet silicone, causing immediate leaks.

Allow RTV sealant to cure for at least one full hour before pumping fluid into the housing cavity.

F-150 Community
🟢 Going viral on F150Forum & Reddit

“I’ve driven an F-150 for 4 years and didn’t know this existed.”
— The most common reaction when this article is shared

9
features
2015+
models
11 min
read
Free
no signup

Did you know which button on your fob opens the tailgate when your hands are full? Or the button combo to reset CarPlay in 15 seconds without turning off the engine?

I want to know right now →

bryansgarage.com · June 24, 2026

Frequently Asked Questions About F150 Rear Differential Fluid Changes

How often should I change the rear differential fluid in my F-150?

For standard daily driving, change rear differential oil every 50,000 to 60,000 miles to protect bearings.

If you tow heavy loads regularly or operate off-road, change the gear fluid every 30,000 miles.

Do all Ford F-150 rear differentials require friction modifier additive?

No, friction modifier is required ONLY for trucks equipped with mechanical Trac-Lok limited-slip differentials.

Trucks with open differentials or electronic locking differentials (E-Lockers) do not require friction modifier additives.

Should I use an RTV silicone gasket maker or a reusable LubeLocker gasket?

Both methods provide reliable fluid sealing when installed properly on clean, oil-free metal surfaces.

Pre-formed reusable gaskets save cleanup time on future services, while high-temp gear oil RTV offers an economical seal.

What is the correct torque specification for F-150 rear differential cover bolts?

Standard cover bolts on 8.8-inch and 9.75-inch rear axles should be torqued to 33 foot-pounds (45 Nm).

Tighten bolts evenly in a star pattern to ensure uniform compression across the sealing surface.

How do I know if my rear differential gear oil level is low?

Remove the fill plug on a level surface and check fluid depth with your pinky finger.

The fluid level should sit level with or no lower than 1/4 inch below the bottom lip of the fill hole.

Conclusion

Changing your rear differential fluid is a straightforward DIY service that prevents costly axle bearing replacements.

Selecting the correct oil weight and following proper torque procedures protects your truck for thousands of miles.

Ready to transform your car maintenance from a stressful chore into a breeze? Explore more tips at Bryan’s Garage.

Have questions? Our team can help you find the best solutions for your car problems and avoid costly mechanic visits.

Note: Individual results may vary depending on individual vehicle makes, models, year of manufacture, and overall condition. This article is intended for general automotive reference purposes only and does not replace official manufacturer service manuals or advice from a certified mechanic.

Leave a Comment